Introduction
Login to NUCT
Launch a Web browser and access https://ct.nagoya-u.ac.jp/portal.
Welcome page of NUCT is displayed.
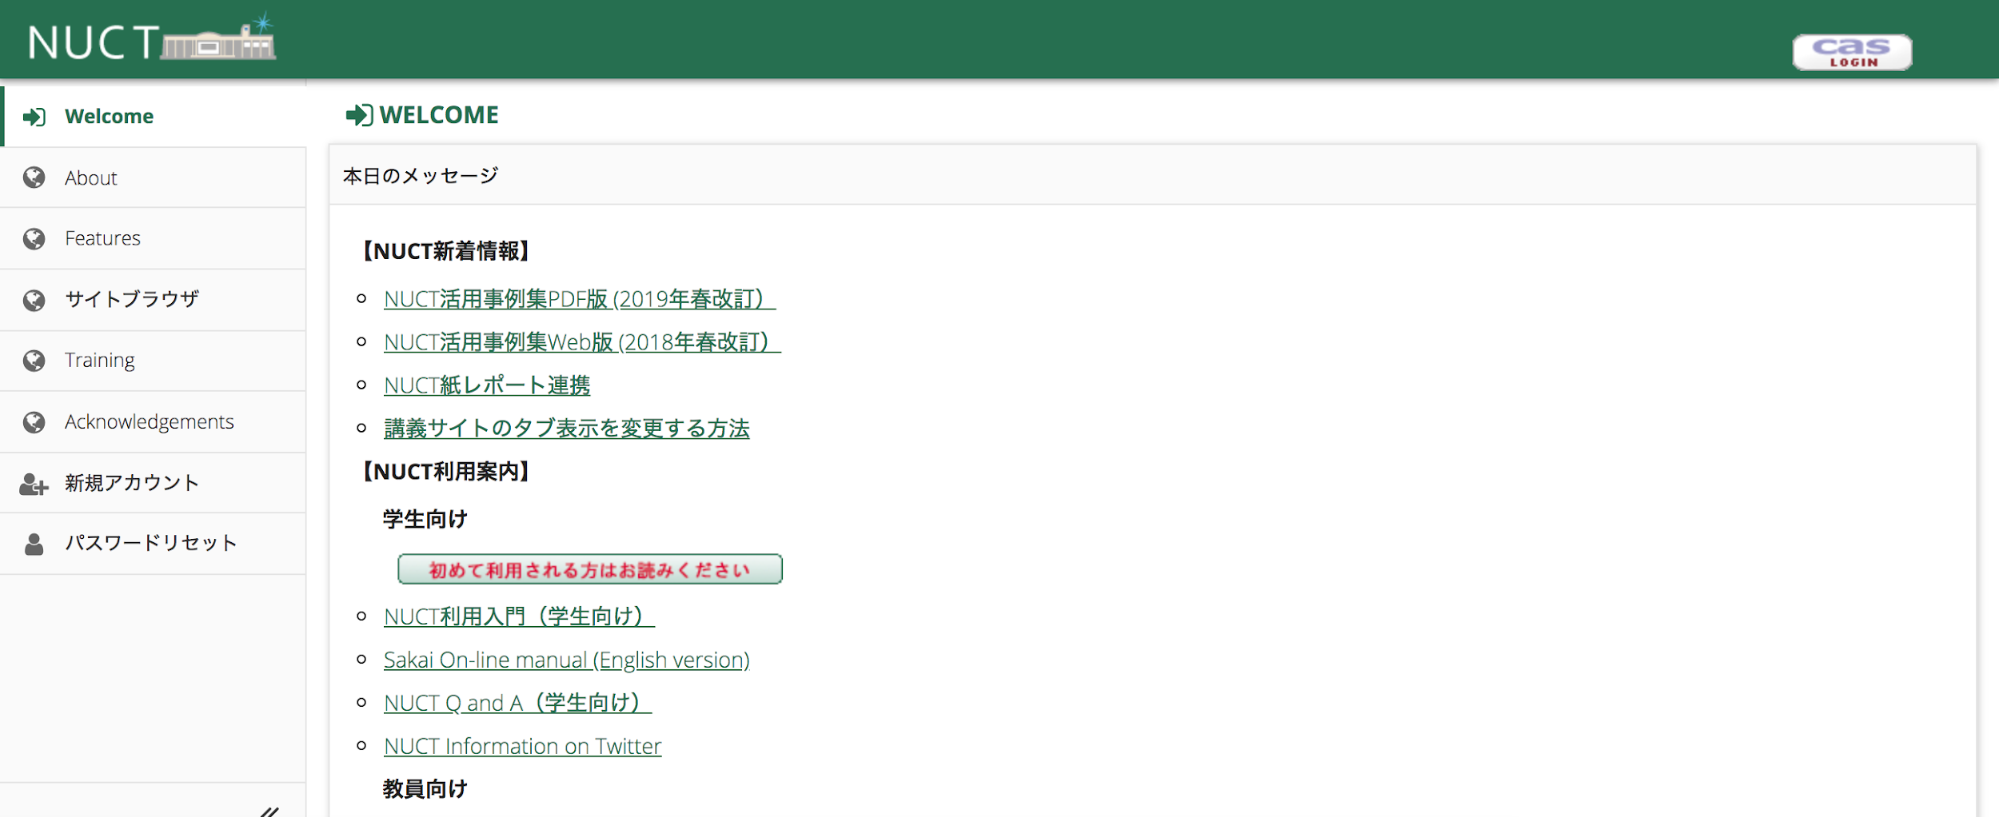
Click the "CAS Login" button at the top right of the window.

When the authentication screen is displayed, enter your NUID (Nagoya University ID: 2 alphabet characters and 7 digits) and password and click the 「ログイン」 button.

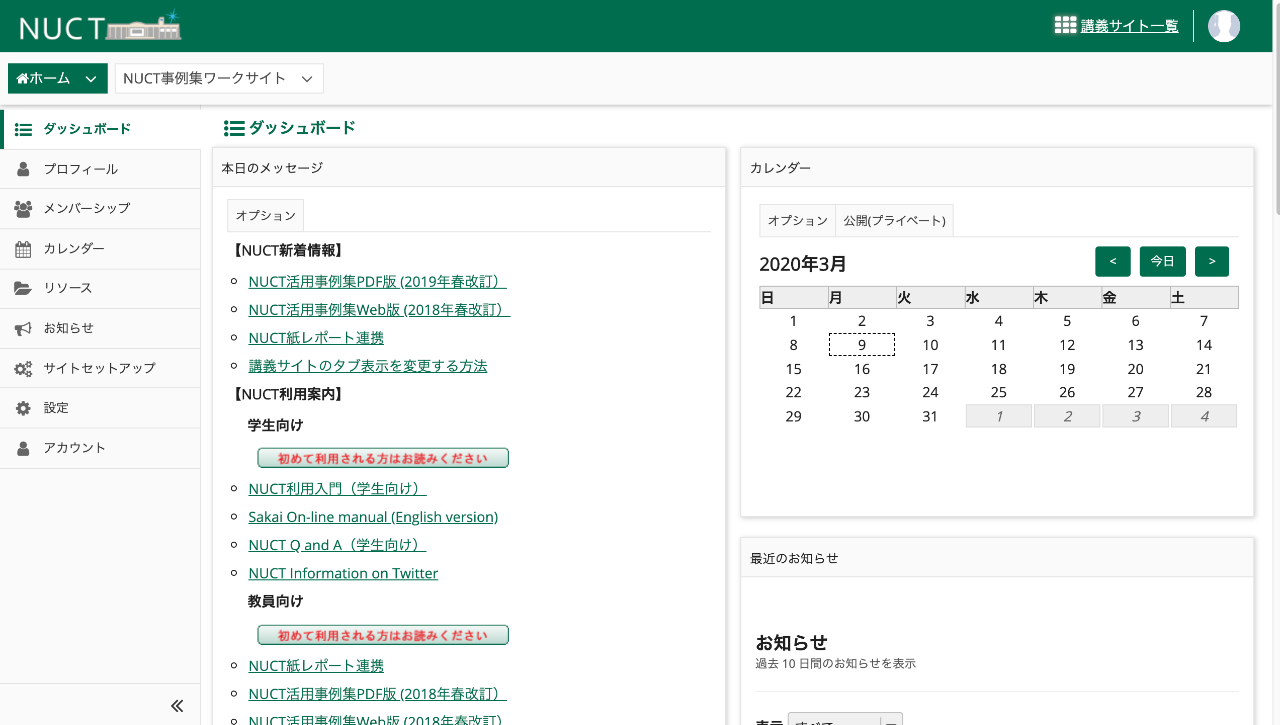
If you log in successfully, you will find the available worksite tabs, including the Dashboard.
If you don't find your worksite,
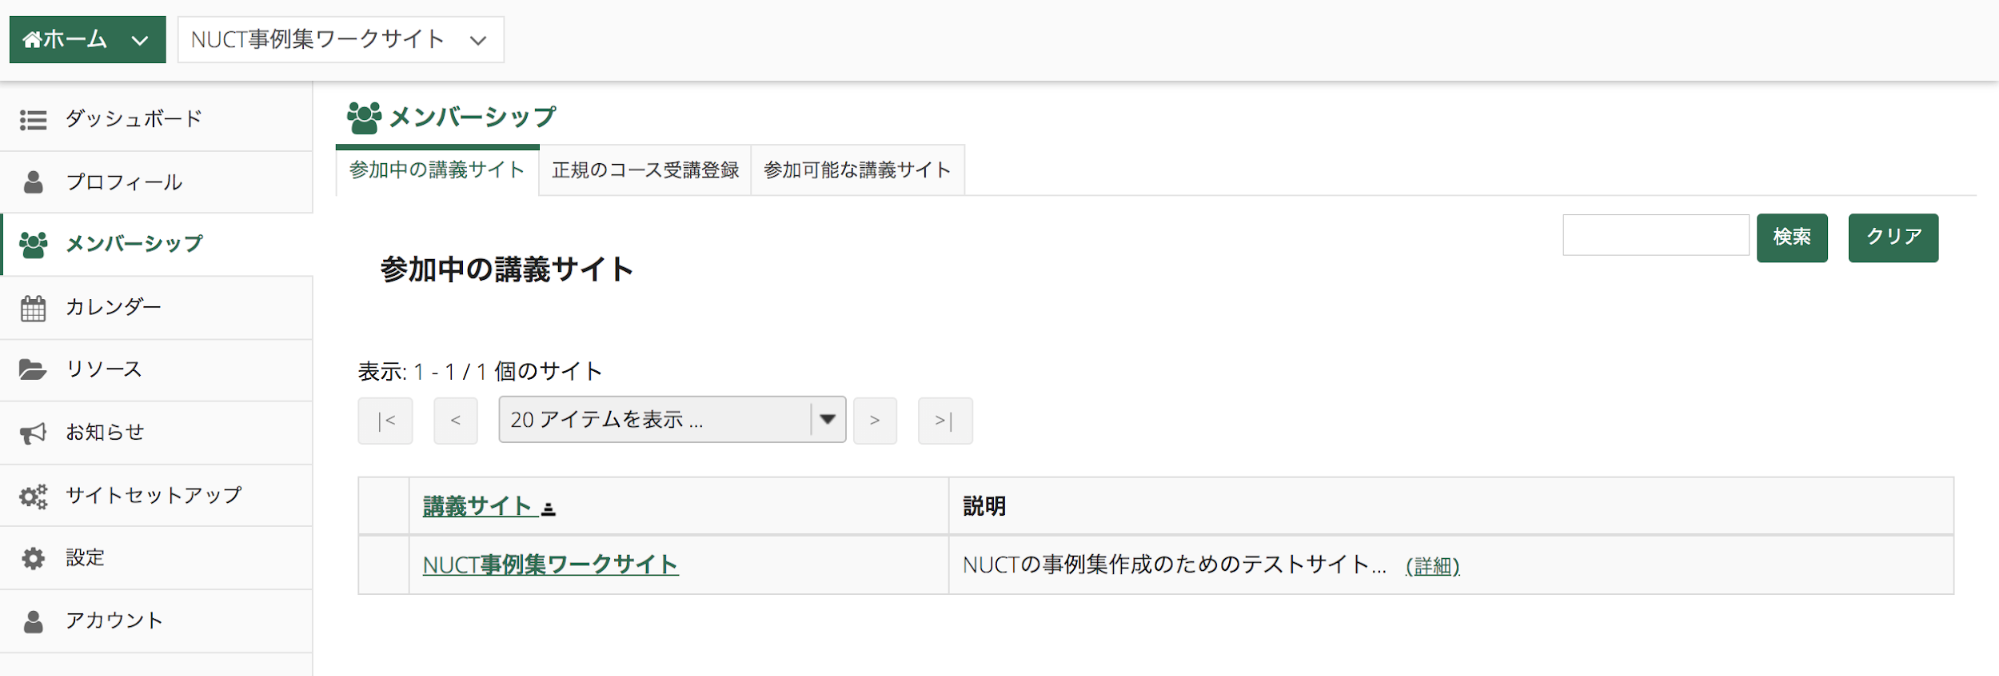
Click the "Membership" from Home menu.
Press the "Available Sites" button to display a list of work sites that you can register.
Use the search window to find work sites if necessary.
Announcements
What is the Announcements tool?
The Announcements tool allows for the delivery of messages to the entire class, to groups, or to specific sections within the class. Participants will see the Announcement message displayed in the Announcements area of their Home area, as well as within the course itself. These messages can be set to show immediately, or to show during specific dates. Email notifications can be sent to alert participants of the Announcement message.
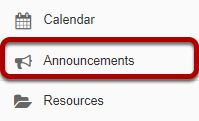
To access this tool, select Announcements from the Tool Menu in your site.
How do I add an announcement?
Click Add.
Title your announcement and add content.
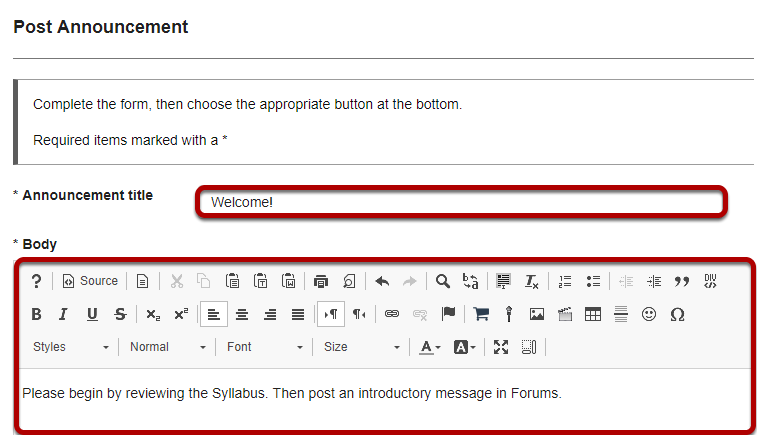
Give your announcement a title, and then enter the content of the announcement into the Rich Text Editor. You may use the formatting options in the editor to modify the font size or color, add images or links, or embed other content.
Determine who can view the announcement.
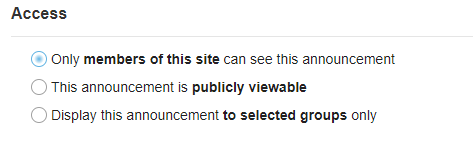
By default, all people enrolled in this site see the announcement.
Making the announcement publicly viewable means that you can send a link to the announcement to people outside the course, even outside your instance of Sakai, and the announcement will be viewable by them.
Post announcement to group(s). (Optional)
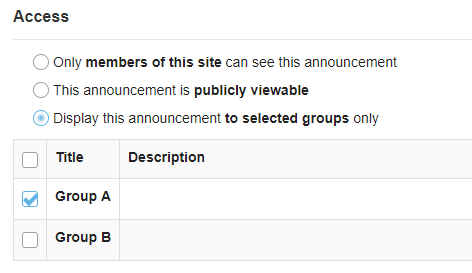
If you have created groups in your course, the option to display to groups is shown. Select the group(s) you want to see the announcement. Only the people in the selected group will see this announcement.
Select when the announcement will be displayed.
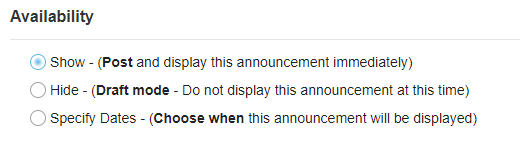
By default, the announcement is displayed immediately upon posting. You can also choose to Hide it (saving as a draft until you are ready to post it), or you may Specify Dates when the announcement will be available.
Select availability dates. (Optional)

If you want the announcement to display during a specific time frame, choose Specify Dates. Select the box beside Beginning and/or Ending and click the calendar icon to insert the properly formatted date and time when the announcement will begin and/or end.
Click calendar icon to insert date and time.
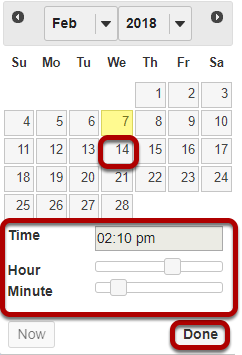
Click the date on the calendar, and use the sliders to select the time. Then click Done.
Add attachments. (Optional)
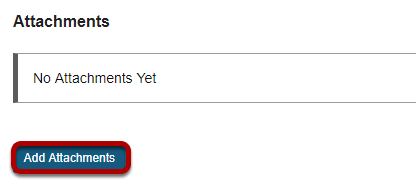
Click the Add Attachments button.
Browse for the file.
If the file is in your Resources, click Attach a copy to the right of the file. Click Continue to attach the file.
Notify participants of announcement by email. (Optional)
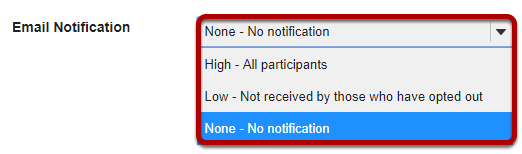
By default, no email notification is sent. You may also select:
- High - All participants to send an email to everyone in the course.
- Low - Not received by those who have opted out to send to everyone except people who have intentionally changed their settings so that they don't receive low priority messages.
Click Post Announcement.

How do I edit an announcement?
Click Edit below the title of the announcement.

Make your edits.
Make edits based on the "How do I Add an Announcement" tutorial.
Click Save Changes when edits are complete.

How do I delete an announcement?
Select the announcement.

Select the check box in the Remove? column for the announcement you would like to delete, and then click Update.
Confirm deletion message.

Click Remove.
Resources
What is the Resources tool?
The Resources tool allows instructors to share a wide variety of files with their students within a site. Individual users may also have Resources within their personal My Workspace area.
Instructors or site owners can upload files (for instance, word processing documents, spreadsheets, slide presentations, audio and videos), as well as create and post HTML (web) pages, simple text documents, library citations, and share links to useful web sites.
Instructors or site owners can organize these files and links into folders and subfolders making it easier for students to locate and access items. Folders and files in Resources can be moved or reordered within a site or copied from one site to another.
Files and folders can display contextual remarks, can be shown, hidden or viewable only during specific dates and times. Instructors can automatically notify site members by email that an item has been added to Resources.
Resources also allows users to upload multiple files using the Drag and Drop interface, or using the WebDAV protocol.
To access this tool, select Resources from the Tool Menu in your site.
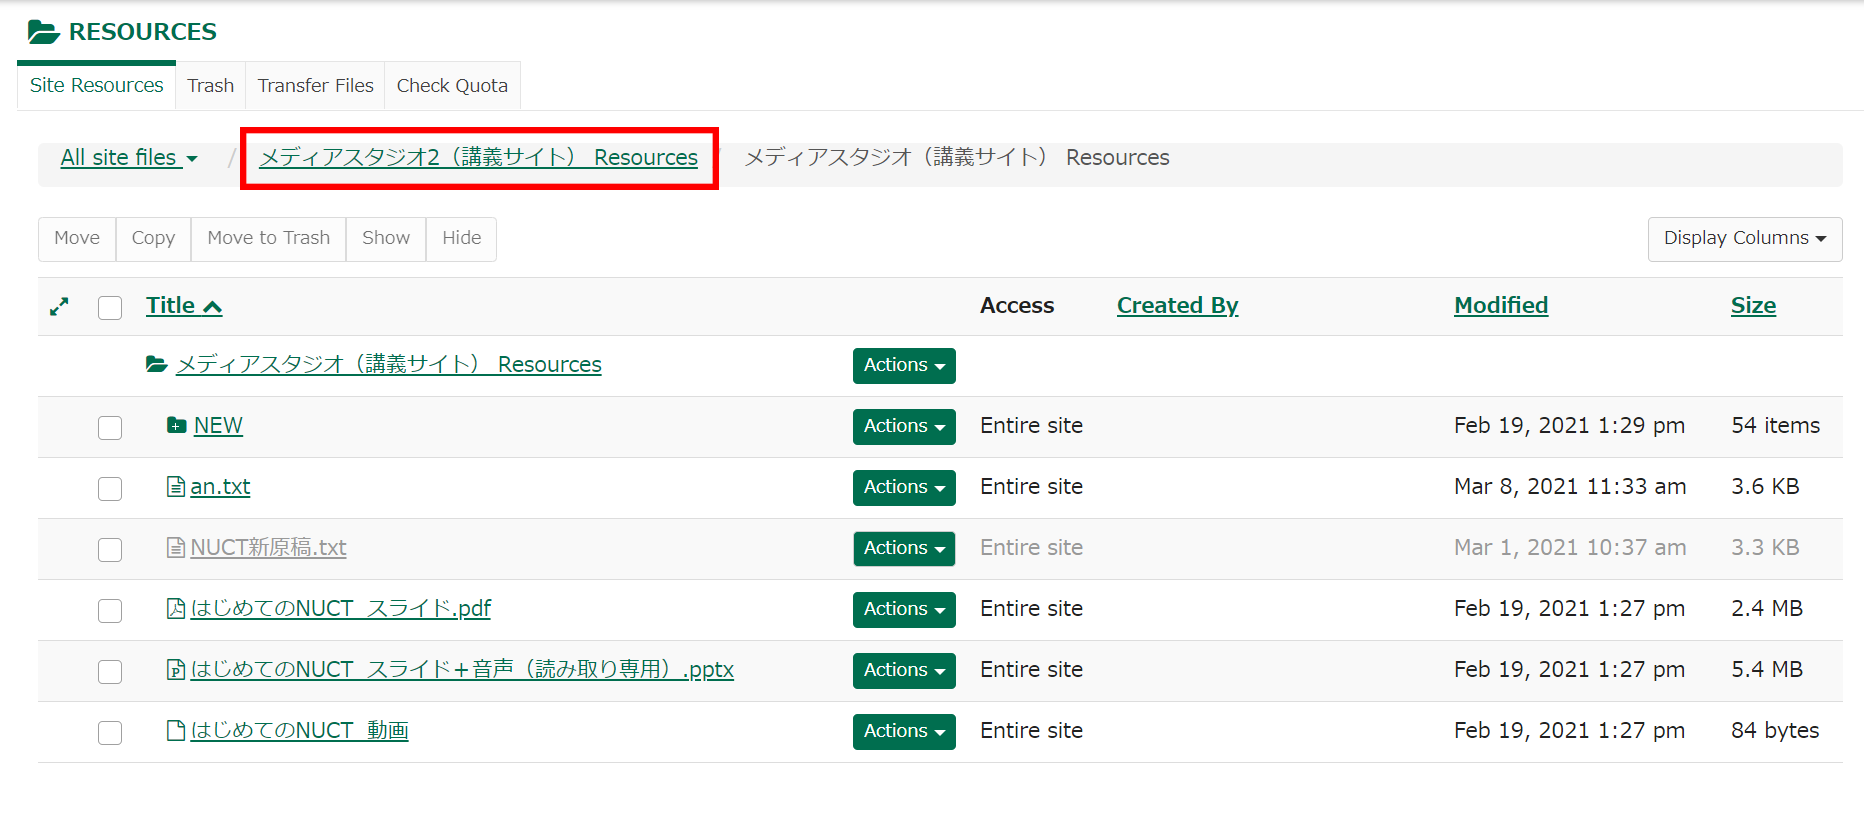
Example of a Resources page.
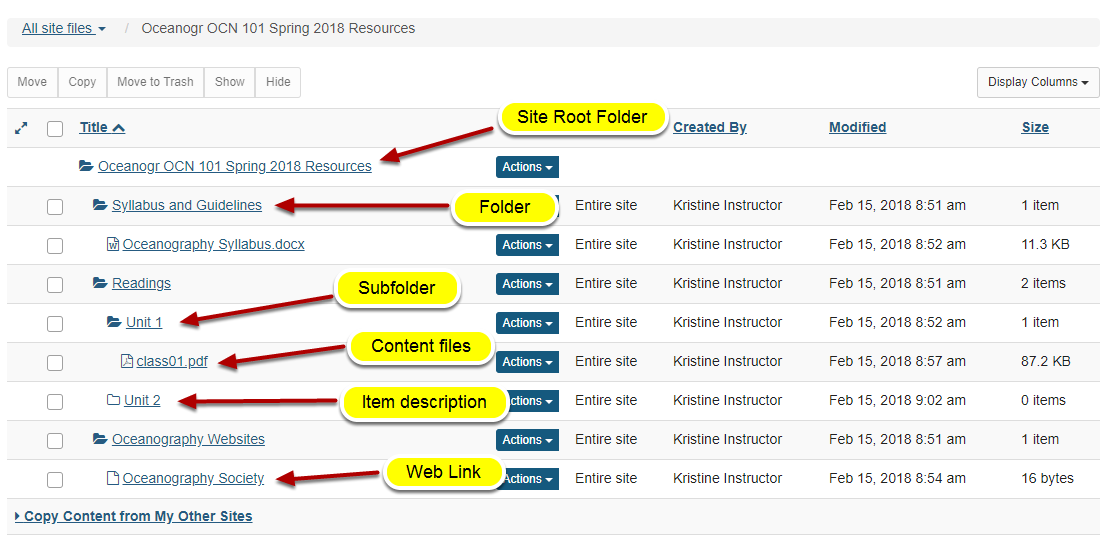
How do I navigate the Resources tool?
There are a number of controls and breadcrumbs that determine the display of the Resources tool, making it easier to maneuver about within the tool.
Folder View
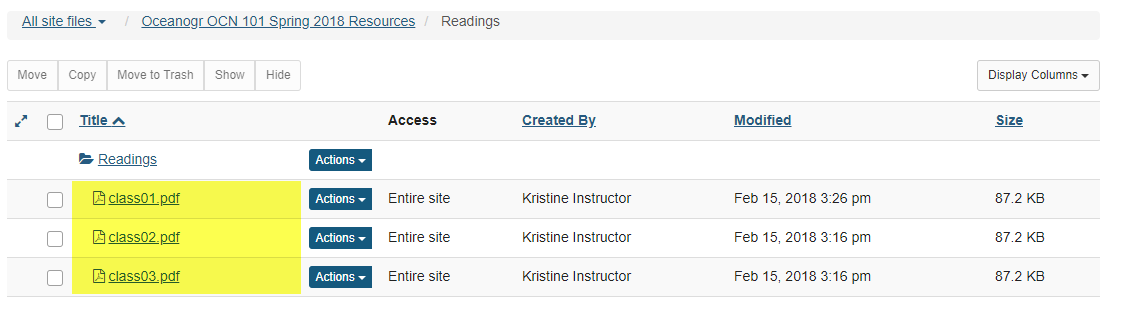
Clicking on the name of any folder will isolate the display to just the contents of that folder.
Breadcrumb Trails
Tool-Level Breadcrumb Trail
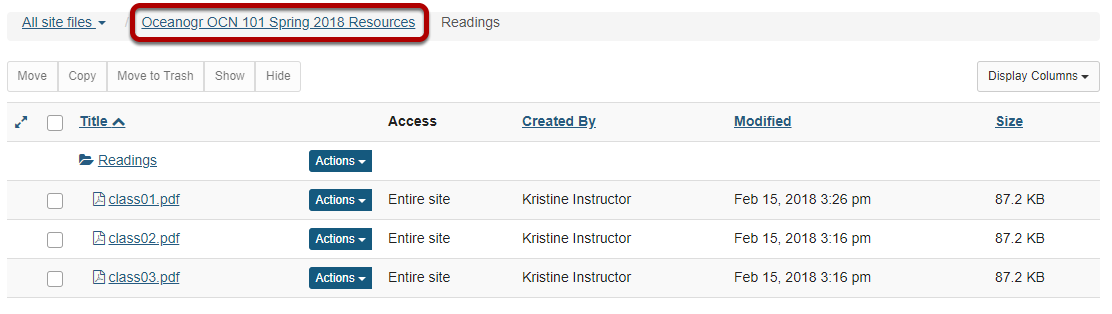
When a folder or subfolder is isolated, a breadcrumb trail of links allows users to navigate the folders. Clicking the root folder will return the Resources display to the root level with all the folders closed.
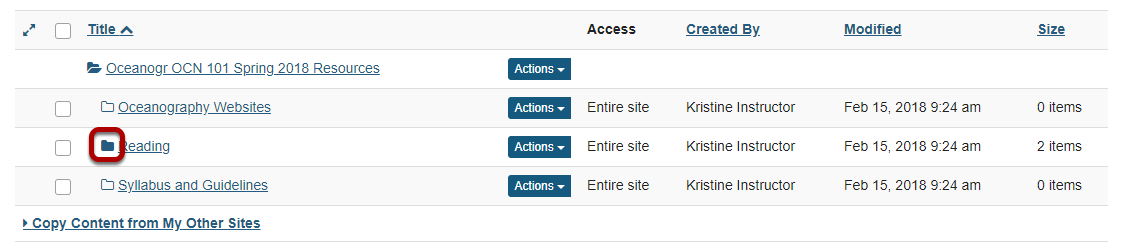
Open / Close
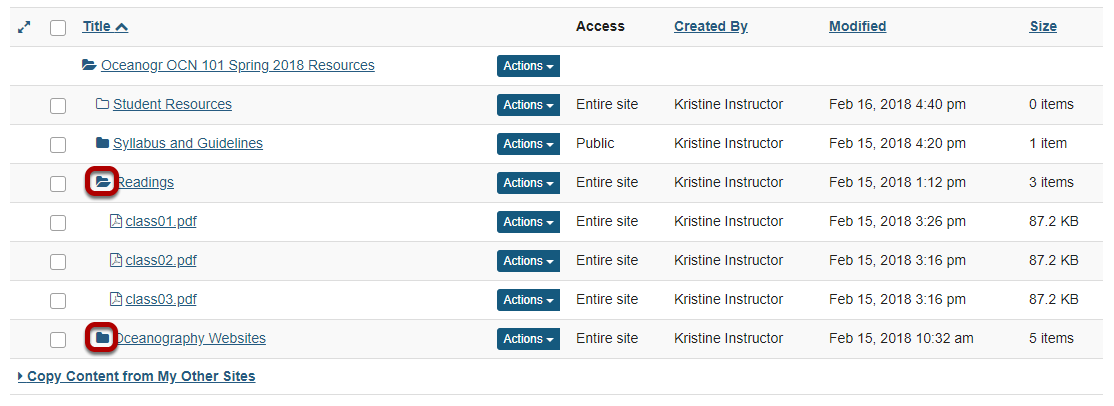
Folders with content will display a solid folder icon. Clicking a solid closed folder will open a folder, within the view of all of the folders. Clicking a solid open folder will close a folder.
Expand All / Collapse All

Clicking Expand All will open up and display the contents of all folders and subfolders. Clicking Collapse All will close all folders and subfolders.
Expand All / Collapse All is a toggle button. Clicking it once will expand the display; clicking it again will collapse the display.
Search
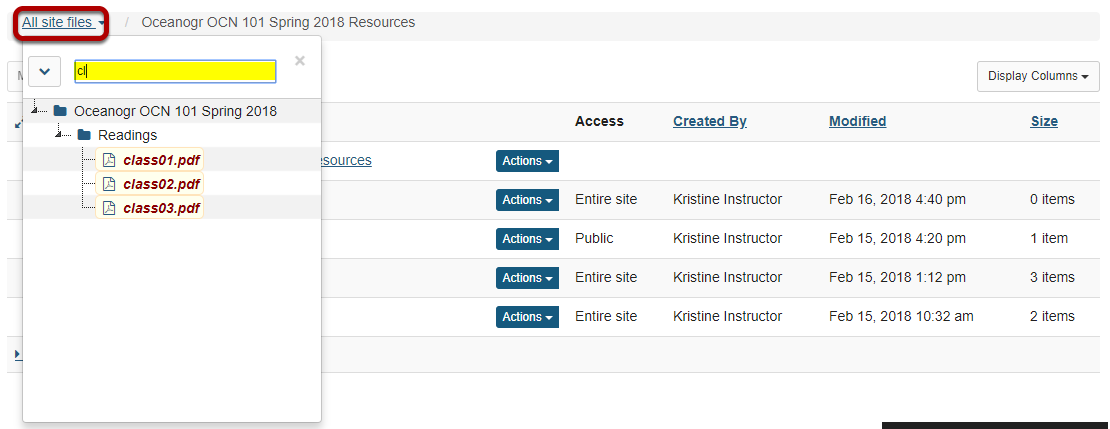
Clicking All Site Files link will display a search field. Enter keywords to locate a specific file or files.
How do I create folders?
Click Actions, then Create Folders.
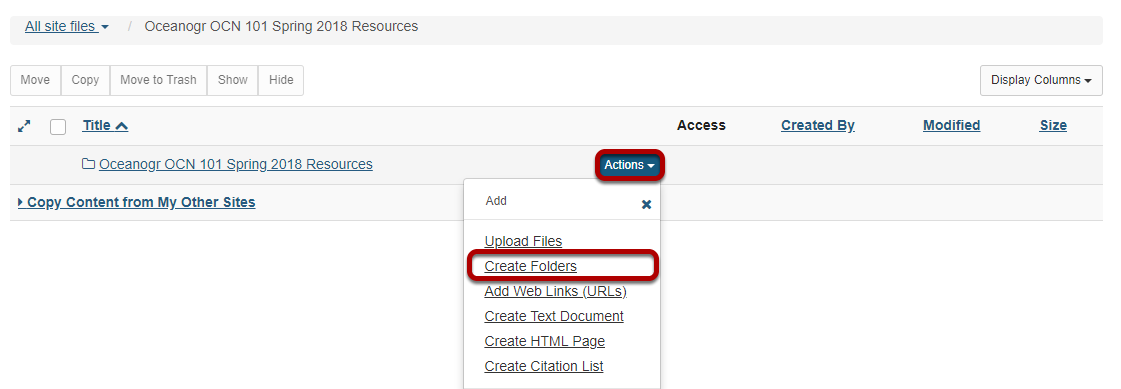
To the right of the site's root folder, from theActions drop-down menu, selectCreate folders.
This displays the Create Folders page.
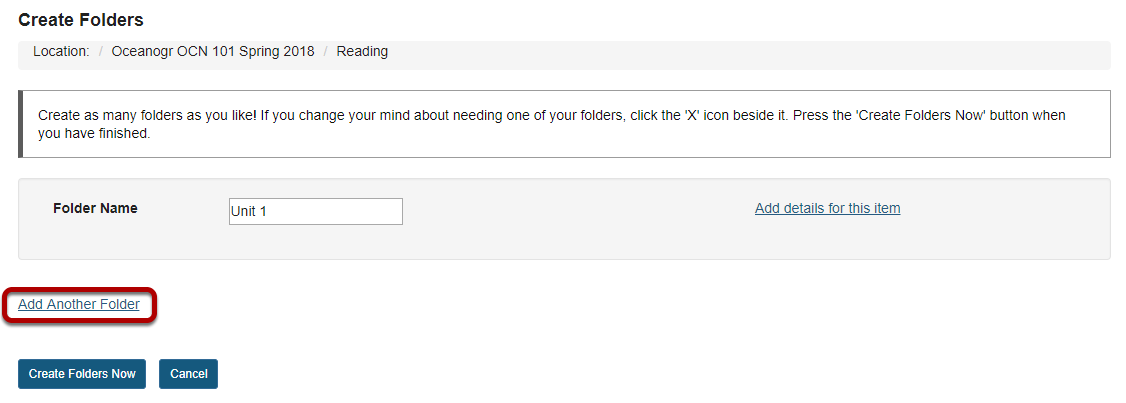
Enter the name of the folder.
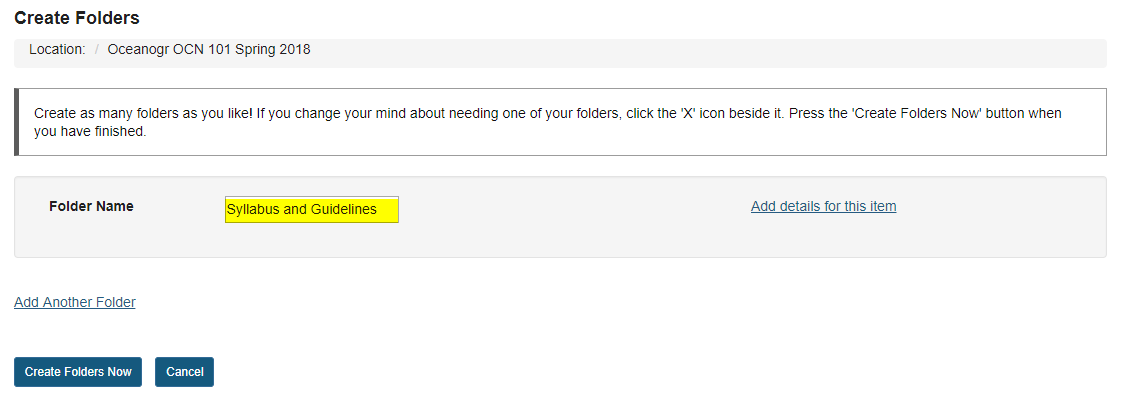
Add multiple folders. (Optional)
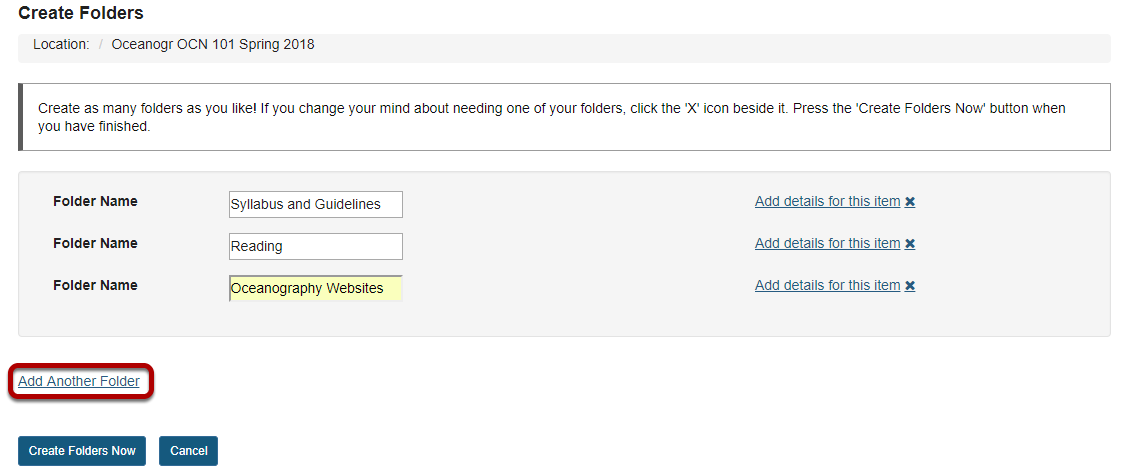
If you would like to create multiple folders, click Add another folder.
Note: You can add as many folders as you want by clicking "Add another folder".
Click Create Folders Now.
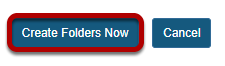
To create the folder(s) in Resources, click Create Folders Now.
This returns the display to the Resources page with the newly created folder(s) displayed.
View folders in Resources.
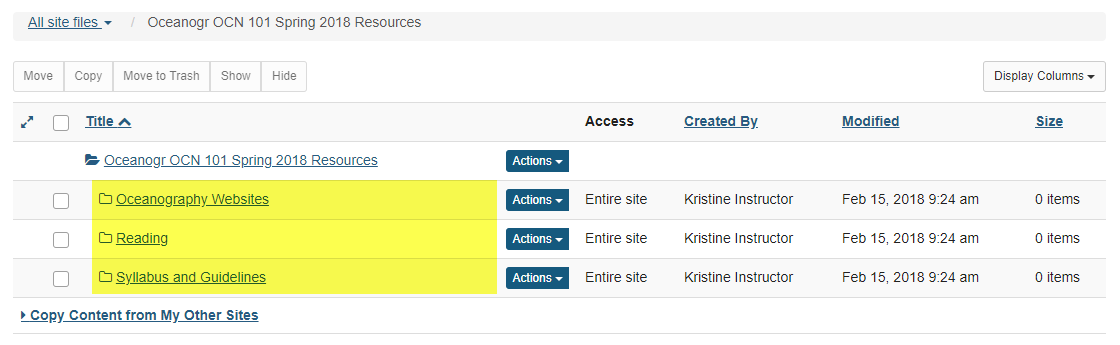
Notice that the folders are displayed slightly indented to the root folder.
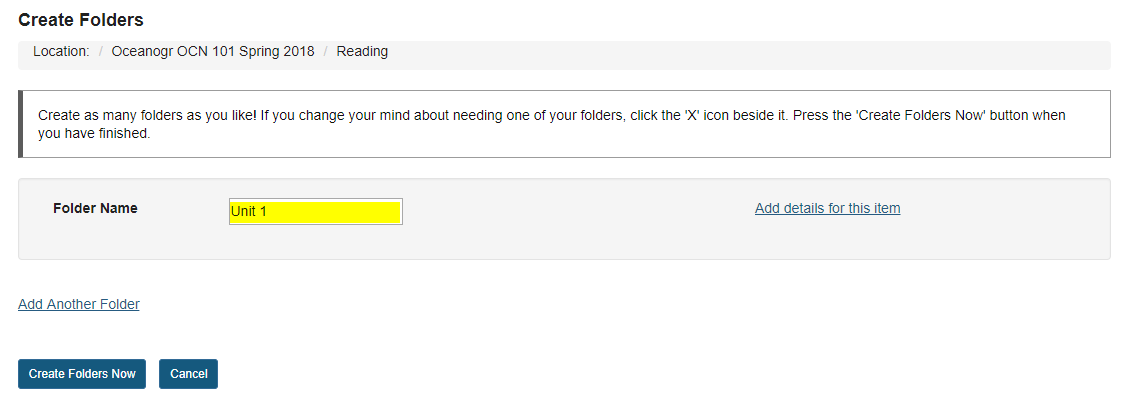
Create subfolders. (Optional)

To create a subfolder within a folder, from the Actions drop-down menu, select Create Folders to the right of the parent folder.
This displays the Create Folders page.
Enter a title for the subfolder.
Create multiple subfolders. (Optional)
If you would like to create multiple subfolders, click Add Another Folder.
Note: You can add as many subfolders of a folder as you want by clicking "Add Another Folder".
Click Create Folders Now.

To create the subfolder(s) in Resources, click Create Folders Now.
This returns the display to the Resources page with the newly subfolder(s) displayed within the main folder.
View subfolders in Resources.
Once a folder contains subfolders, the icon will appear as a solid folder.
View contents of subfolder.
Click the solid folder icon to view the folder contents. Notice that the subfolders are displayed slightly indented to the parent folder.
How do I upload files to Resources?
Click Actions, then Upload Files.
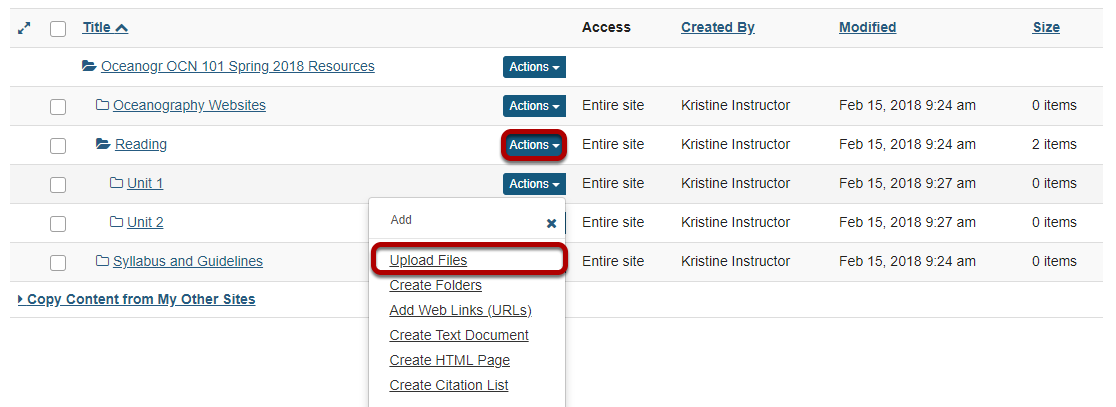
To the right of the folder to which you want to add files, click the Actions dropdown menu and select Upload Files.
If you have not created any folders yet, use the site's root folder (bearing the name of the site) to add files.
Drag and drop files from your computer.
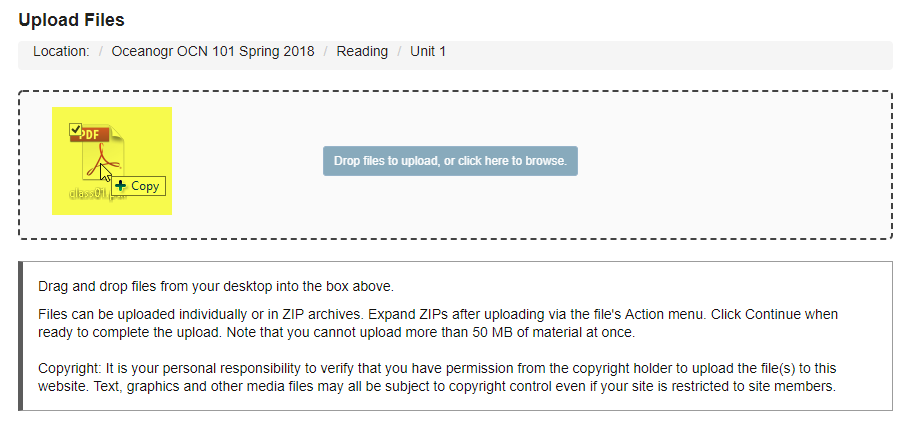
Drag files from your computer and drop them in box Drop files to upload, or click here to browse.
This will display thumbnails of the files that will be uploaded.
Or, browse your computer for files.
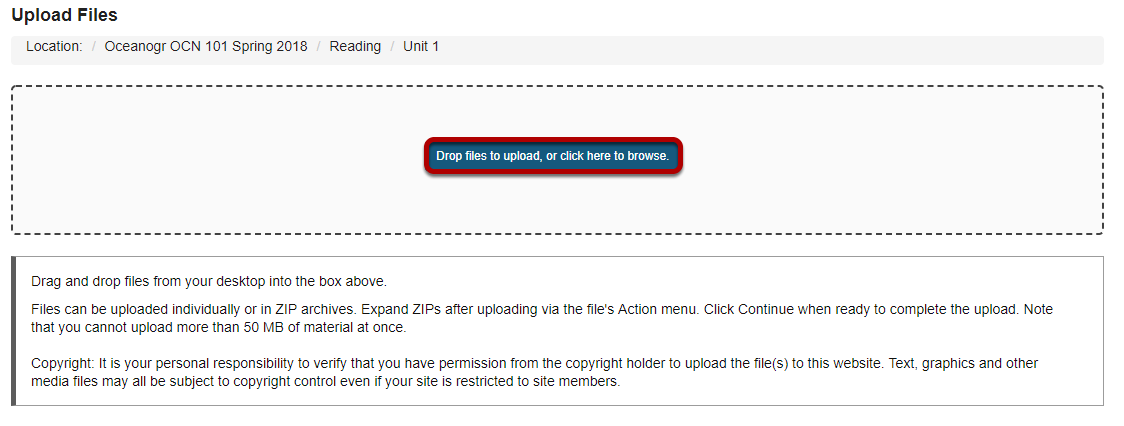
Click the Drop files to upload, or click here to browse button.
This will open your computer's File Upload window where you can browse for and select the file.
Click Continue.
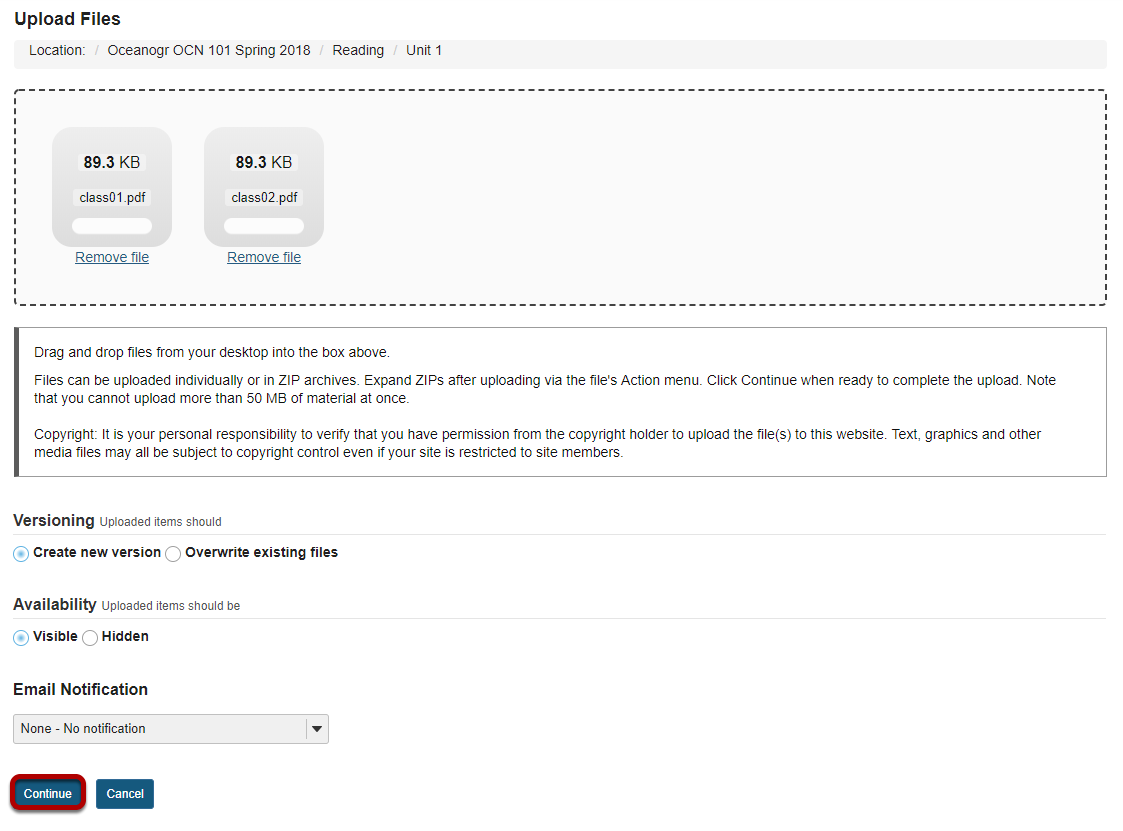
This uploads the files.
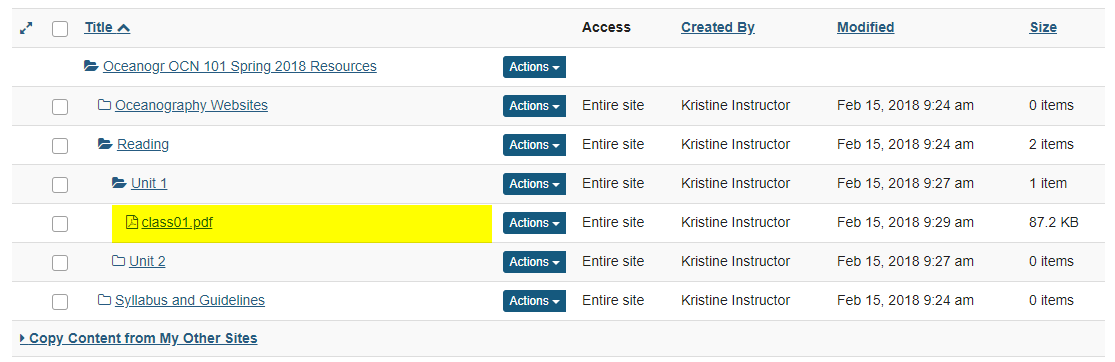
View files in Resources.
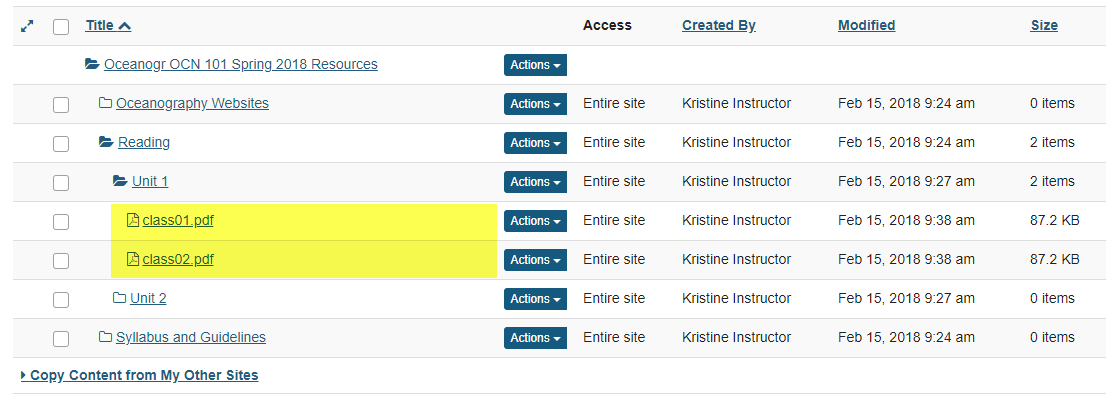
The files are now located inside the selected Resources folder.
How do I add a web link or URL?
Users can create links to web pages in Resources.
Click Actions, then Add Web Links (URLs).
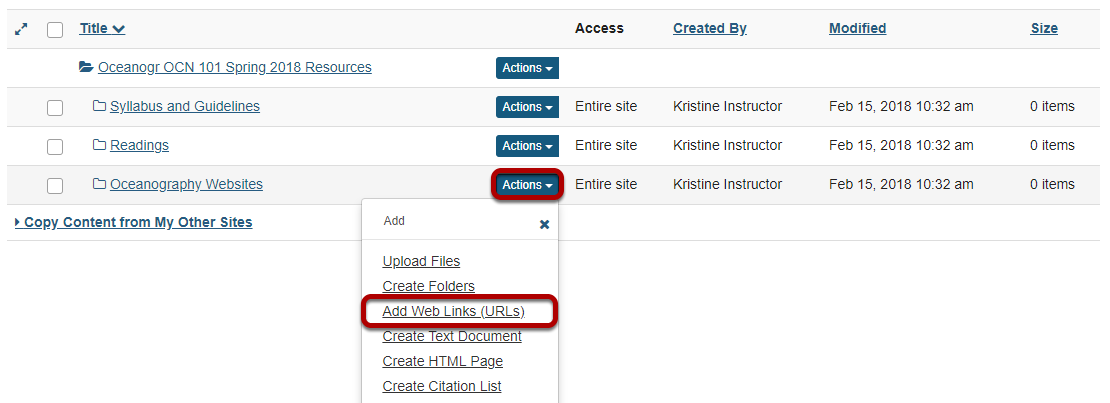
To the right of the folder to which you would like to add the web link, from the Actions drop-down menu, select Add Web Links (URLs).
This displays the Add Web Links (URLs) page.
Enter web address.
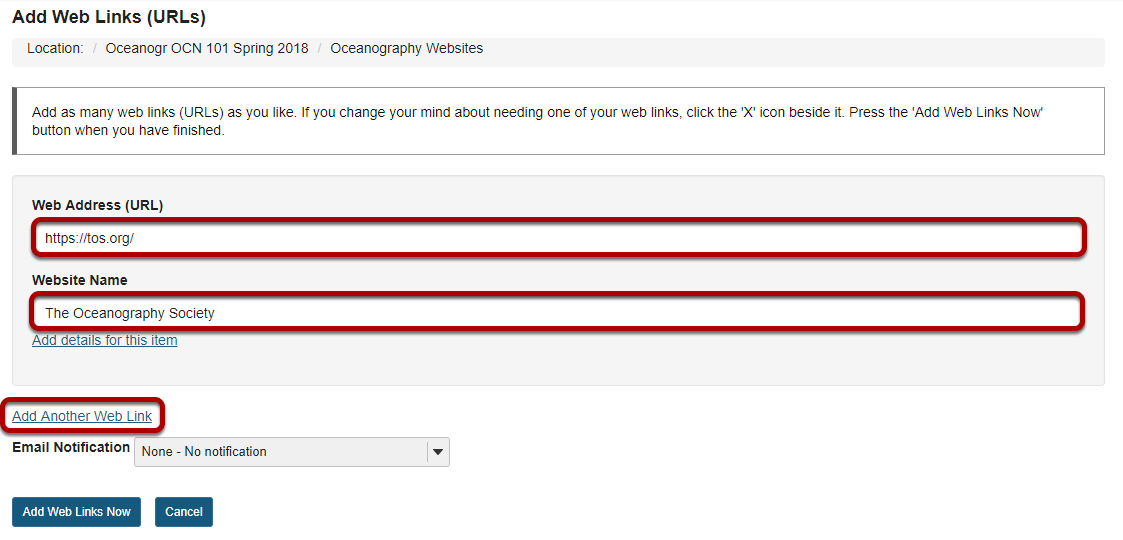
Enter (or paste) the web site address (URL) and enter a name of the link.
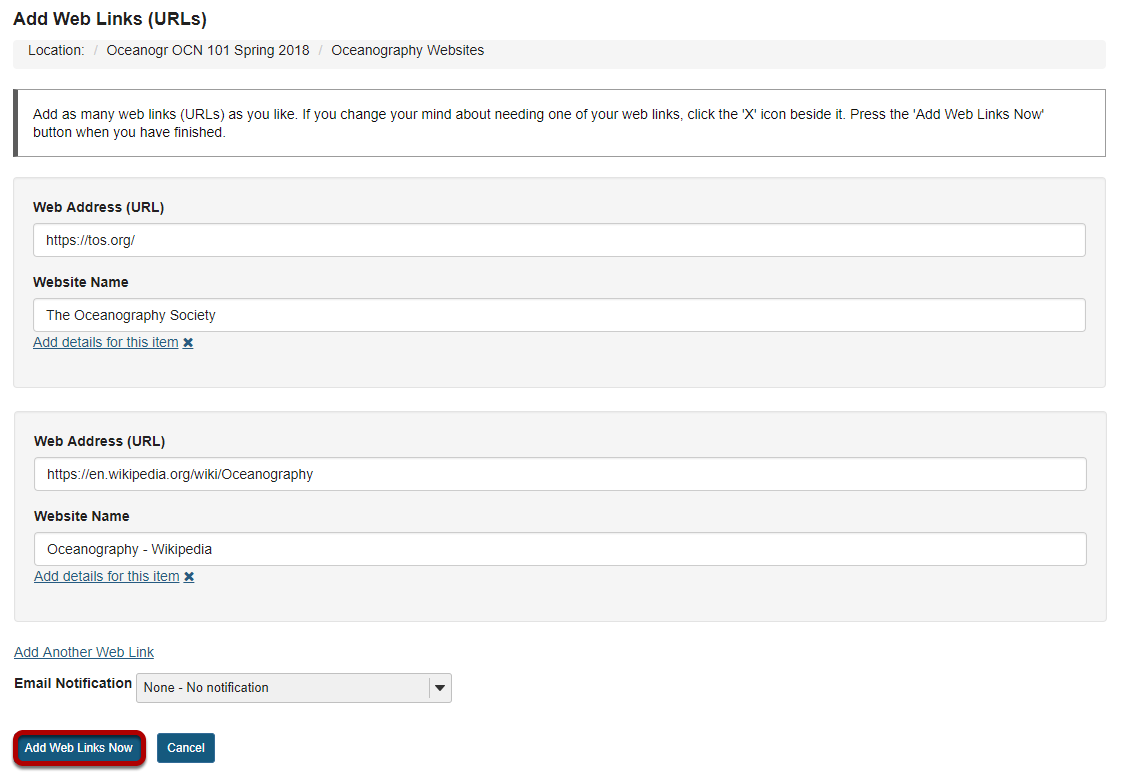
You may also click Add Another Web Link to add additional links. (Optional)
Click Add Web Links Now.
View links in Resources.
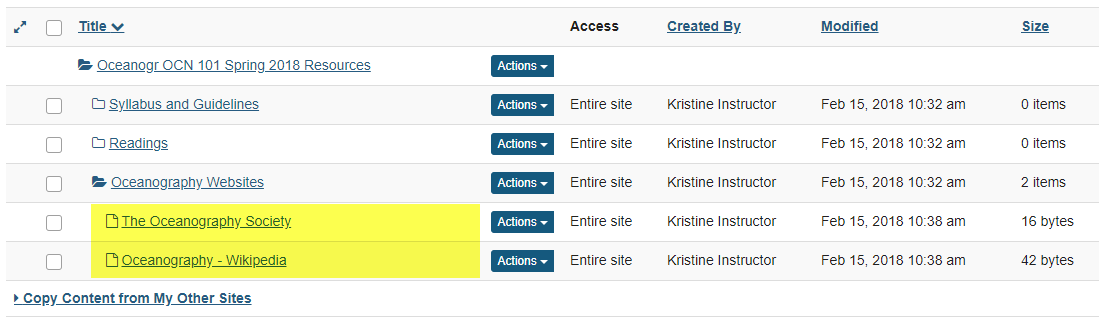
This creates links to the web sites in the selected Resource folder.
How do I create a text document?
Click Actions, then Create Text Document.
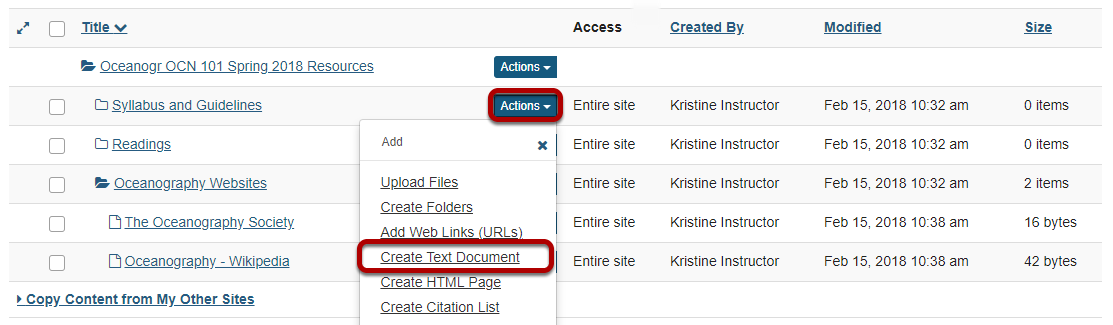
To the right of the folder in which you want to create the text document, from the Actions drop-down menu, select Create Text Document.
This displays the Create Text Document page.
Enter text, then click Continue.
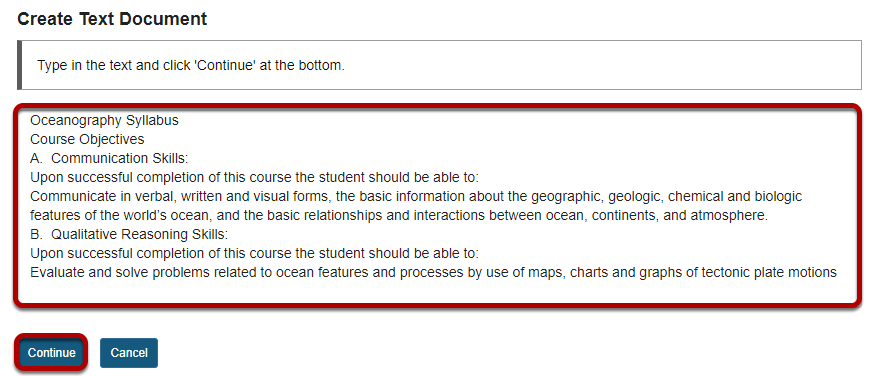
Enter (or paste) the text into the text box, then click Continue.
This displays the details page for the text document.
Enter document information.
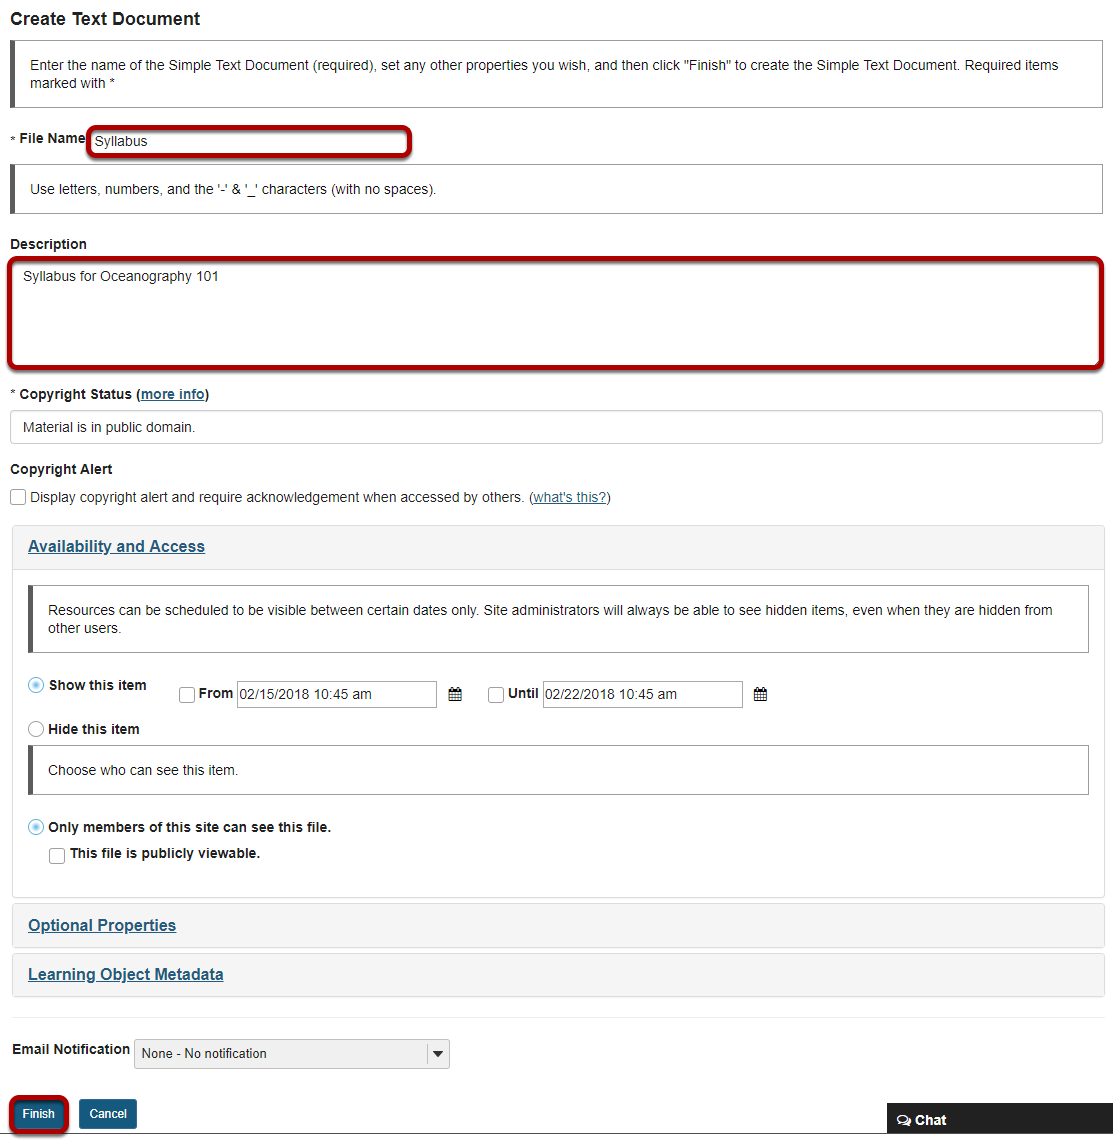
Enter a display name for the text document, and additional details if needed, then click Finish.
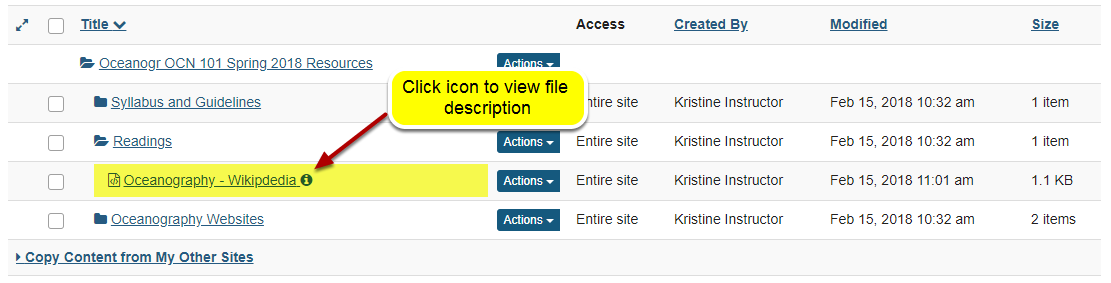
View text document in Resources.
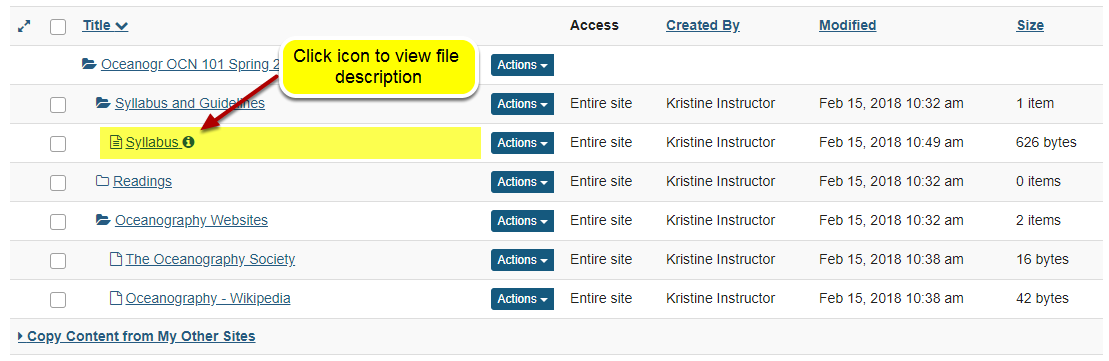
The text document has been placed in the selected folder.
Note: You may click on the blue Information icon to the right of the file to see the item description.
How do I create an HTML page?
Click Actions, then Create HTML Page.
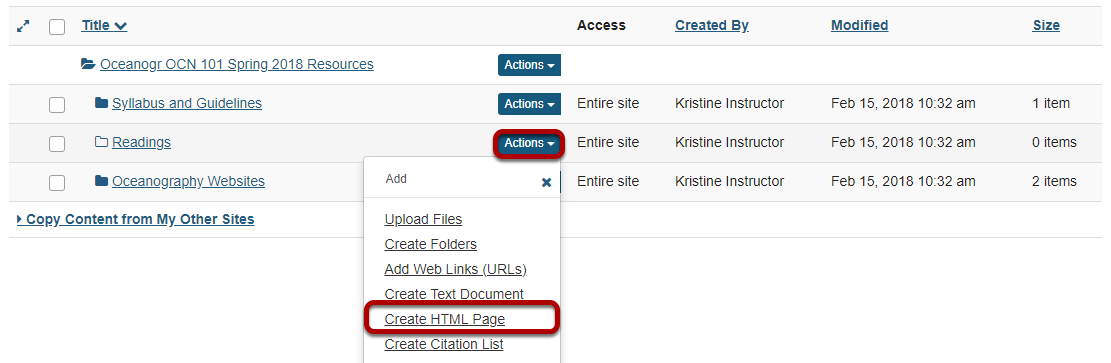
To the right of the folder where you want to create the HTML page, from the Actions drop-down menu, select Create HTML Page.
Enter document content.
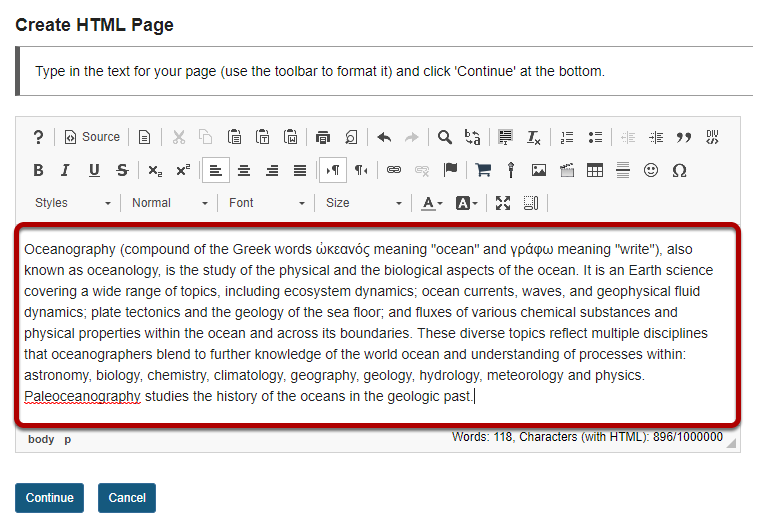
Enter (or paste) the text content of the document into the.
Use the Rich Text Editor to format or add links and media.
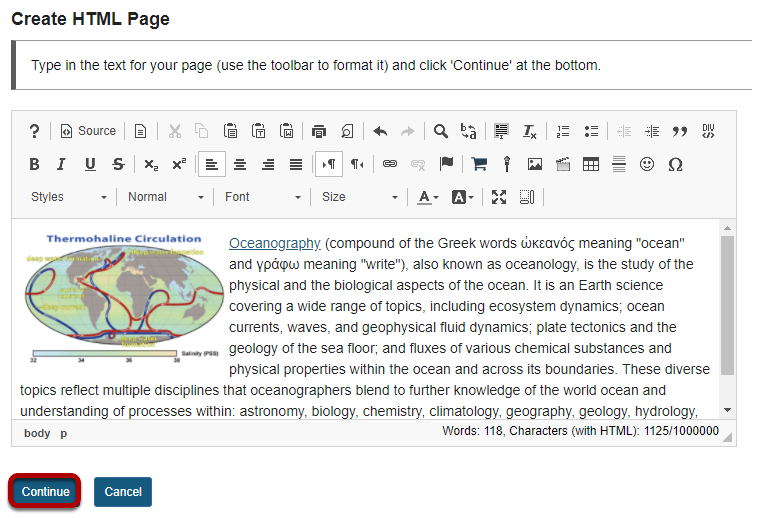
Use the Rich Text Editor tools to format the text, add images, links or other HTML items to the document.
Click Continue to save your document when you are finished editing.
Enter document details.
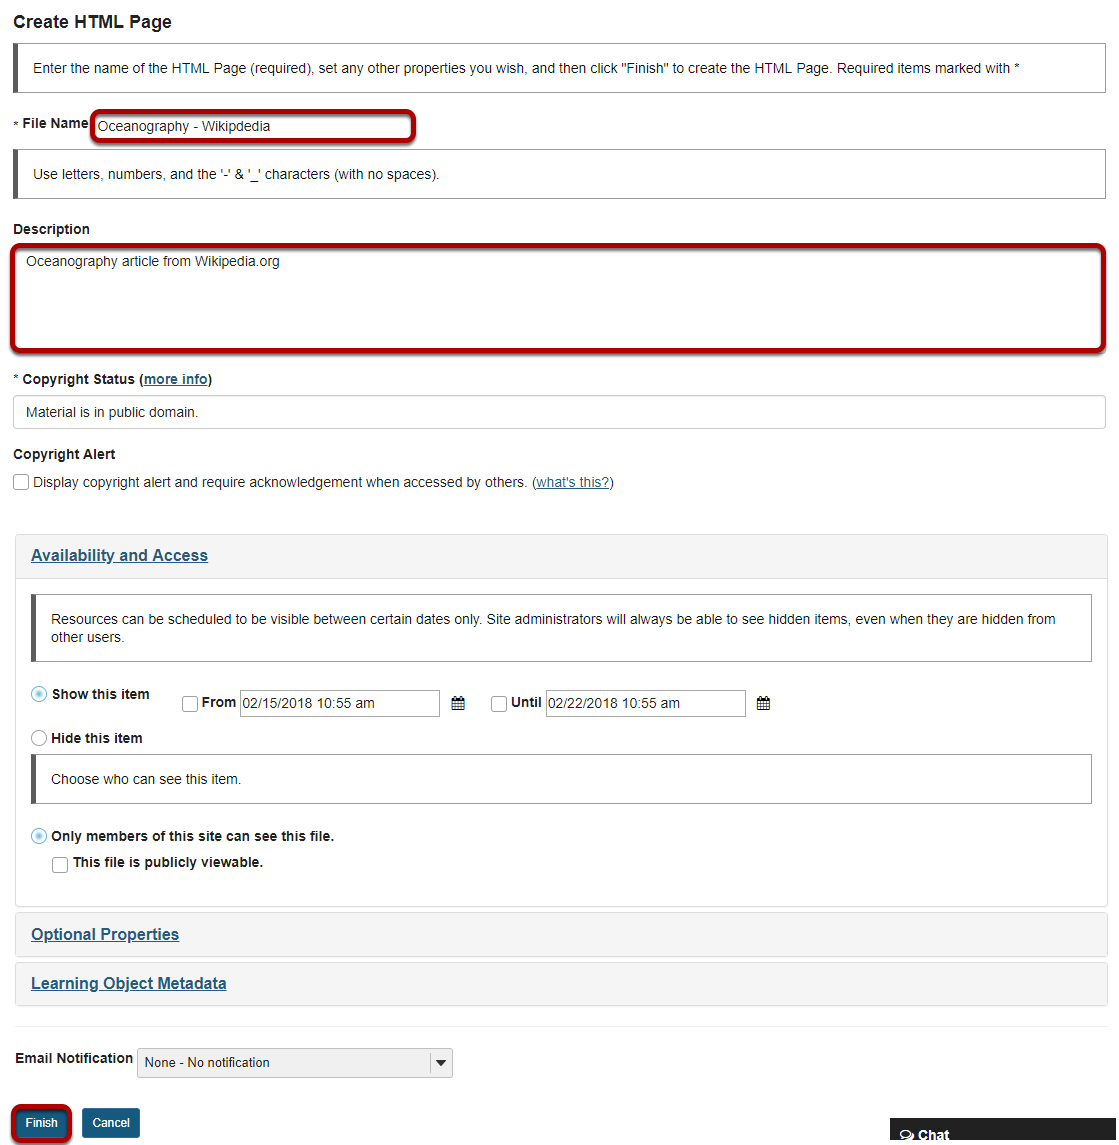
Enter a display name for the HTML document, and any other information as needed. Click Finish when done.
View HTML file in Resources.
The HTML page is created and placed in the selected folder.
Note: You may click on the blue Information icon to the right of the file to see the item description.
How do I create a citation list?
Users can create a citation list for a books, journal articles, manuscripts, newspapers or musical compositions in Resources. There are two methods for creating a citation list.
Method 1: Import a file in RIS (Research Information Systems) format.
Method 2: Manually create list.
Method 1: Import RIS file.

To the right of the folder you want to import the RIS citation list, from the Actions drop-down menu, select Create Citation List.
This displays the New Citation List page.
Enter a name, then Import.
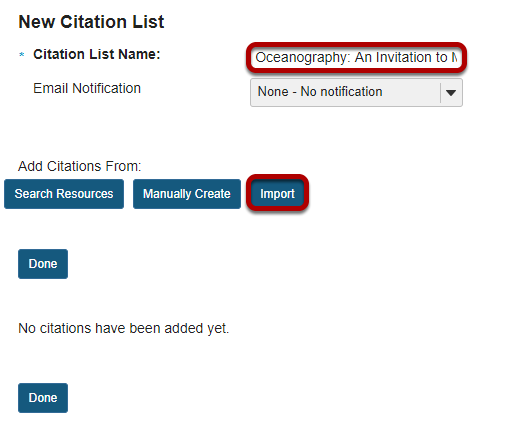
Enter a name for the citation list, then click Import.
This displays the Import Citations page.
Click Choose File.
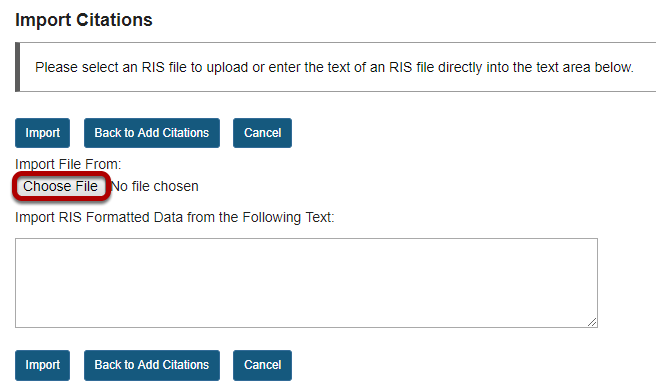
Click Browse to locate and select the .ris file on your computer.
Click Import.

Note: The selected .ris filename will appear next to the Choose File button.
Click Done.
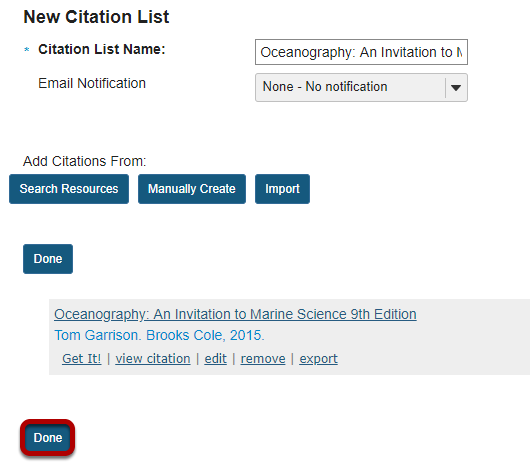
View citation list in Resources.
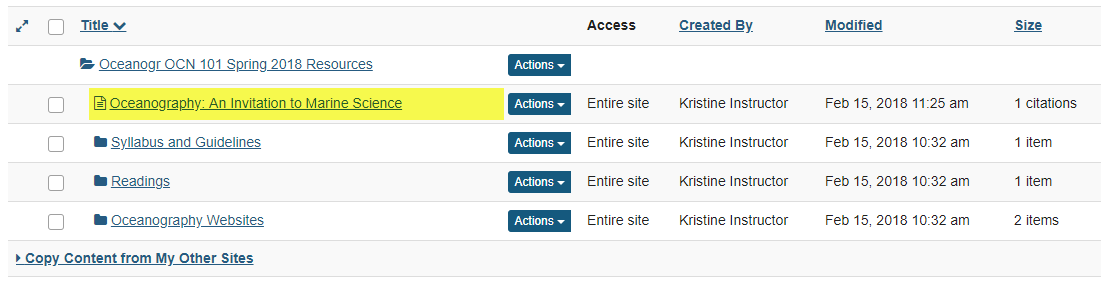
The citation list is located in the selected folder.
Click on the citation list name.
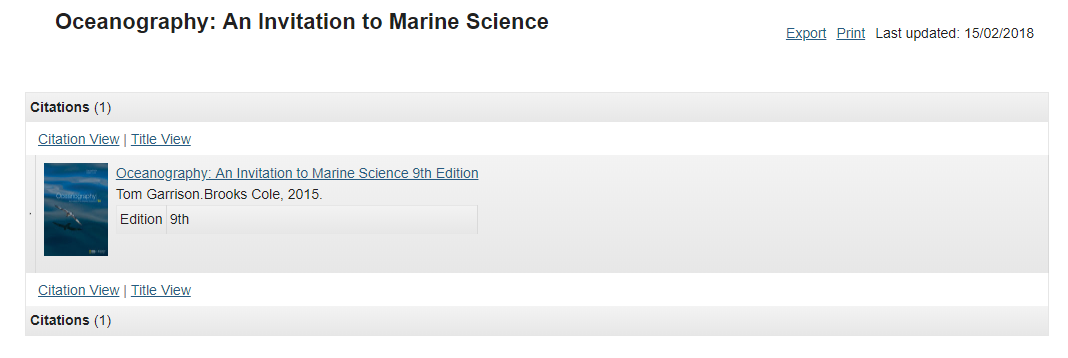
Clicking on the list name will open the item and display the list of citations.
Method 2: Manually create citation list.
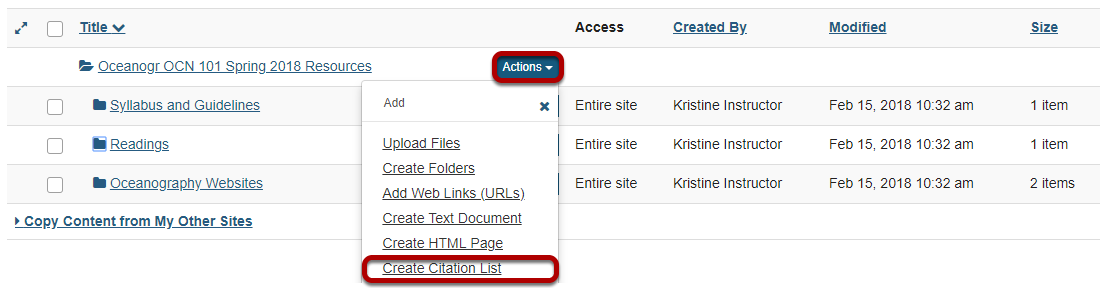
To the right of the folder where you want to create the citation list, from the Actions drop-down menu, select Create Citation List.
This displays the New Citation List page.
Enter a name for the citation list, then click Manually Create.
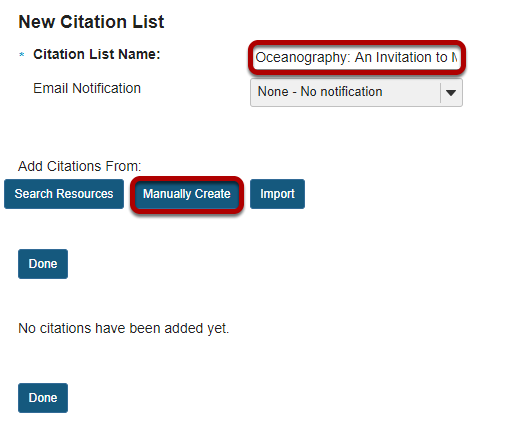
Enter citation information, then Save.
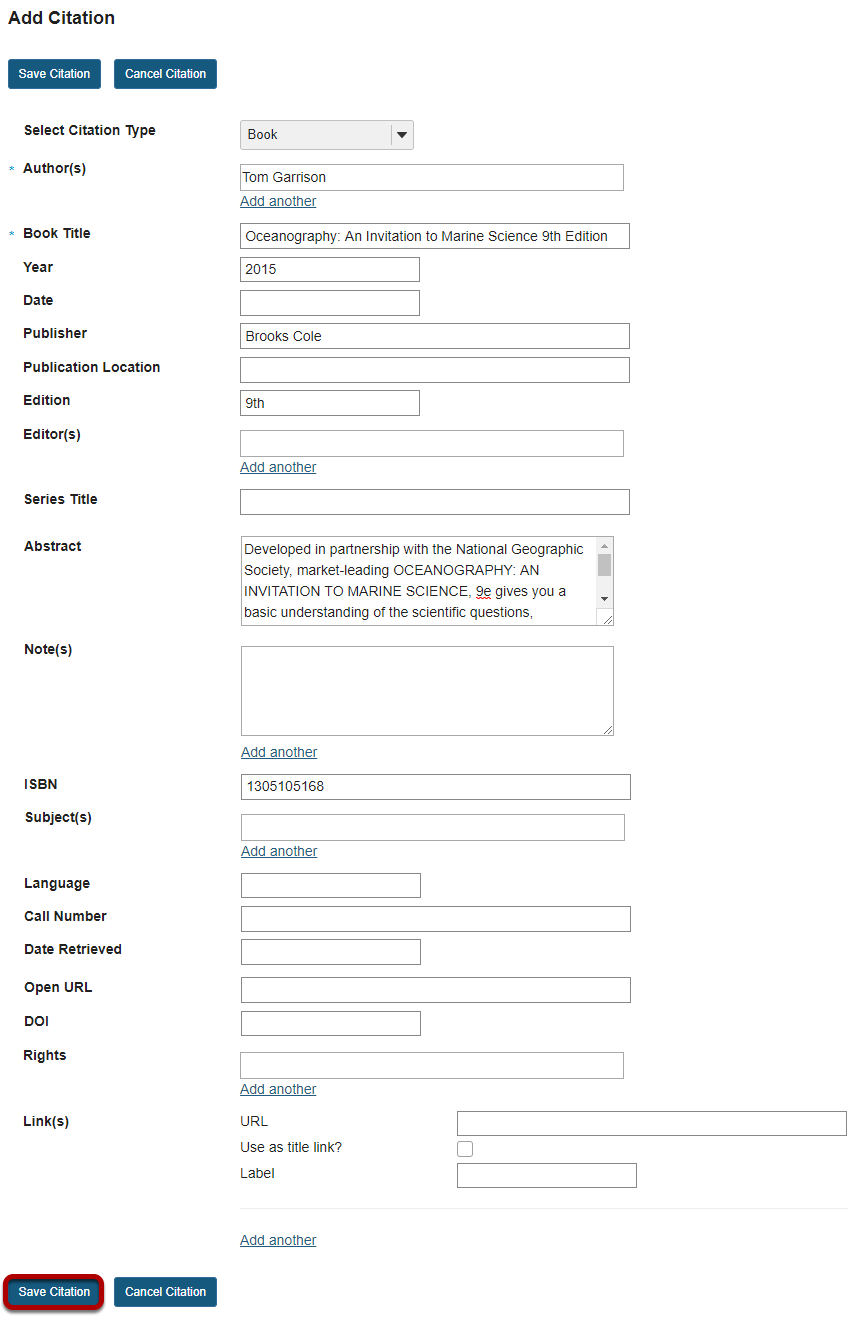
Manually enter the citation information, then click Save Citation.
Click Done.

This returns the display to the New Citation List page with a summary of the citation information. You may add more citations if needed. When finished, click Done.
View citation list in Resources.
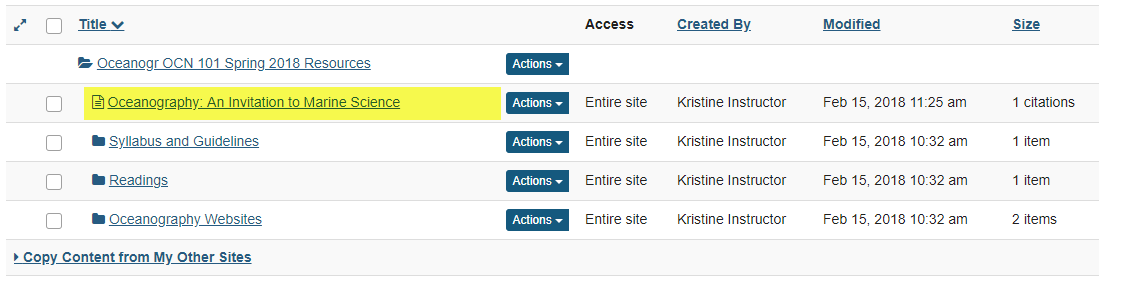
The citation is listed in the selected folder.
Click on the citation list name.
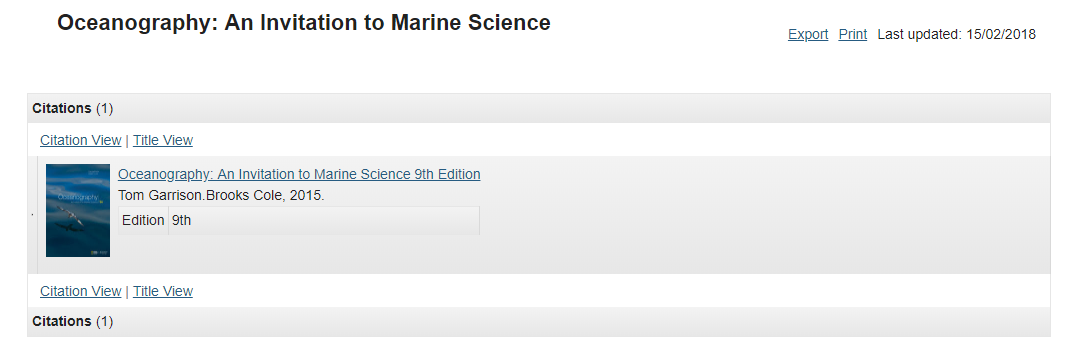
Clicking on the list name will open the item and display the list of citations.
How do I upload a new version of a file in Resources?
If a file is linked and active elsewhere in your course site - such as in a Lessons module or an image in a quiz - deleting it from Resources and uploading a new file in its place will break the link. By uploading a new version, your existing links remain intact.
Click Actions, then Upload New Version.
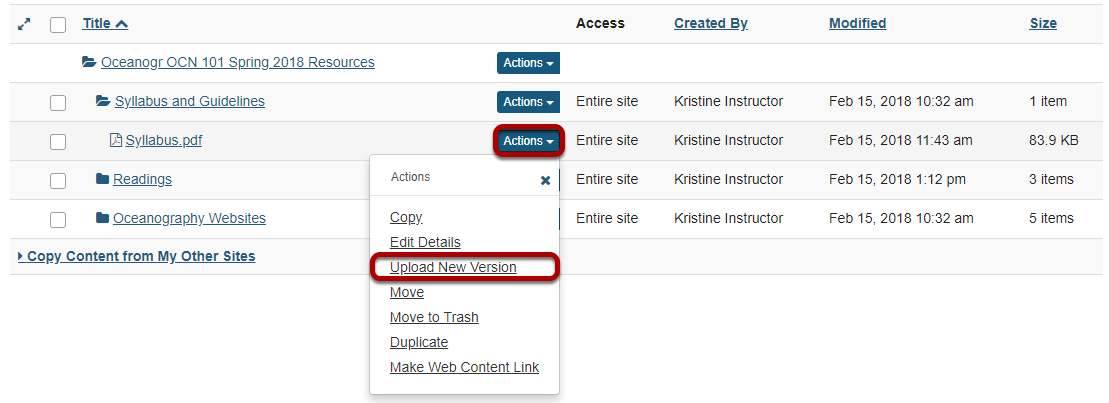
To upload a new version of a file, to the right of the file to replace, from the Actions drop-down menu, select Upload New Version.
This displays the Upload New Version page.
Click Choose File.
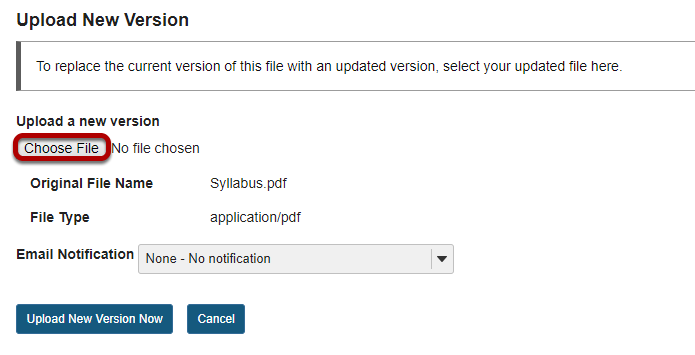
Click Choose File to locate and select the file on your computer.
This returns the display to the Upload New Version page with the name of the new file.
Click Upload New Version Now.
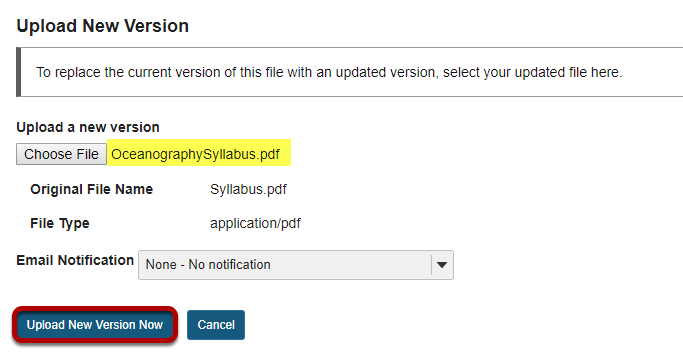
The file name of the new file is displayed.
Original file is replaced.
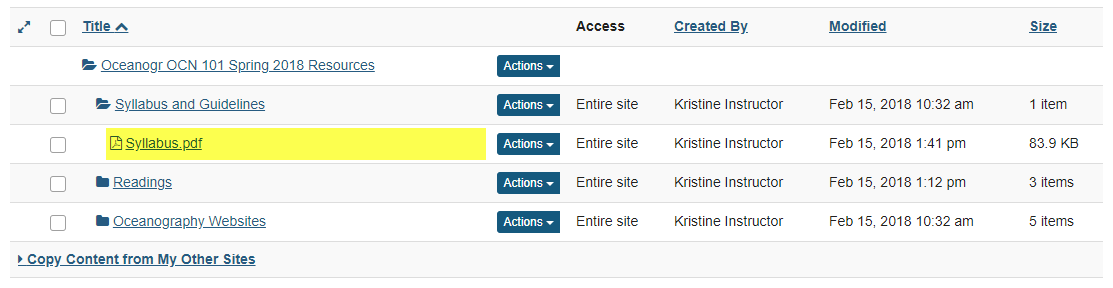
This replaces the original file with the new revised file.
Note: The display name for the new file remains the same as the original file.
How do I remove a file or folder in Resources?
Select one or more items, then click Move to Trash.
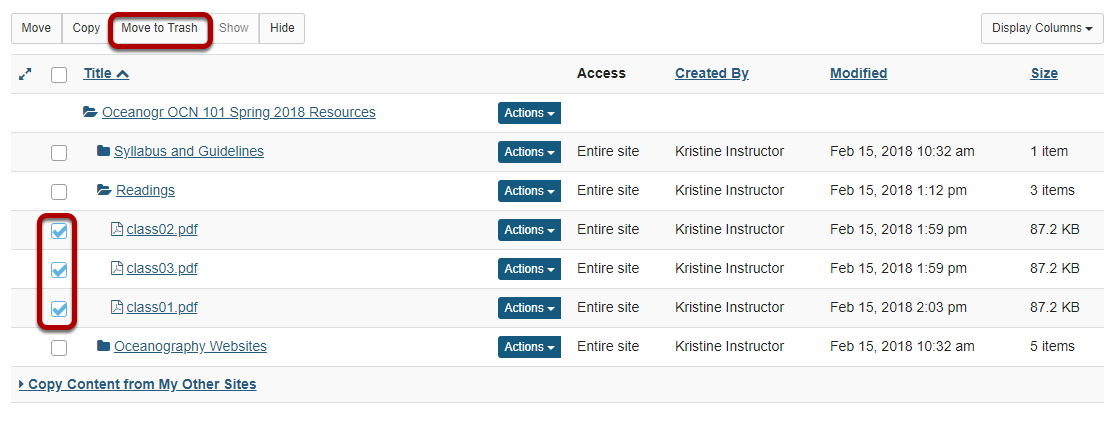
To remove a Resource file or folder select the item(s) by checking the boxes next to each one to be removed, then click Move to Trash.
Note: Alternately, if you are removing one item at a time, you may select Move to Trash from the item Actions menu instead.
Click Remove again to confirm.
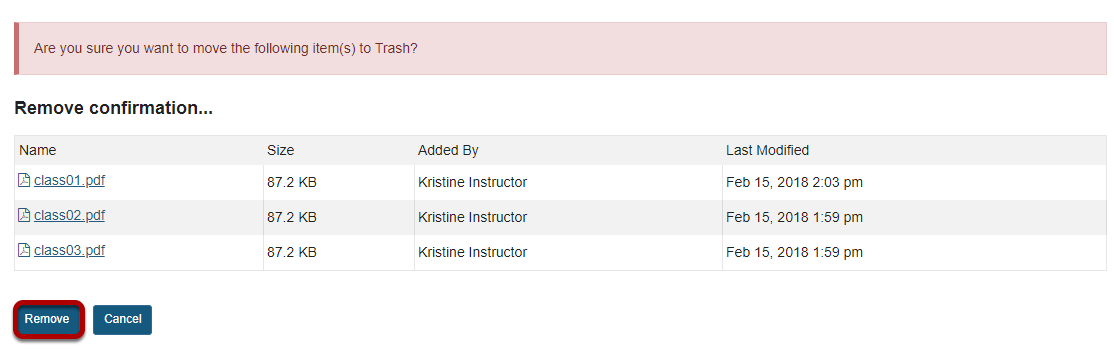
Items are removed.

Note: If you remove a folder, all of the items inside the folder are also removed.
How do I allow all students to upload content to a selected folder?
Instructors can allow all students to upload and edit file to a selected folder in Resources. Instructors must first create the folder. (See "How do I create folders?")
Click Actions, then Edit Folder Permissions.
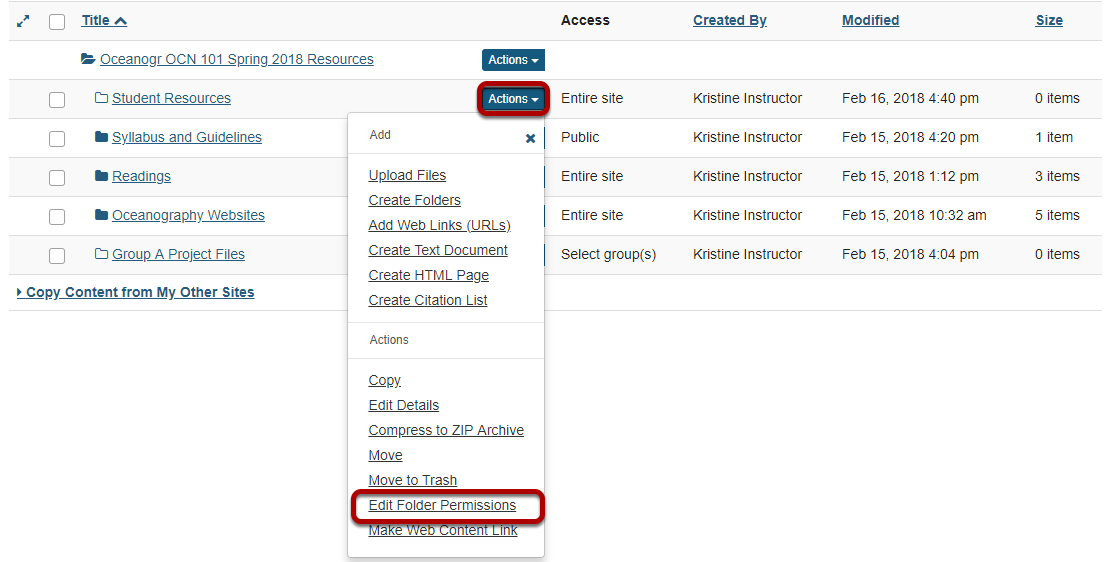
To grant uploading permission to all students, to the right of the folder, from the Actions drop-down menu, select Edit Folder Permissions.
This displays the folder permissions dialog box.
Modify student permissions, then Save.
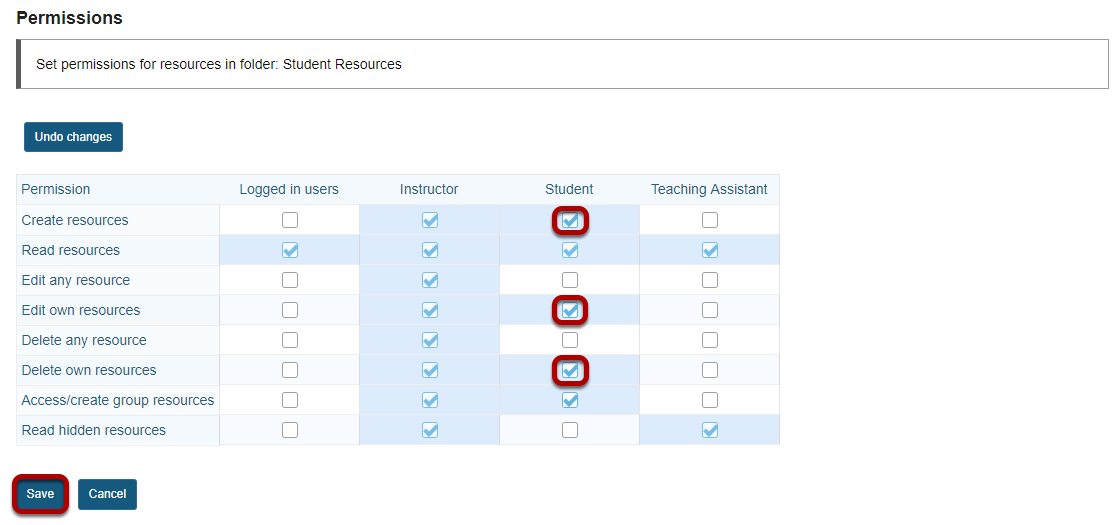
In the student column, select Create resources, Edit own resources and Delete own resources, then click Save.
Students may now upload and edit items within the folder.
This allows the students to upload and edit content in the selected folder.
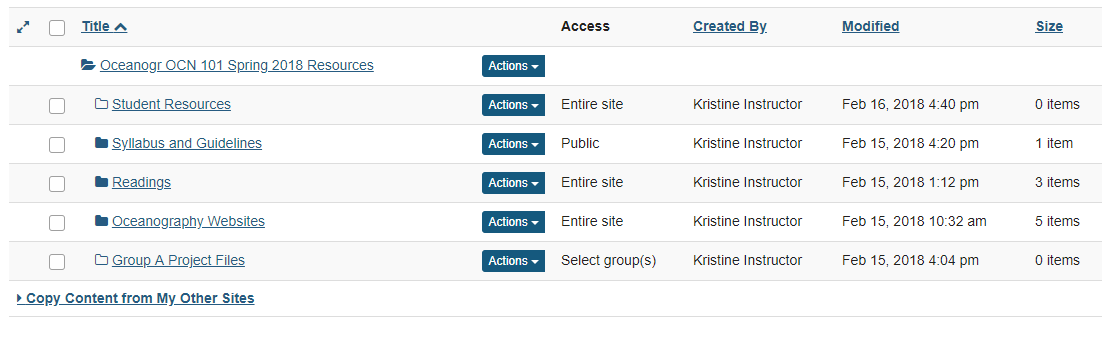
Students will have an "Add" section added to their Actions button displayed next to the folder.
How do I transfer files to Resources using WebDAV?
Users can transfer files to Resources using the WebDAV protocol. WebDAV allows users to upload multiple files and folders from their local computer to and from their site Resources.
WebDAV stands for "Web-based Distributed Authoring and Versioning". It is a set of extensions to the HTTP protocol that allows users to collaboratively edit and manage files on remote web servers.
Once users have set up WebDAV for a particular site Resources, their computer will treat the Resources like any other folder on their local system. Users are able to drag and drop files and folders from Resources just as they would in "My Computer" in Windows, or the "Finder" on a Mac.
For Windows, users can download AnyClient for WebDAV connections, or set up a connection using the native Windows WebDAV support.
Mac OS X 10.4 (Tiger) and newer supports secure WebDAV connections in the Finder. Mac users can also use Cyberduck or AnyClient.
Depending on your specific operating system version, you may find one method performs better than another.
Note: You may also upload multiple files using the drag and drop feature in Resources.
Click Transfer Files.

To locate directions for setting up WebDAV on your computer, click Transfer Files.
WebDAV instructions will display.
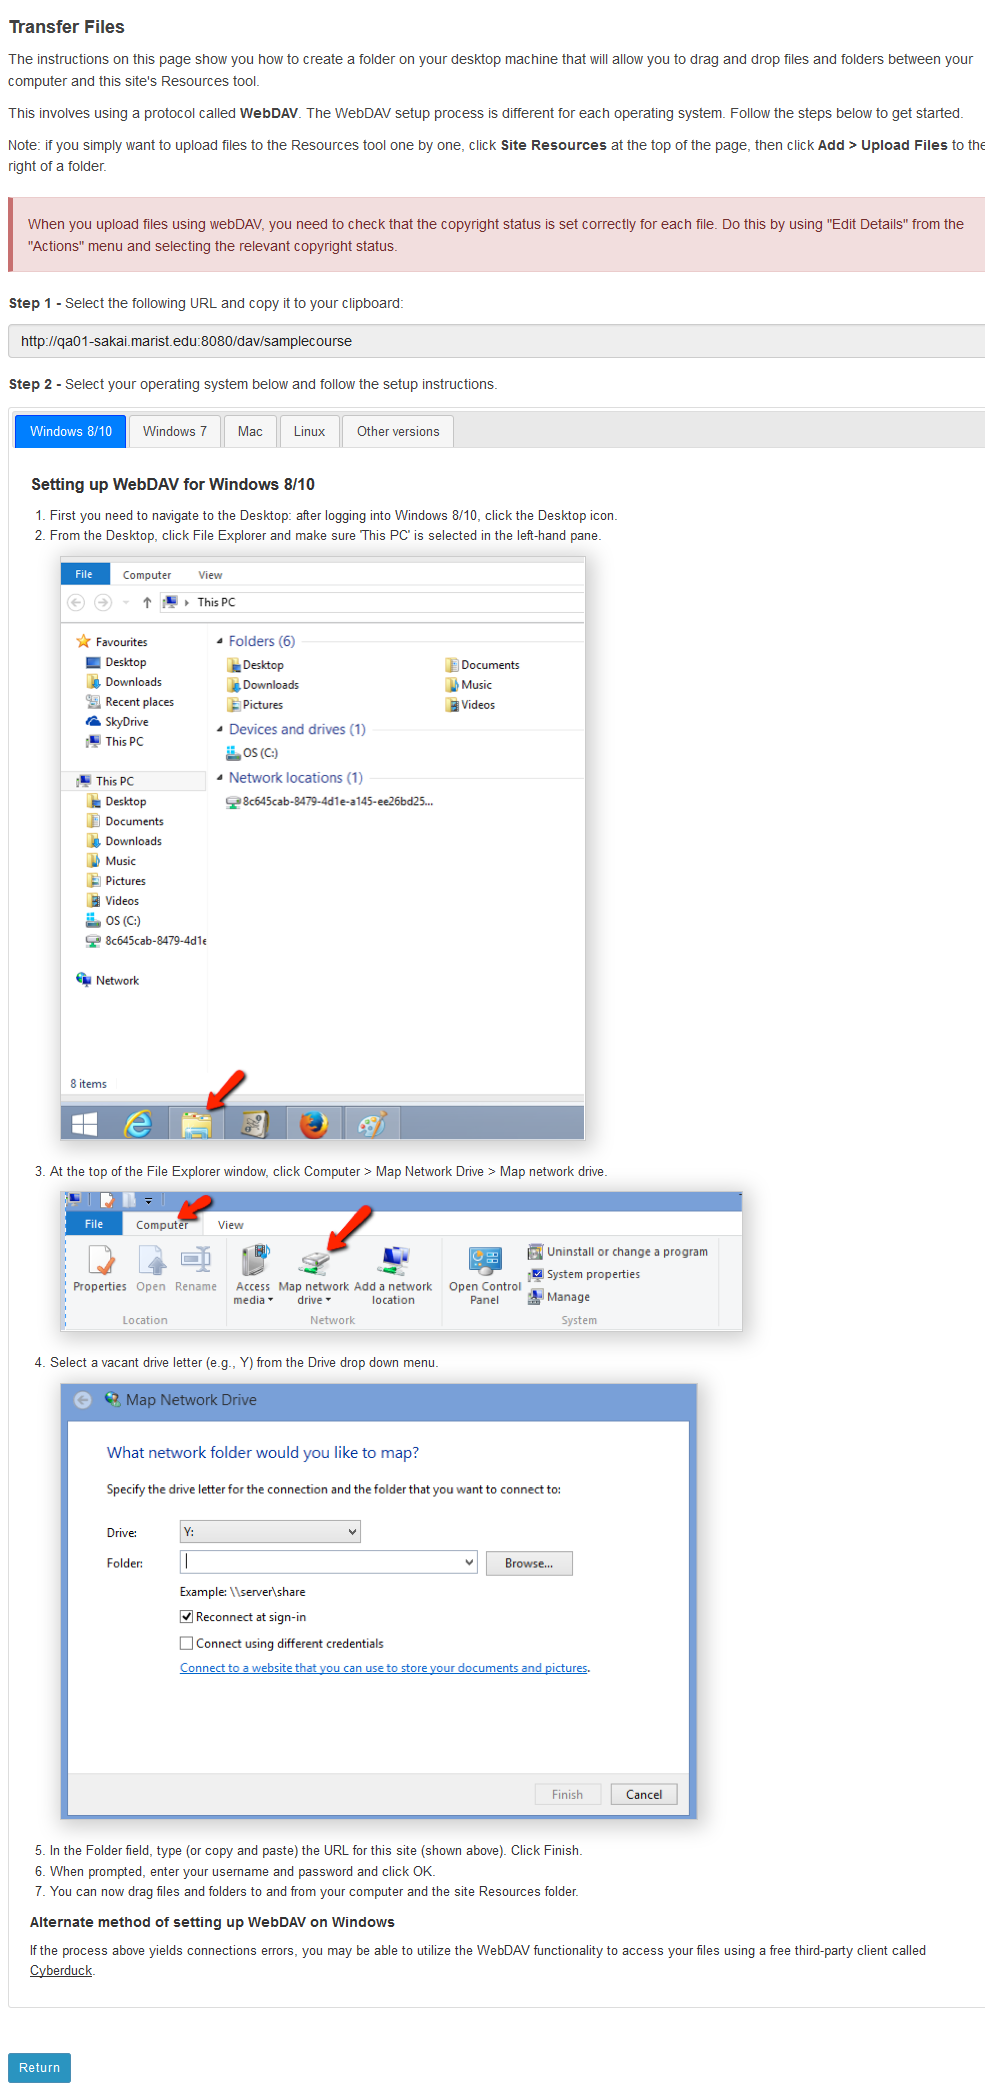
This displays links to directions for setting up WebDAV for your computer's operating system. Locate your operating system in the list of supported systems shown, and follow the instructions provided for setting up WebDAV on your computer.
How do I copy content from another site?
Users can copy Resources from other sites.
On the page of Site Resources, click Copy Content from My Other Sites. Then select the source site.

Click Actions for the folder or file you would like to copy, then Copy.
Click [Destination site] Resources to return to the directory of the Destination course site.
Click Actions for the folder where you would like to add the resources, then Paste copied items.
If a folder is copied and pasted, the name may be different, so rename it if necessary. To edit the display name, click Actions for the folder or file, then Edit Details.
Assignments
What is the Assignments tool?
The Assignments tool allows instructors to create, distribute, collect, and grade online assignments.
Assignments are typically private; student submissions are not visible to other users of the site. However, the instructor has the option to enable peer evaluation of assignments if desired.
Assignments may be submitted via file upload or in-line using the Rich Text Editor, depending on instructor preference.
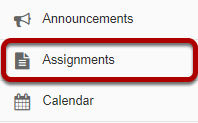
To access this tool, select Assignments in the Tool Menu of your site.
How do I add an assignment?
Click Add.
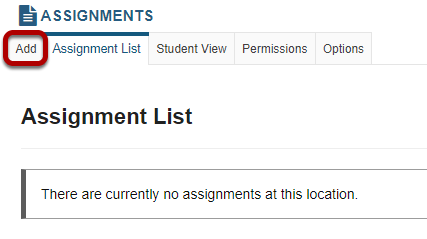
Click the Add button to add a new assignment.
Give your assignment a title.

The title of your assignment should be something descriptive and unique, as this is the title students will see when they go to the Assignments tool to submit their work.
Add assignment instructions.

Enter the instructions for the assignment into the Rich Text Editor. You may use the editor to format your assignment description, and add images, links, or other media if desired.
Add honor pledge. (Optional)

If you would like to add an honor pledge to your assignment, check the Add honor pledge box.
Student view of honor pledge.

When the honor pledge option is selected, students must accept the statement pictured above that reads "I have neither given nor received aid on this assignment" in order to submit their assignment.
Add Attachments. (Optional)

If you would like to attach any additional files to the assignment, such as a grading rubric or peer review rubric, click the Add attachments button to browse for and attach file/s.
Specify the availability.
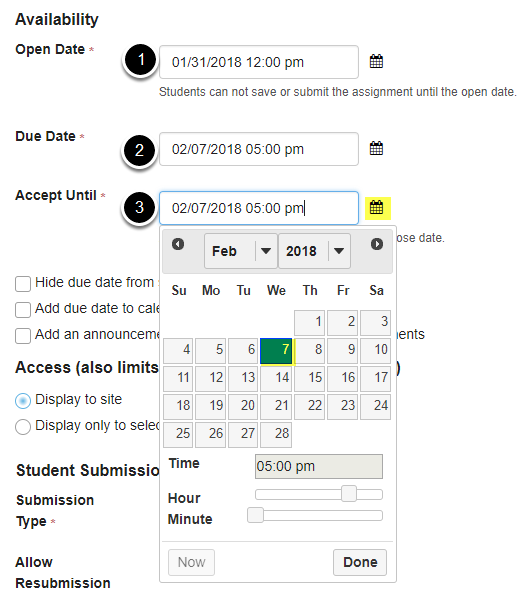
When you create a new assignment, the Open Date will default to the current day, and the Due Date and Accept Until dates will default to one week later. Change the dates using the calendar icon to bring up the date-picker pop-up calendar.
Tip: Often, faculty like to set the time on the due date to 11:55 PM, as that is the latest time you can select on a given day. Selecting 12:00 AM will display the date as the next day, and this may confuse students about the actual due date if they assume they have all day to turn in their work.
Hide due date from students. (Optional)

If you would prefer for students not to see the assignment due date, check the box next to the Hide due date from students option.
Add due date to Schedule. (Optional)

If you would like your assignment due date to be added automatically to the Schedule (a.k.a. Calendar) in your class, check the Add due date to Schedule box.
Add an announcement. (Optional)
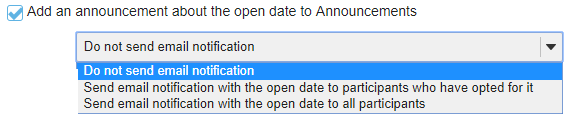
If you would like an announcement to be automatically posted to the site regarding the open date for your assignment, check the Add an announcement about the open date to Announcements box. If you enable an announcement about the option date, you will also have the option to choose an email notification for the announcement.
Note: The announcement will be posted immediately when you post your assignment, regardless of the actual open date of the assignment itself. This option is best used to announce changes in a due date, or the availability of a newly posted item.
Access.
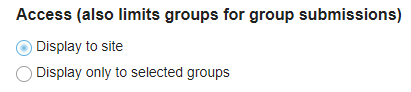
You may display your assignment to everyone in the site (the default), or to selected groups.
Note: You must have existing groups in your site in order for the Display to selected groupsoption to appear.
Display only to selected groups. (Optional)
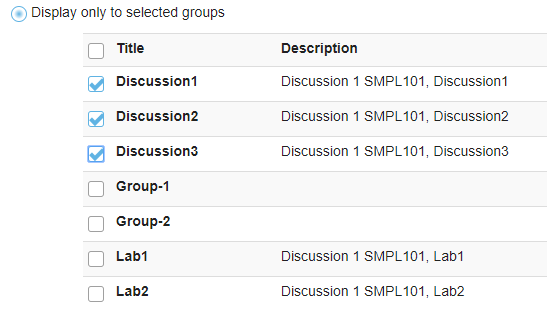
If you select the Display only to selected groups option, the settings will expand to show a list of all existing groups in the site. Select one or more groups to display the assignment to those groups only. If you selected the Group Submission option, you may limit the groups that are allowed to submit here.
Note: The display option only controls the visibility of the assignment for users in different groups. By default, each member of the group still submits an individual assignment, but this display setting allows you to identify different assignments for different groups or sections.
Tip: If you want students to submit one assignment per group, use the Group Submission - One submission per group option below.
Choose the submission format.
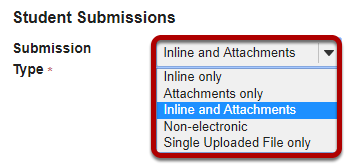
There are several submission formats that you may accept.
Choose your preferred format from the drop-down menu.
Allow resubmission. (Optional)
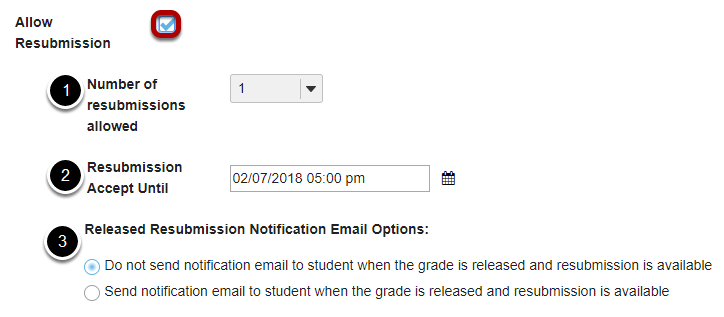
If you select Allow Resubmission, you may specify:
Tip: You may also choose to allow resubmissions on an individual basis when you grade student submissions.
Submission notification.
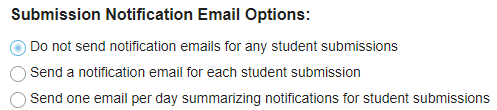
The default notification setting is Do not send me notification emails for any student submissions. If you would like to be notified, select either of the following two options:
Choose the radio button for the notification setting you prefer.
Note: The notification email message will be sent to the external email address for your Sakai user account. It does not send the notification to the Sakai Messages tool.
Choose the grade scale.
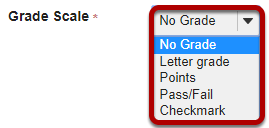
There are several grade scales to choose from:
Select the assignment's grade scale from the drop-down menu.
Note: The only grade scale option that can be added to the gradebook automatically is Points.
Enter maximum points.
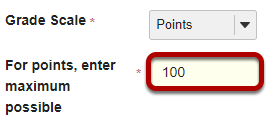
If you select Points as the grade scale, you must enter a maximum number of points for the assignment.
Grading
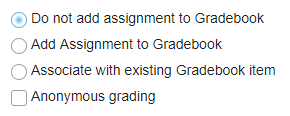
Select the radio button for the gradebook option you would like to use.
Tip: Remember that you must have a Points grade scale in order to add the assignment to the gradebook!
Released grade notification.
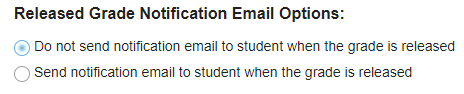
The default notification setting is Do not send notification email to student when the grade is released.
If you would like students to be notified, select the radio button for Send notification email to student when the grade is released.
Note: The notification email message will be sent to the external email address for the student's Sakai user account. It does not send the notification to the Sakai Messages tool.
Additional Assignment Options
Peer assessment.
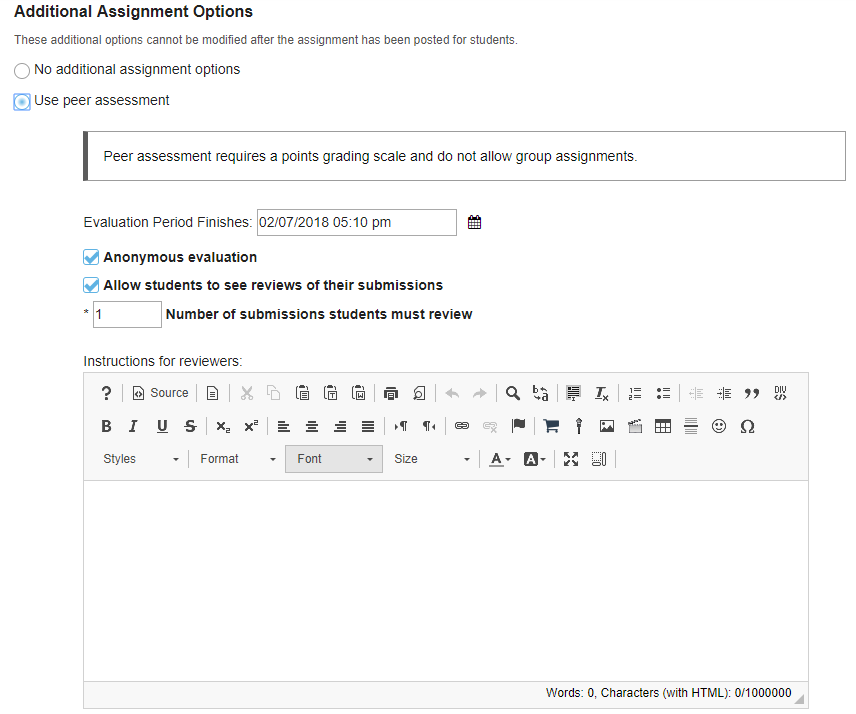
Peer assessment facilitates student peer review of assignments.
If you select the radio button for Use Peer Assessment, the settings will expand to show additional options. You may indicate the following items here:
Note: You must be using a Points grade scale in order to enable peer review.
Group Submissions (Optional)
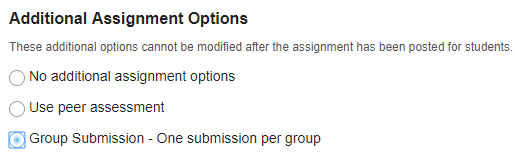
If you select the radio button for Group Submission - One submission per group it will allow any member of a group to submit an assignment on behalf of the group. By default, the same grade is applied to all group members when the item is graded. However, the instructor can also override the group grade for any individual member of the group.
Note: You cannot enable both Peer Assessment and Group Submission for the same assignment.
Additional information. (Optional)

This section gives you the option of including additional information, such as a Model Answer, Private Note, or All Purpose Item.
Click the Add link to add any of these items.
Model answer.
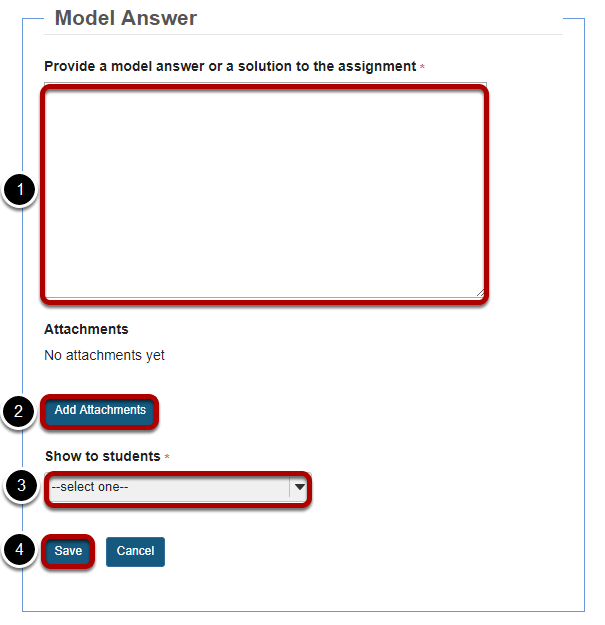
The model answer can provide an example of the ideal correct answer or solution for a particular assignment.
Private note.
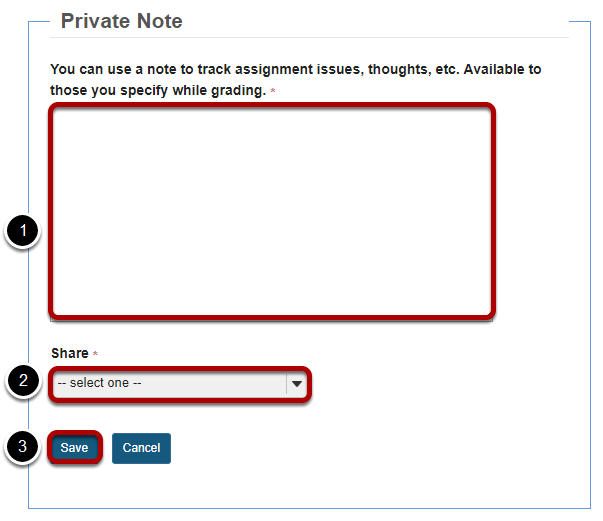
If you would like to make any private notes which are not visible to students, you may enter them here.
All purpose item.
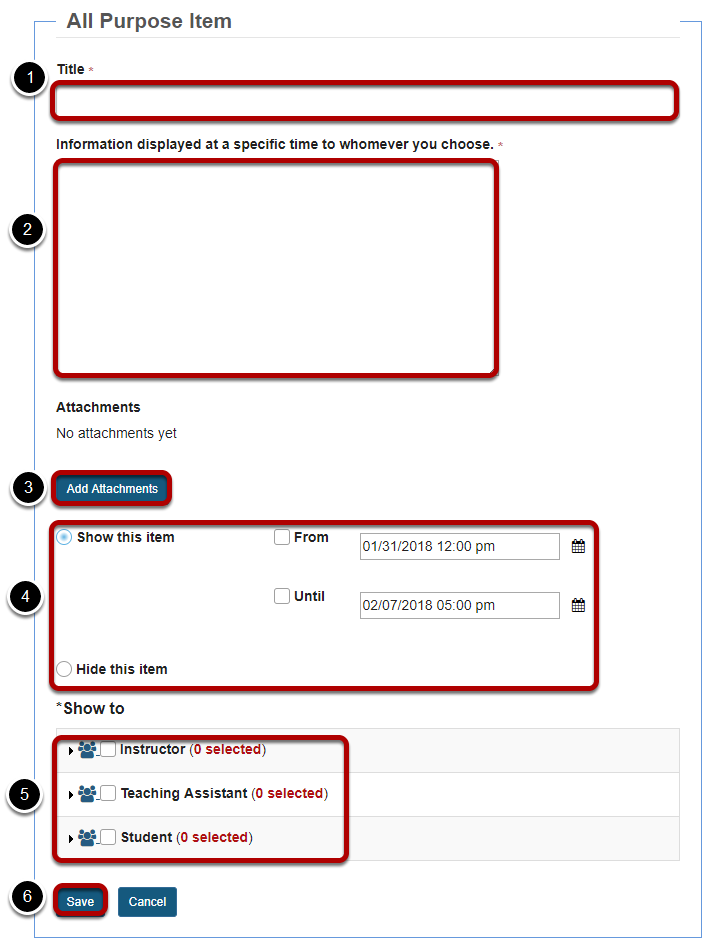
You may also create an All Purpose Item which can be displayed based on specific dates or users.
Post your assignment.

Once you have entered all of your assignment settings, scroll down to the bottom and click Post to save your changes and post the assignment.
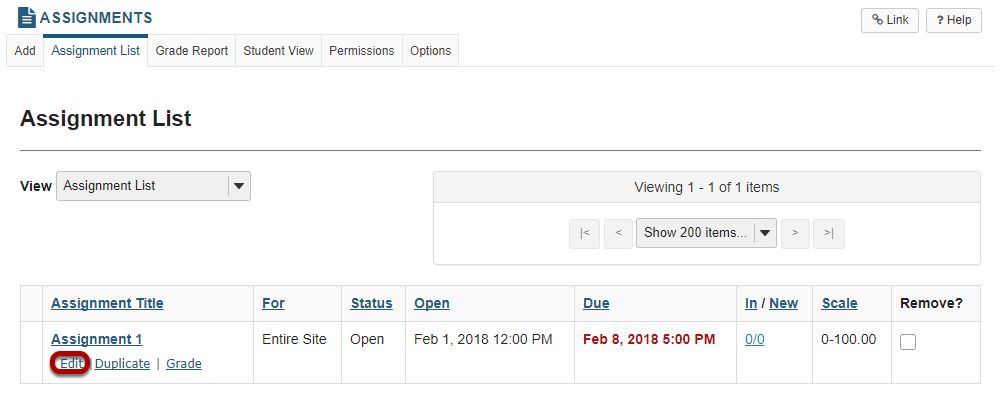
How do I edit an existing assignment?
Select the Edit link for the assignment you want to edit.
Make your changes to the assignment.
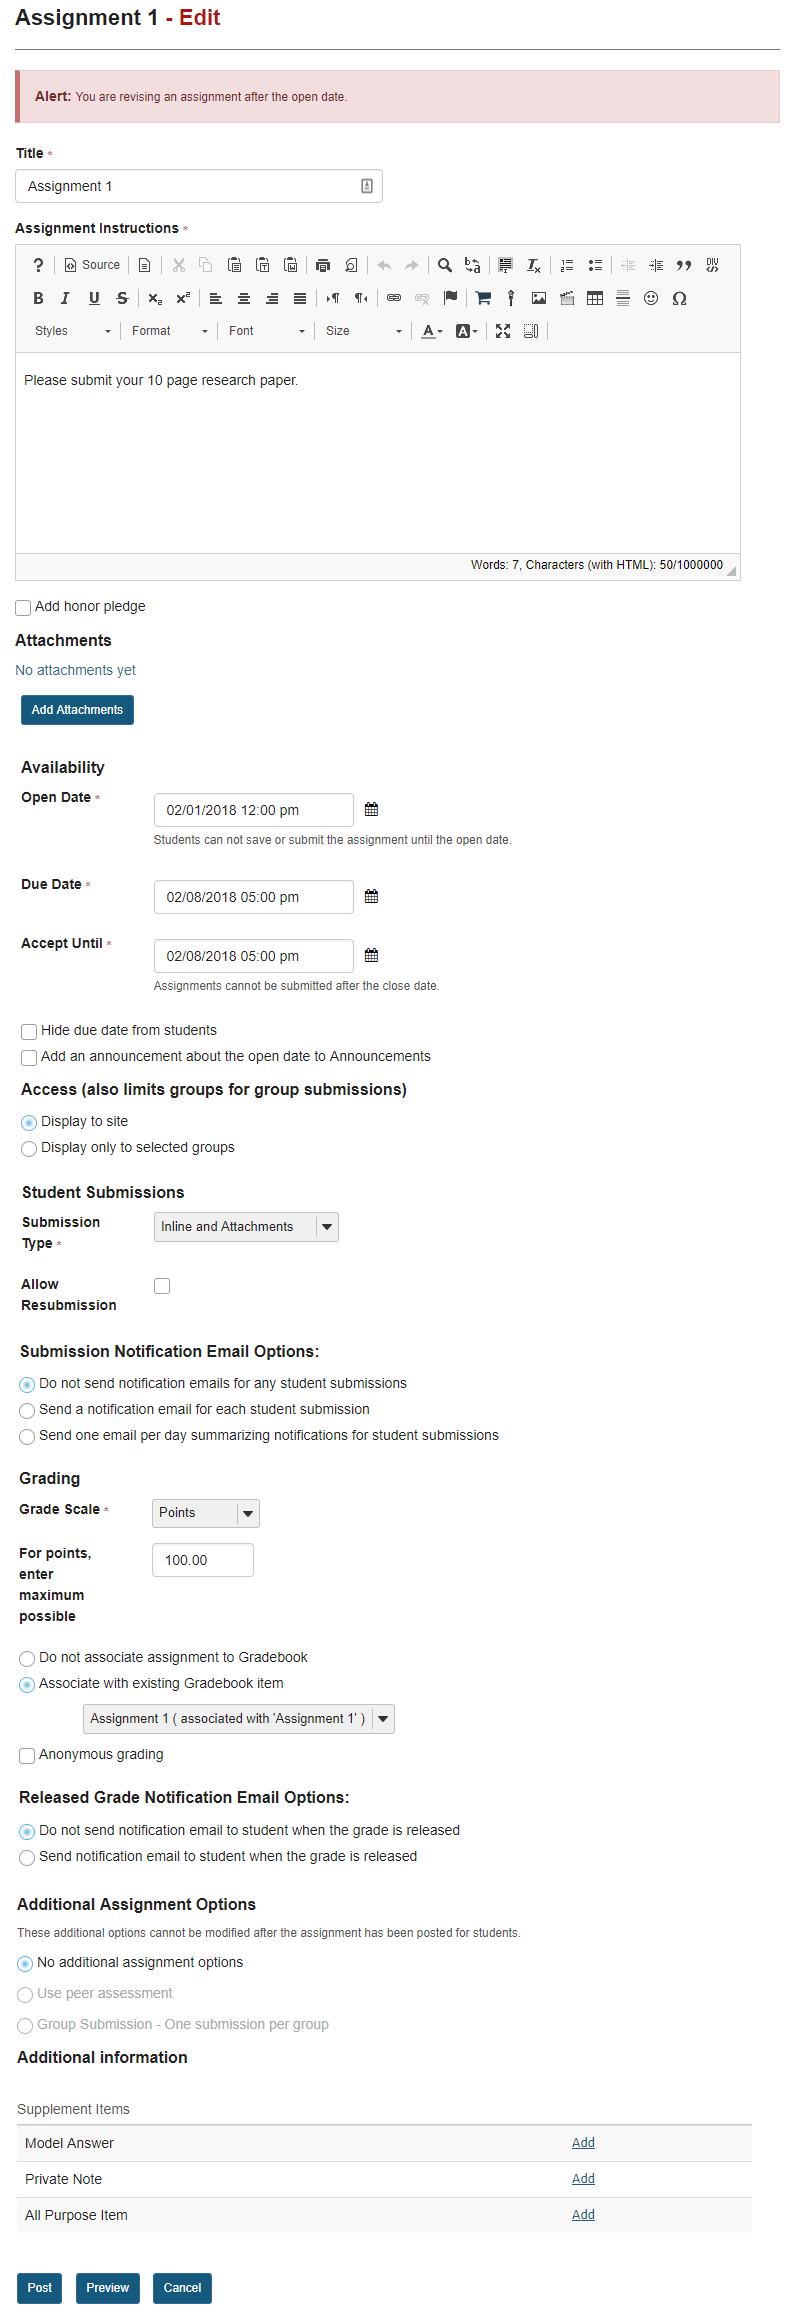
The assignment settings window will appear. Make any necessary changes. For more information on assignment settings, see How do I add an assignment?
Click Post.
Click Post to save your changes.
How do I delete an assignment?
Select the assignment(s) you want to delete.
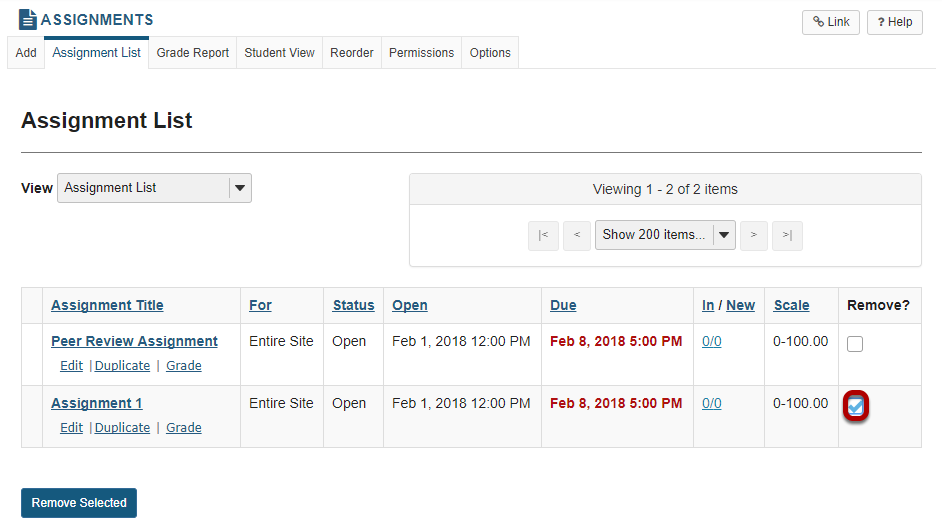
In the "Remove?" column, click to place a check in the box for the item(s) you want to delete.
Click Remove Selected.

Click the Remove Selected button at the bottom of the assignment listing.
Confirm the deletion.
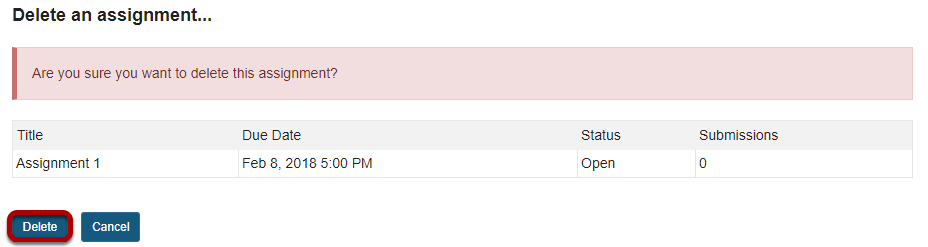
Click the Delete button to confirm the removal of the assignment(s) you have selected.
Note: Removing an assignment with student submissions will also delete the submissions for that assignment.
How do students submit an assignment?
Click on the title of the assignment.
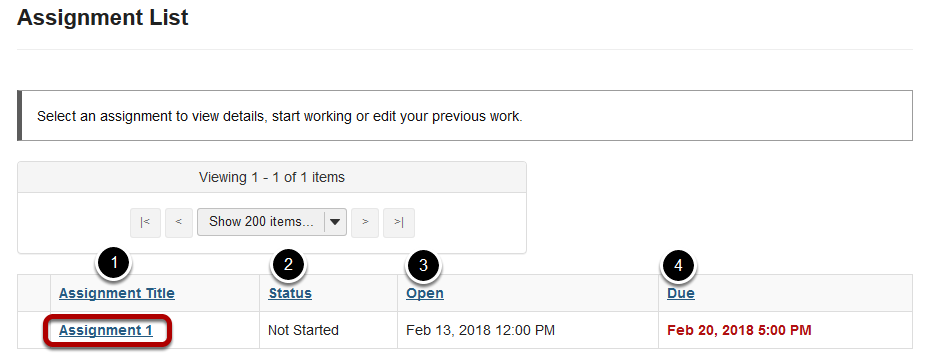
You will a list of all assignments in the site. The following information will be displayed for each assignment.
Select the assignment you want to submit by clicking on the title of the assignment in the list.
Or, click the direct link to the assignment in Lessons.
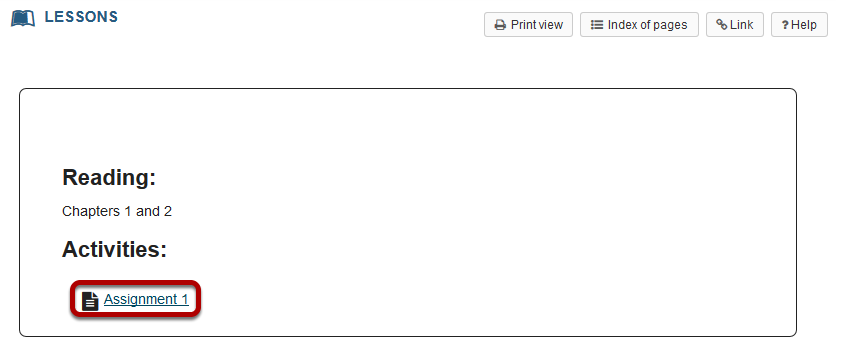
If your instructor has included a link to the assignment in the Lessons tool, you may also access it from this location within the course content.
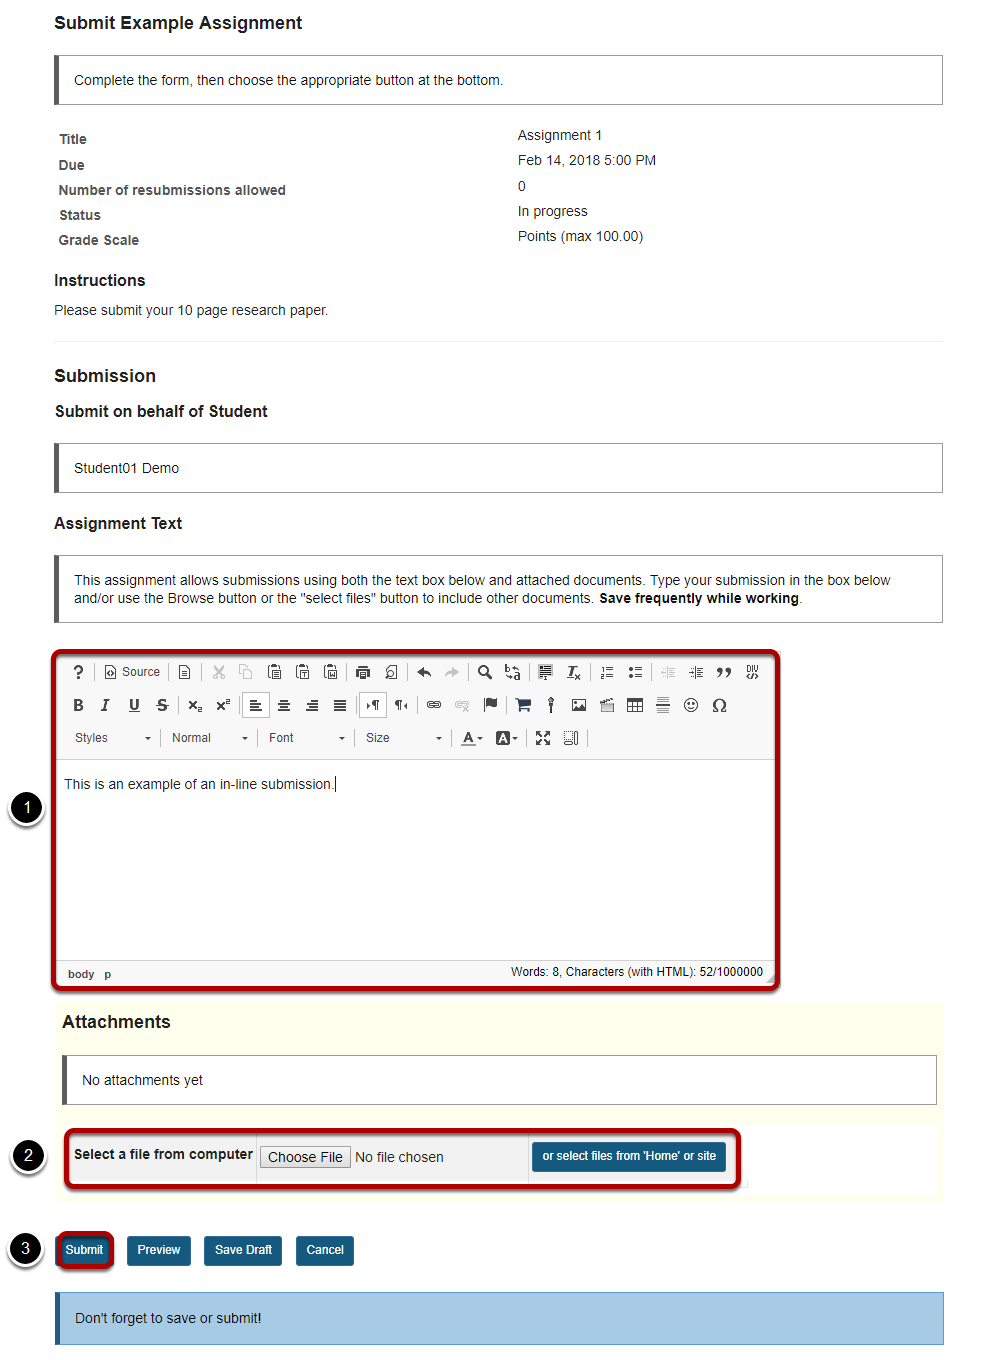
Enter and/or attach your assignment.

Depending on the assignment settings, you may be allowed to enter your submission in-line and/or attach a file or files.
View attached file.
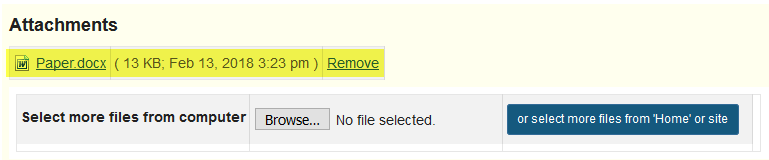
Once you have attached your file, the name of the file, as well as the file size and upload time stamp will be displayed under Attachments.
Tip: You may click Remove to remove the attachment if you selected the wrong file.
Submit your assignment.

When you are ready to turn in your assignment, click the Submit button to complete your assignment submission.
Tip: If you are not yet ready to submit, you may click Preview to preview the submission, or Save Draftto save your submission and submit it later. Click Cancel to exit the assignment without saving or submitting.
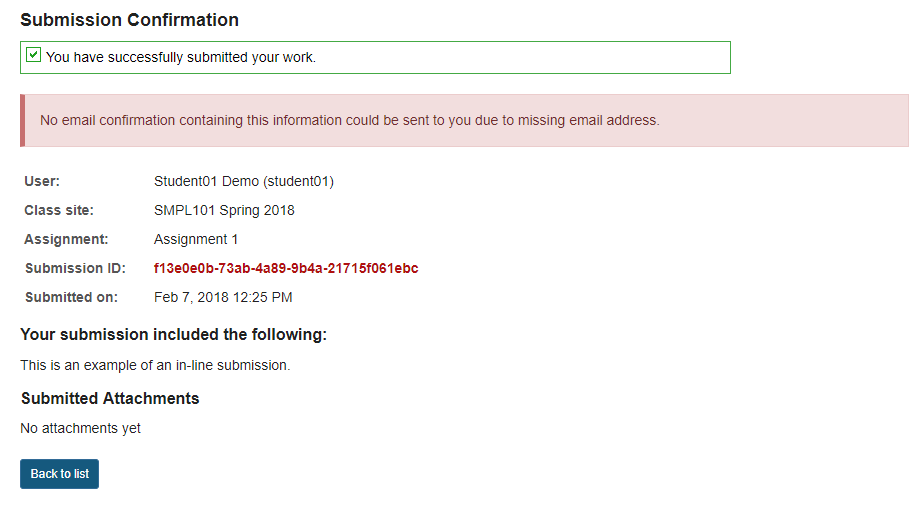
Submission confirmation.
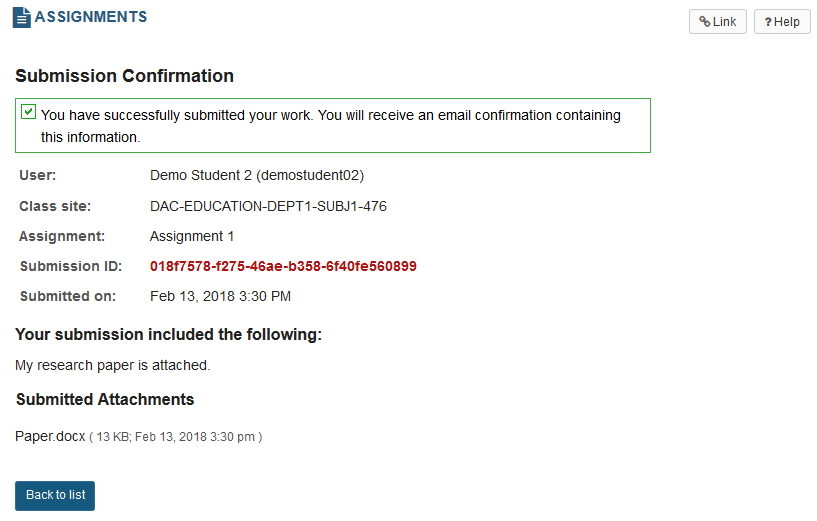
Once you have submitted your assignment, you will receive a confirmation message on screen. In addition, if you have opted to receive email notifications, you will also receive an email confirmation of your submission.
How do I submit an assignment on behalf of a student?
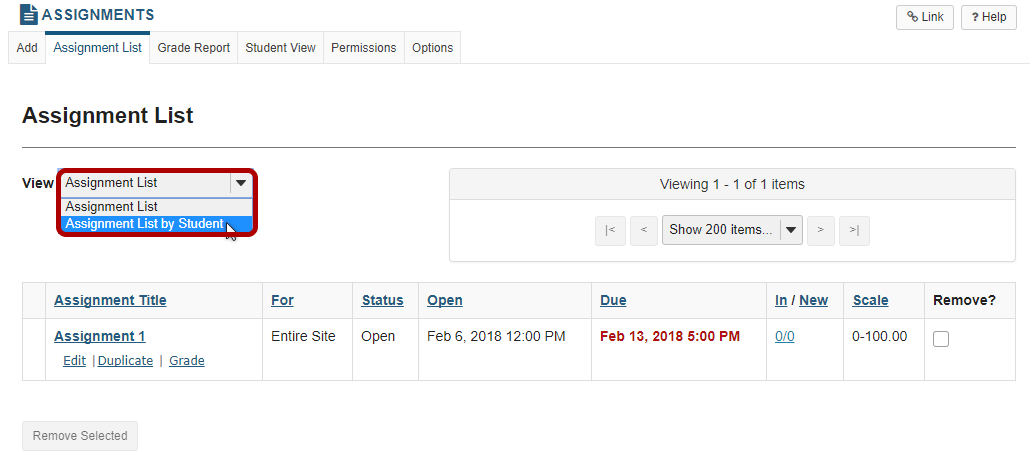
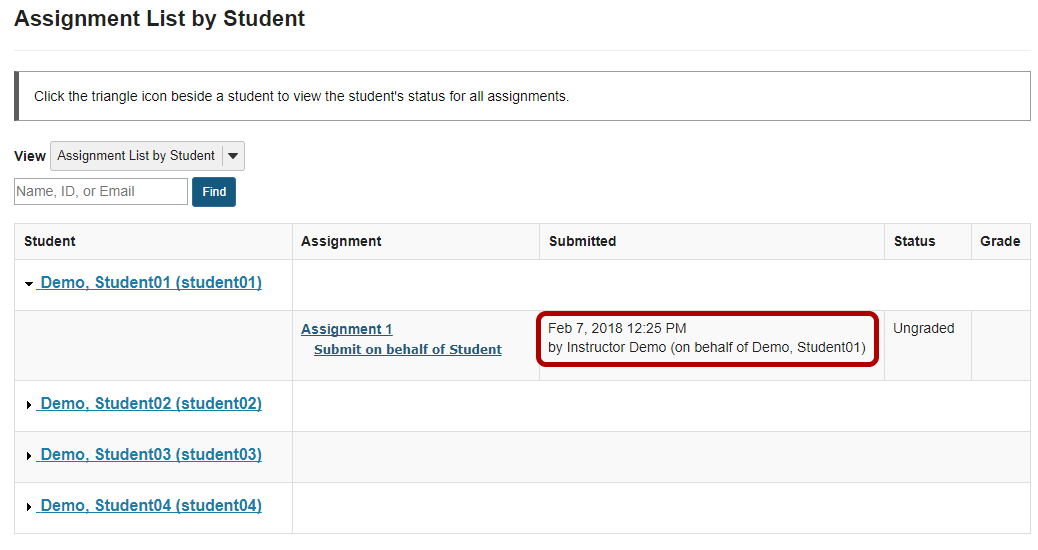
From the View drop-down menu, select Assignment List by Student.
Select a student.
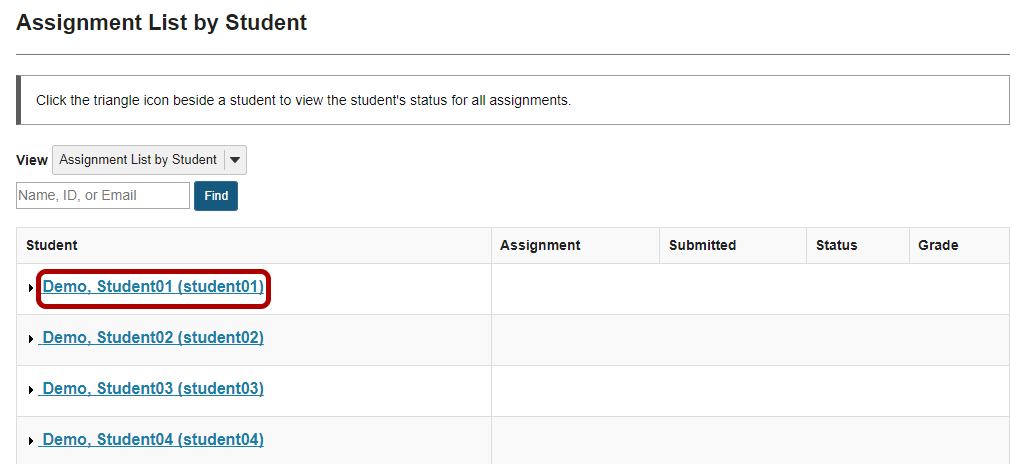
You will see a list of all the students in the class. Click on the student's name to view submission information for that student.
Click Submit on behalf of Student.
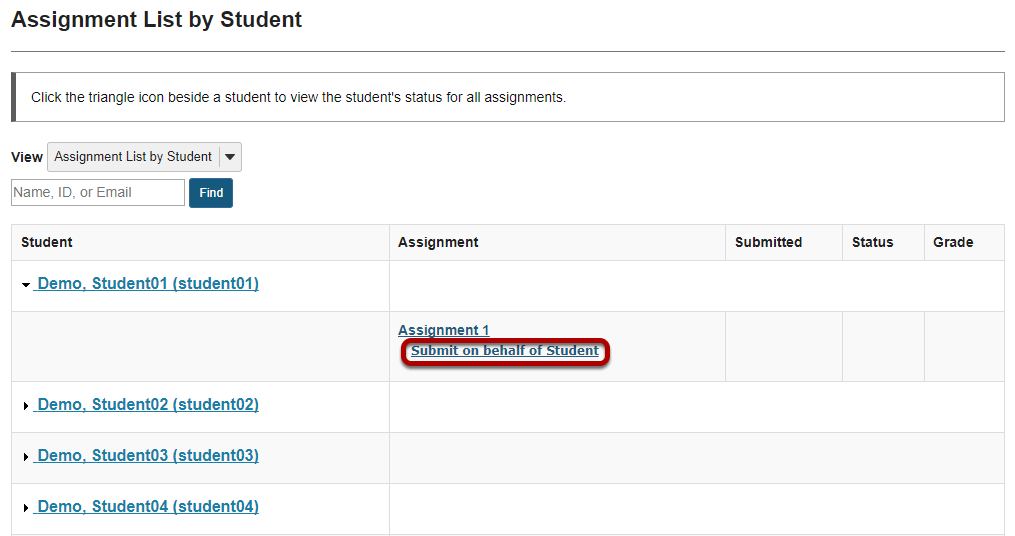
Submit the student assignment.
A submission confirmation will display.
When you view the list, you will see the name of the instructor next to the submission.
How do I grade an assignment?
Select the assignment to grade.
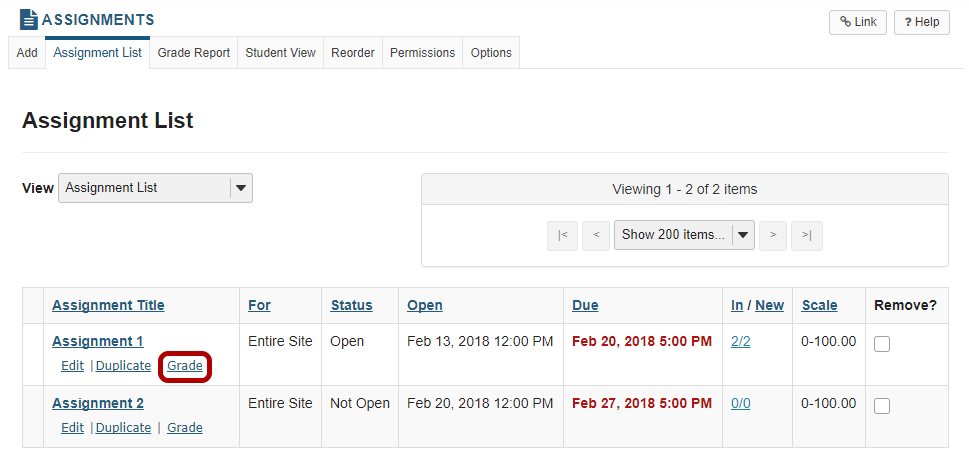
Click the Grade link for the assignment you would like to grade.
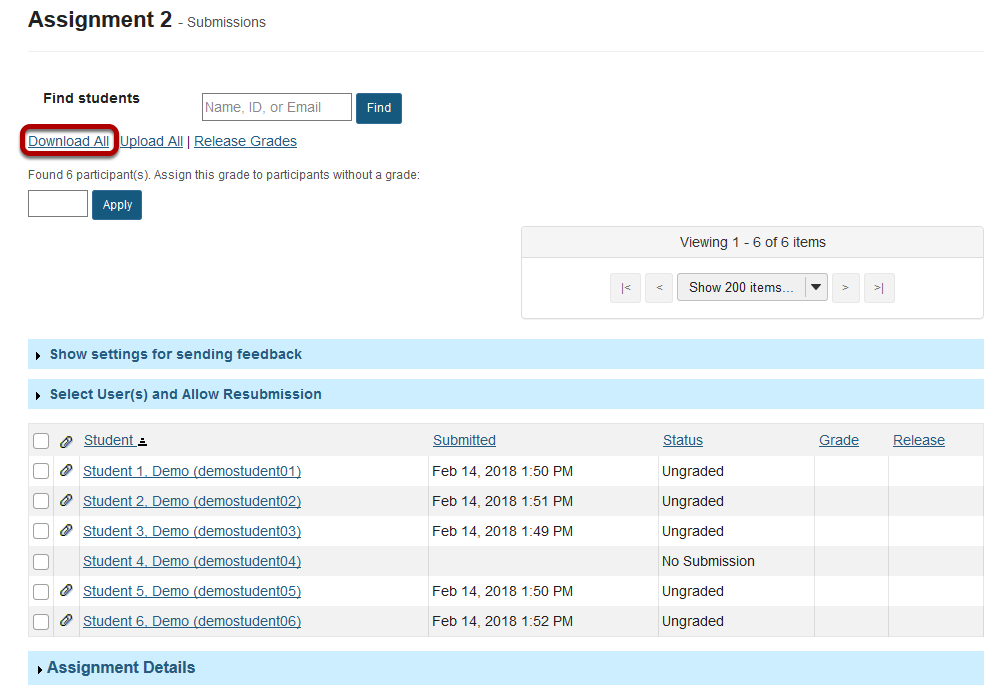
Select a student to grade.
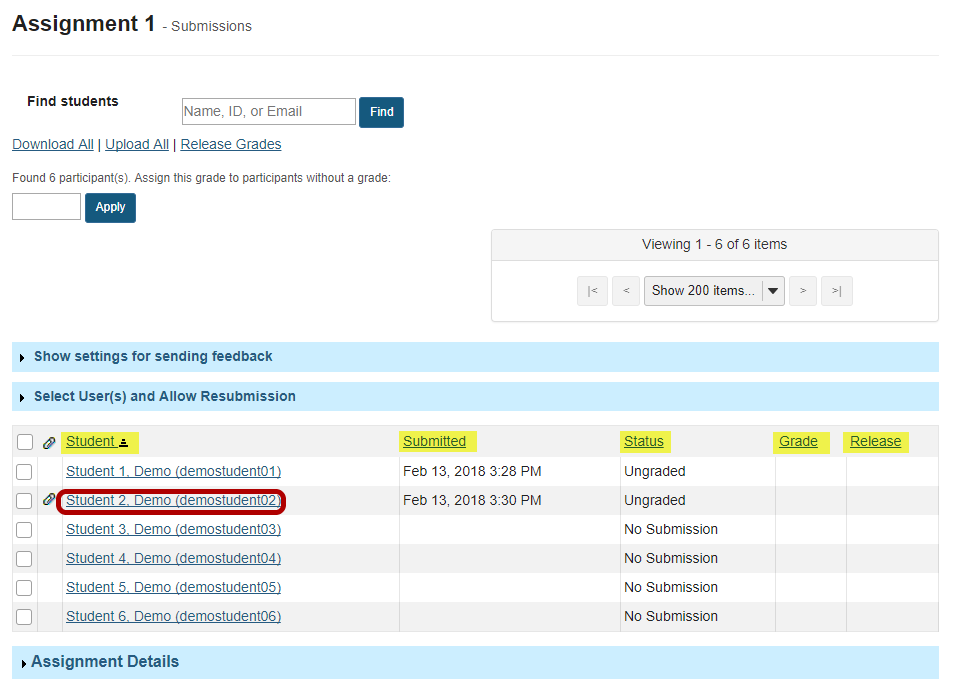
You will see a list of all the students in the class, along with the submission date, status, grade, and release columns for each student. You may sort by any of these columns by clicking on the title of the column if desired.
Click on the student that you would like to grade.
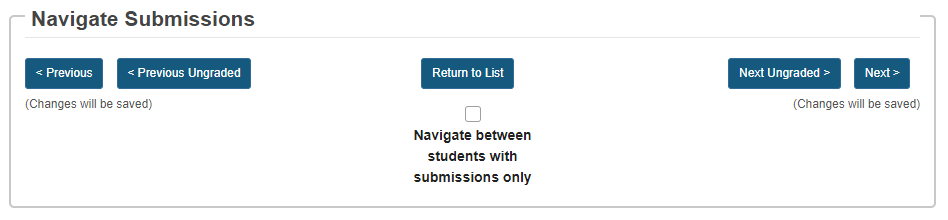
Navigate submissions.
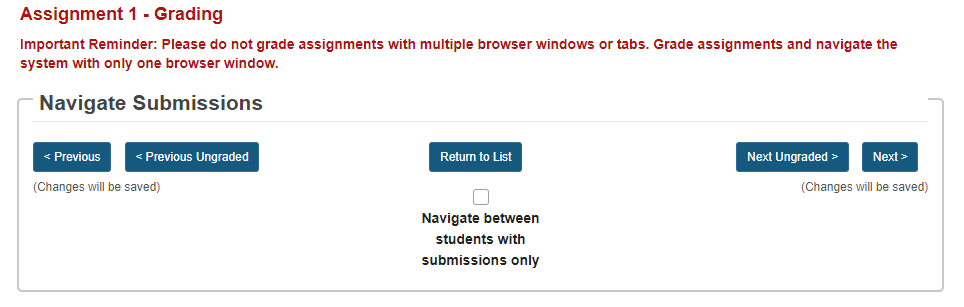
The navigation buttons at the top and bottom of the page allow you to quickly cycle through student submissions. You may use these buttons to jump to the Preview, Previous Ungraded, Next Ungraded, or Next student submission. Or, you can select Return to List to return to the full listing of all student submissions.
Optionally, you may select the Navigate between students with submissions onlycheck box to skip any students in the list without submissions.
View student submission.
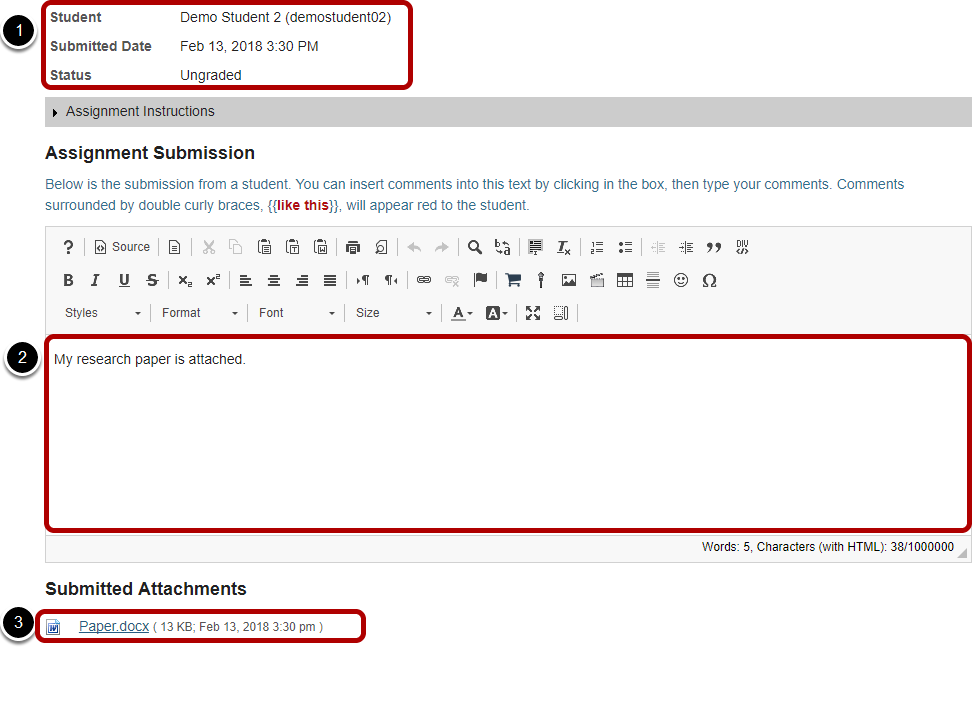
The student submission will be displayed at the top of the page.
Note: To view student file attachments, you will need to click on the filename to download and open the file.
Enter grade.

Enter the score for the student's assignment in the grade entry text box provided.
Enter instructor comments.
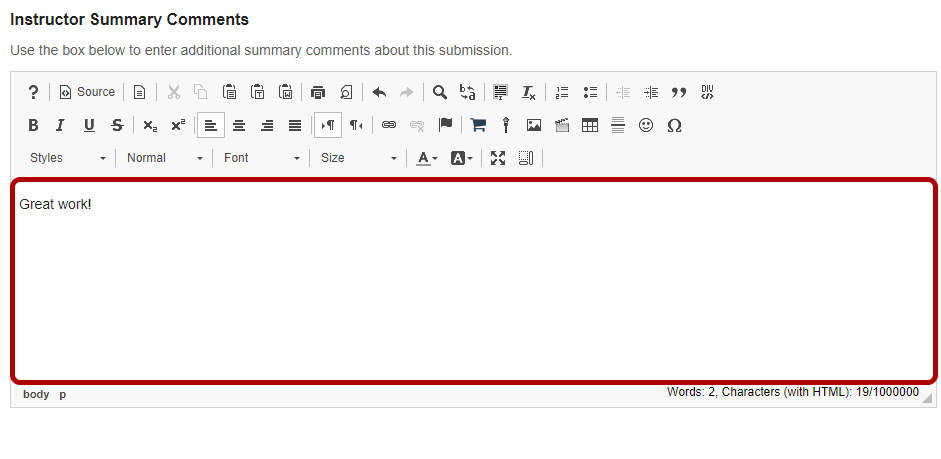
If you would like to include additional comments along with the grade, you may enter them into the rich text editor under the "Instructor Summary Comments" section.
Return an attachment.
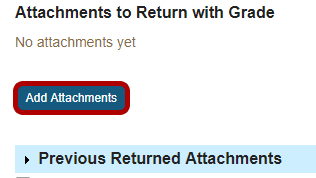
If you would like to return a file attachment to the student with additional feedback, click on the Add Attachments button to browse for and select a file.
Note: If you have returned more than one attachment to a particular a student, you may also click onPrevious Returned Attachments to expand that section and view any other attachments that you have returned for this assignment.
Allow resubmissions.

If you would like to allow the student to resubmit the assignment, you may check the Allow Resubmission box and specify the number of resubmissions allowed and the date until which they will be accepted.
Note: If you allowed resubmissions on the assignment when you created it, this information will be prepopulated with the default resubmission information for this assignment. However, you may override the default resubmission settings for an individual student by changing the information shown here.
Save grade.

If you are finished grading and would like to release the information to the student, click the Save and Release to Student button. NOTE: If you have set up your assignment to send grades to the Gradebook, you will need to release grades to students in order for grades to appear in the Gradebook.
Alternately, if you would like to save the grade but wait and release to the student at a later date, you may select the Save and Don't Release to Student button instead.
Tip: Some faculty prefer to release all of the grades at one time when they have finished entering grades for the whole class.
Navigate submissions.
The Navigate Submission buttons appear at both the top and bottom of the page. You may use these buttons to jump to the Preview, Previous Ungraded, Next Ungraded, or Next student submission. Or, you can select Return to List to return to the full listing of all student submissions.
Optionally, you may select the Navigate between students with submissions onlycheck box to skip any students in the list without submissions.
How do I download assignments for grading offline?
Click the Grade link for the assignment to be graded.

Click the Download All link.
Select the desired download options.
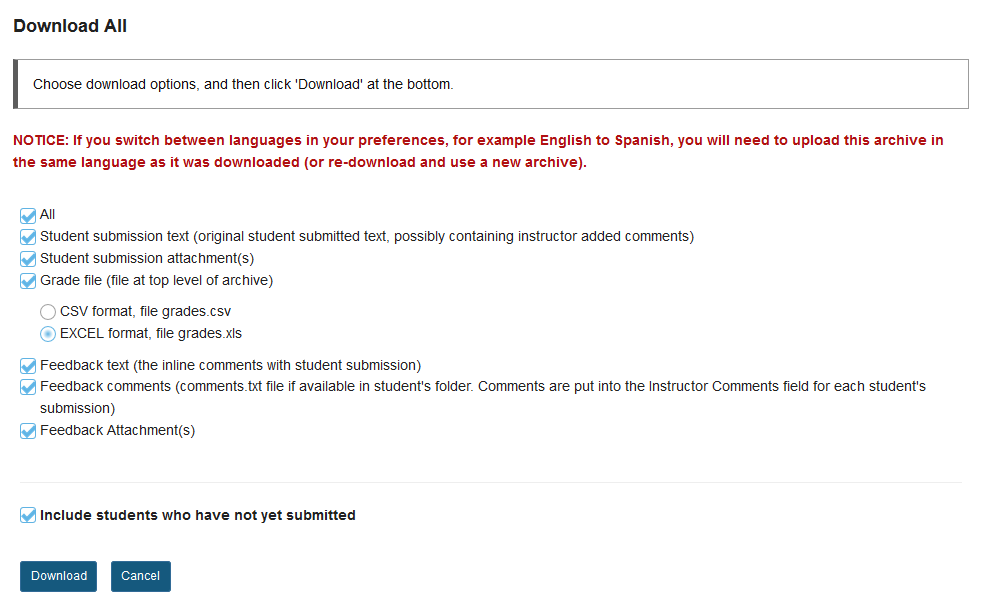
You may choose "All" to select all of the download options, or select only some of them by placing a check mark next to an individual item or items. The options available for download are:
Download the submissions.
Click the Download button to save the files your computer.
Save zip file.
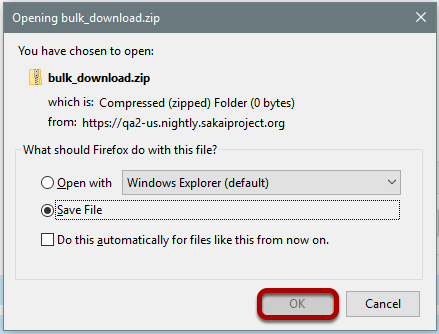
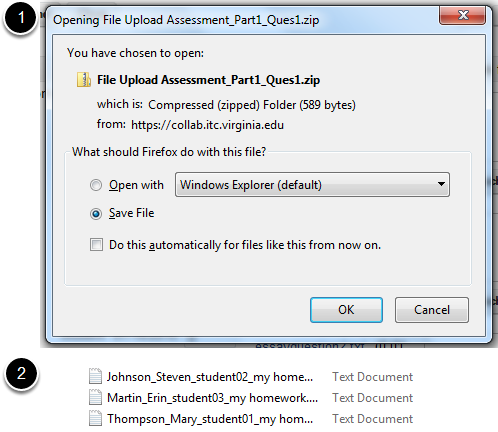
The assignment files will download as an archive file, or .zip file to your local computer. The archive file has the default name of bulk_download.zip.
Extract files.
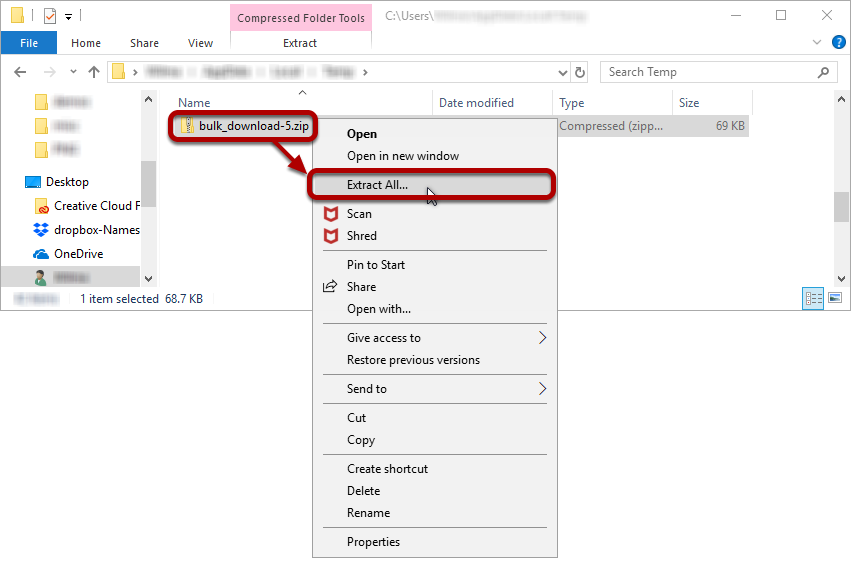
Extract the archive to a location on your computer. (You can do this by right-clicking on the file and selecting Extract All in Windows, or by using your preferred unzipping program on your computer.)
View assignment folder.
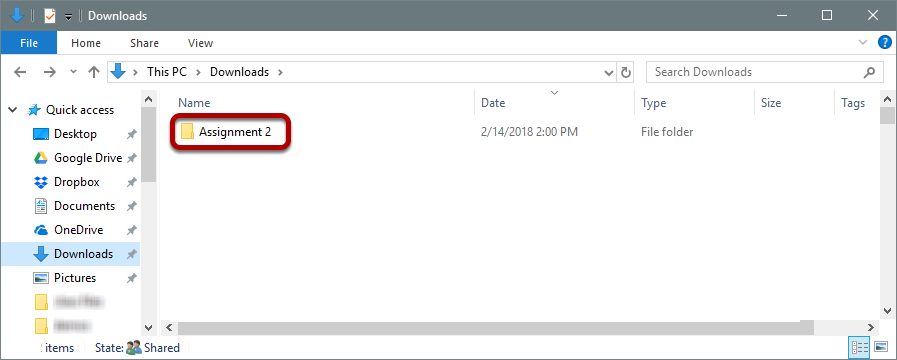
There will be a folder for each of the assignments in your course.
View student submissions.

Within the assignment folder, there will be individual folders for each of the students in the site. Open a student folder to view his or her submissions, feedback, and comments.
Grade the submissions.
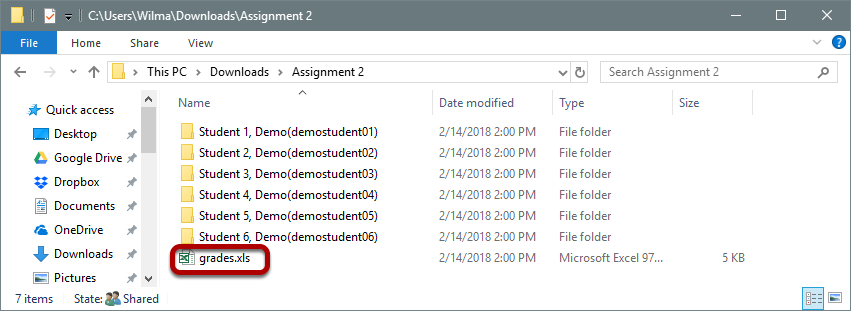
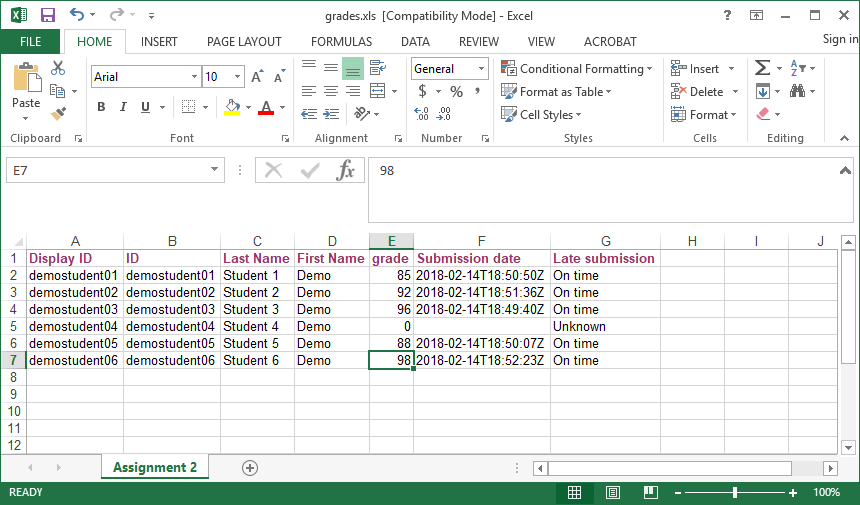
When you are ready to enter student grades, open the grades.csv file within the assignment folder.
Enter grades and comments into spreadsheet and save.
How do I release assignment grades?
When you grade an assignment, students will not be able to view the grade and your feedback in the assignment area until you release their grades.
Click the Grade link for the assignment with grades to be released.
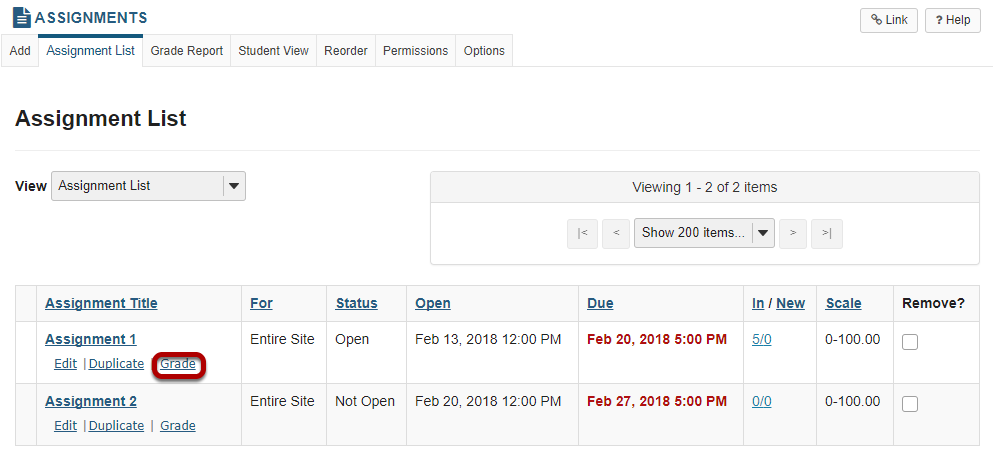
Click Release Grades.
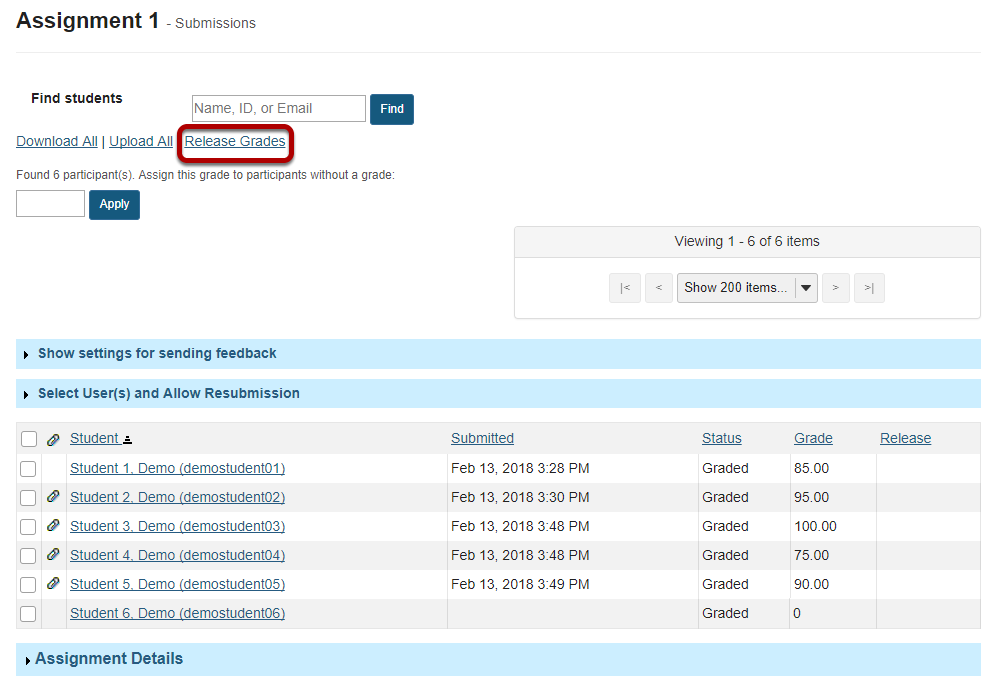
View released grades.
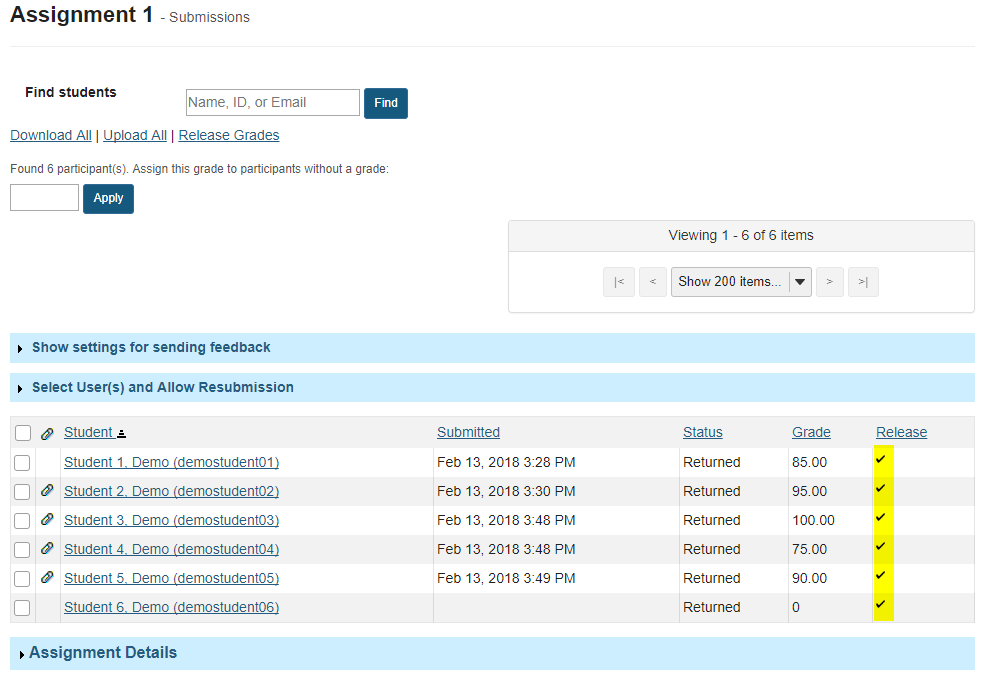
Once grades have been released to students, you will see a check mark in the "Release" column.
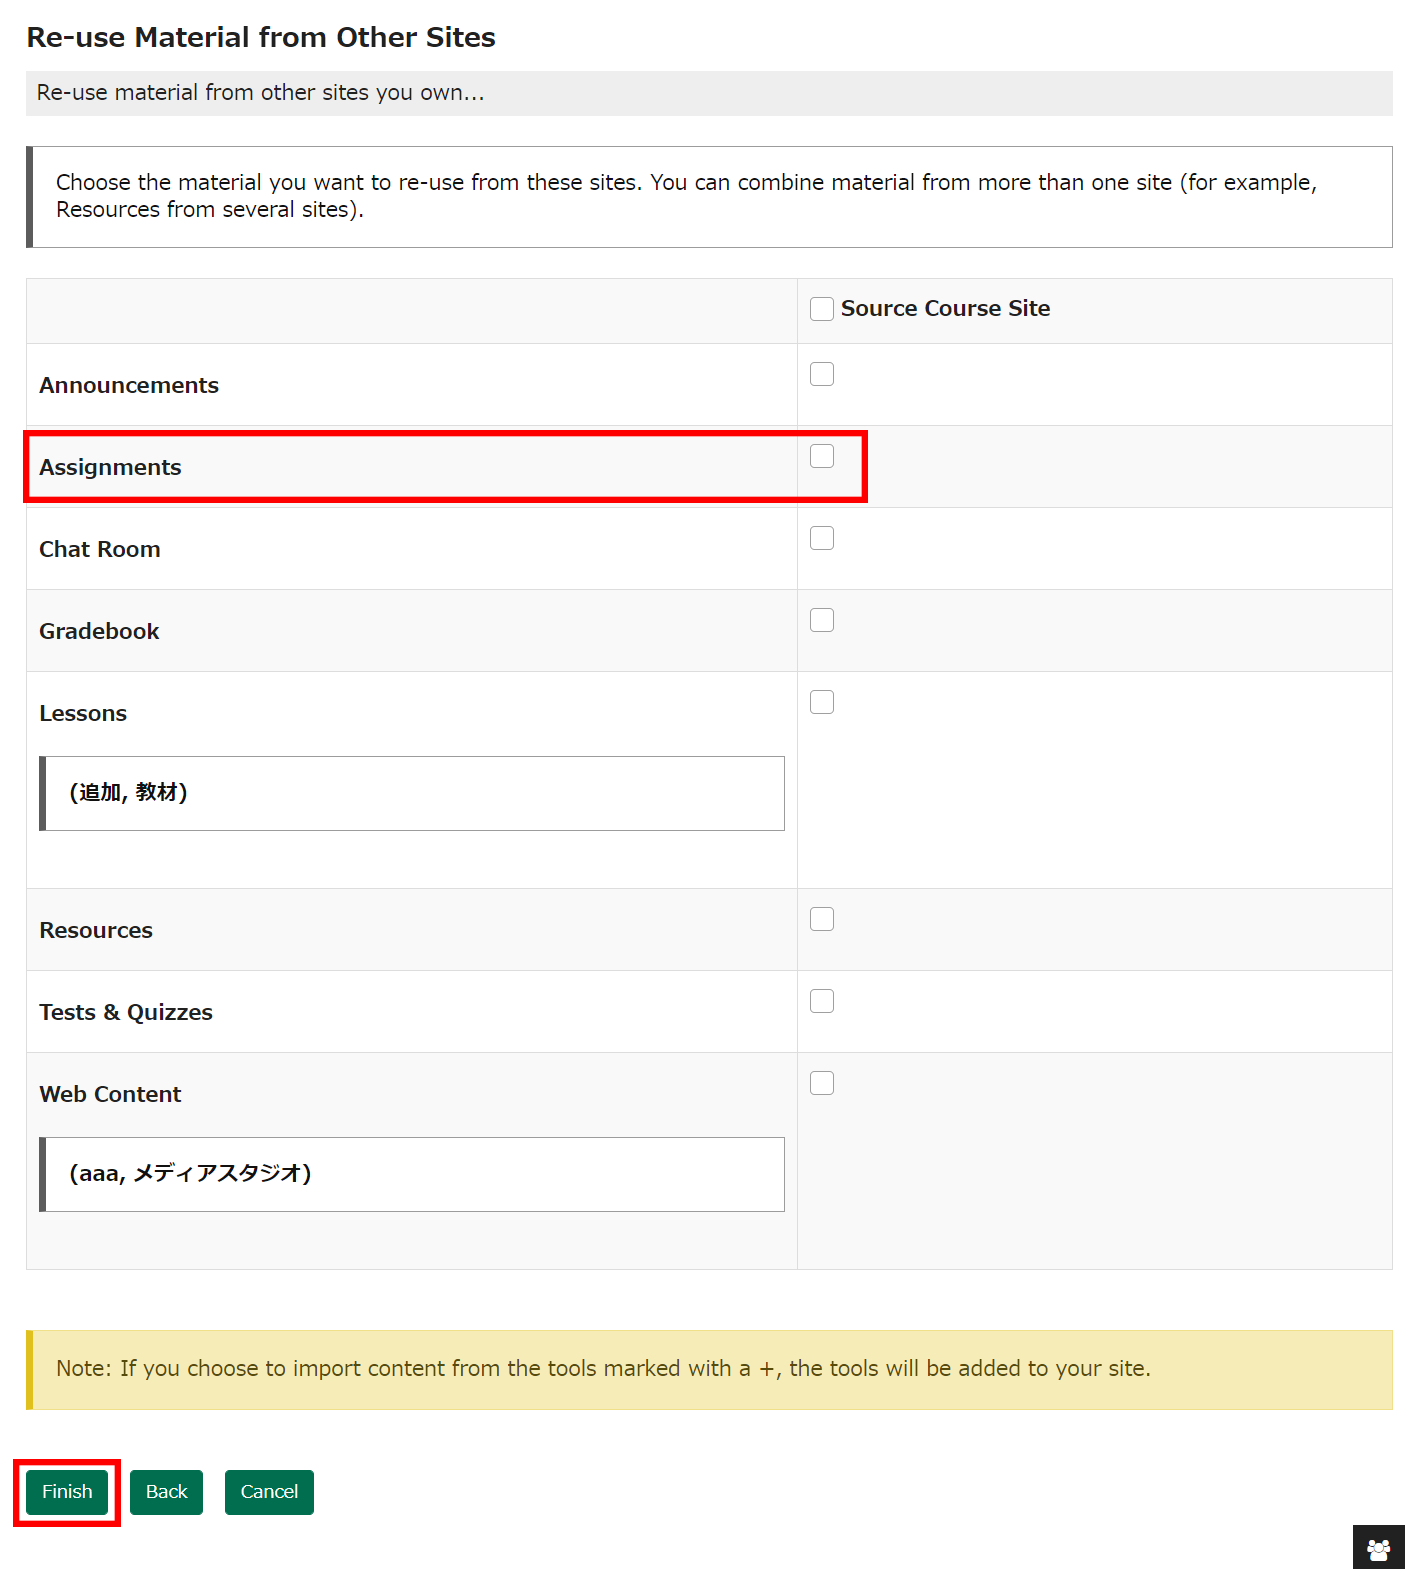
How do I copy assignments from another site in one lump?
Click Site Info in the Tool Menu of your site.

Click Import from Site.

Then select would like to merge my data.

Select the source site, then Continue.
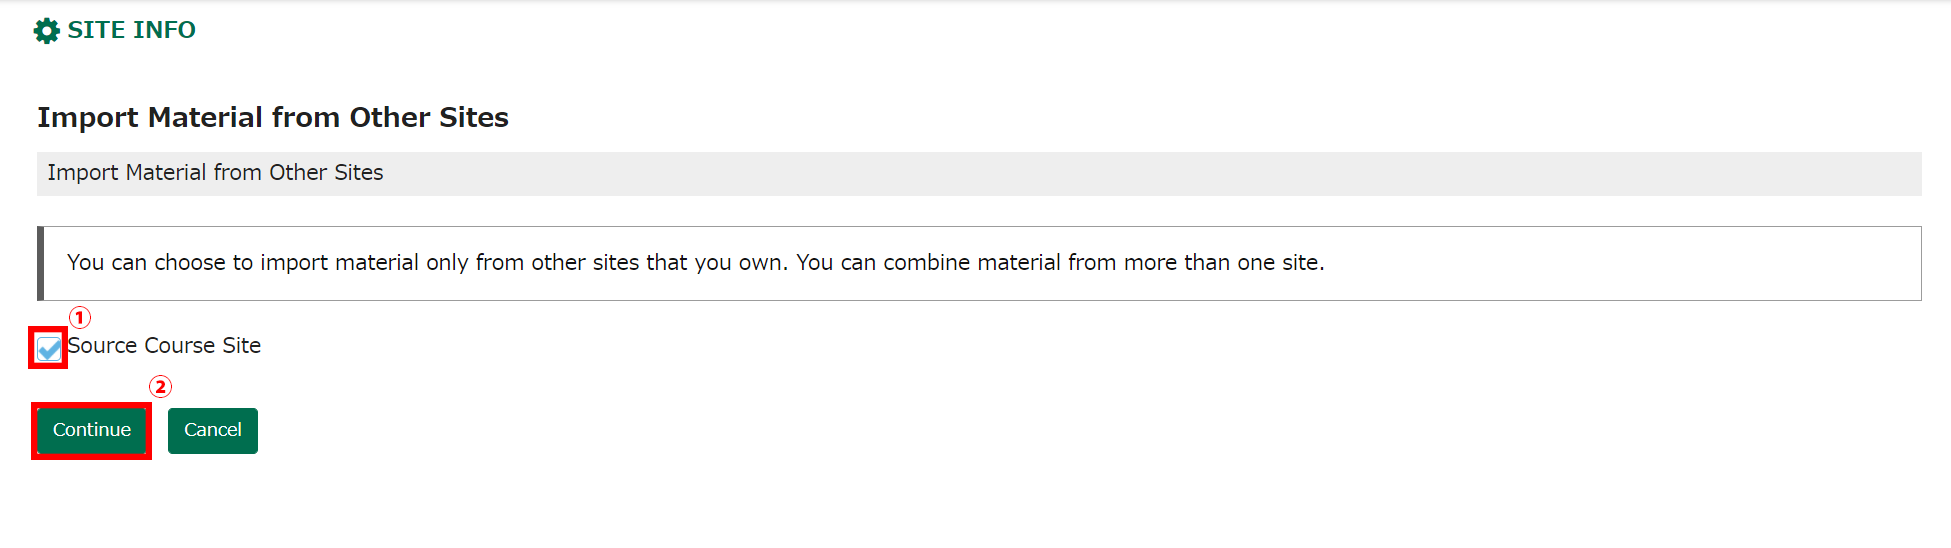
Select Assignments, then Finish.
Tests and Quizzes
What is the Tests & Quizzes tool?
The Tests & Quizzes tool allows instructors to create online assessments (i.e., tests, exams, quizzes, and surveys) for delivery via a web interface to students or other groups. It was designed primarily to administer tests, but instructors may also create assessments to gather survey information or informal course feedback. Assessments are created question by question, or through already prepared text, or through import from a formatted XML file.
The Tests & Quizzes tool offers many settings that allow instructors to control the layout, delivery, grading, student review options, and metadata of the assessment. These settings can be adjusted during the authoring. A bundle of values for the settings defines an Assessment Type, which allows instructors to store and re-use the settings of successive assessments. Common system-defined assessment types are already provided, and new ones can be created and saved.
Assessments in this tool fall into the two categories-- Working Copies and Published Copies, which represent the instructor and student phases, respectively. Authoring by the instructor takes place in Working Copies; a new assessment appears in that category. The act of publication makes the assessment available to students and moves it to the Published Copies category, where submissions and results become available.
To access this tool, select Tests & Quizzes from the Tool Menu in your site.
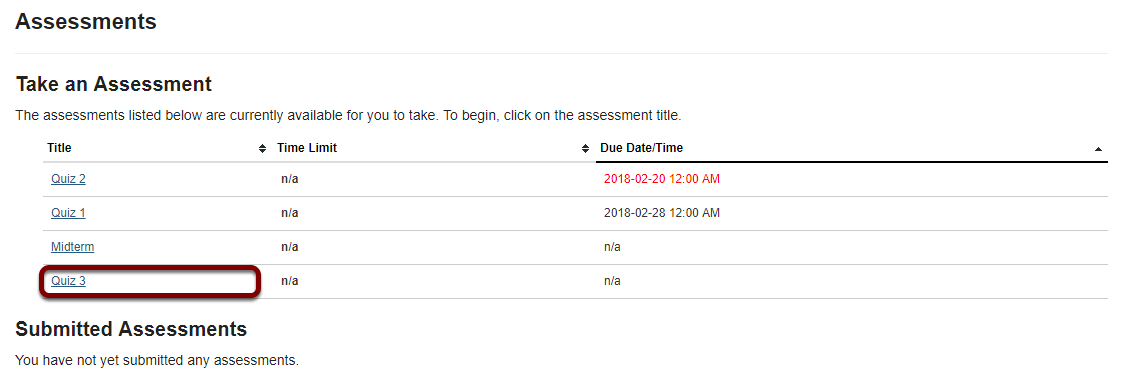
Tests & Quizzes tool landing page. (Student View)
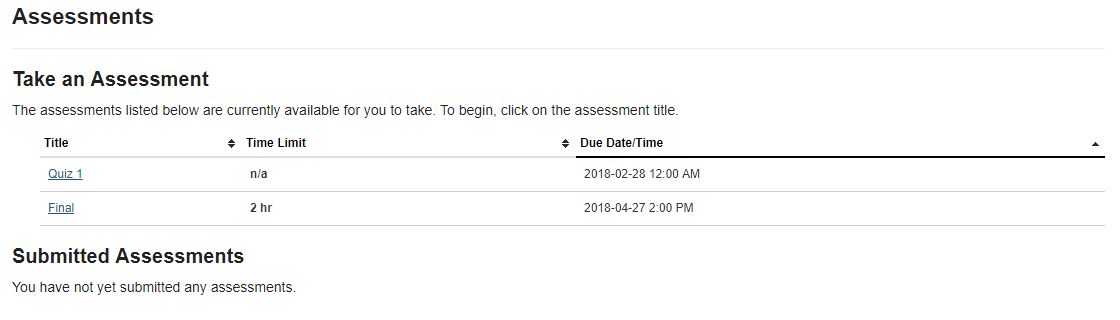
Note: Assessments which are past the due date but still available for late submissions will appear in the list with the Due Date/Time shown in red. Assessments which are not currently available do not show up in the Take an Assessment list at all.
Tests & Quizzes tool landing page. (Instructor View)
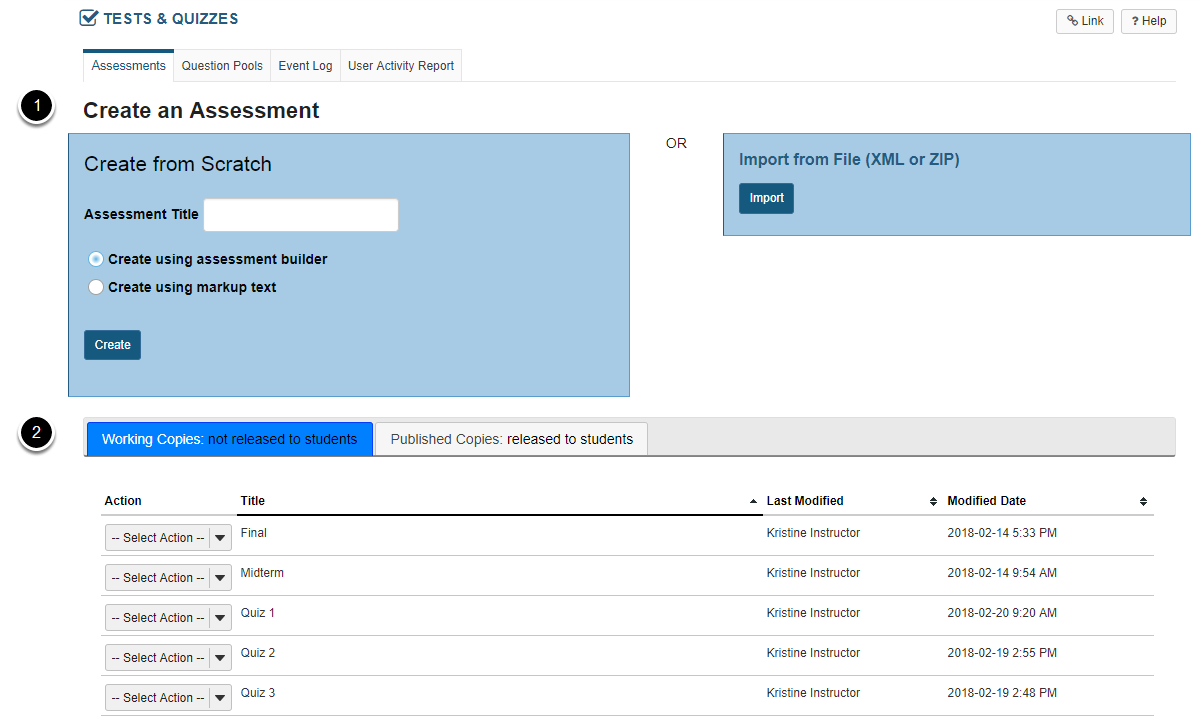
On entry, the Tests & Quizzes tool shows a two-part interface:
1. Options for creating a new assessment.
2. A list of existing assessments, the Working Copies (under development) and Published Copies (deployed to students) on different tabs.
How do I create an assessment in Tests and Quizzes?
The Tests & Quizzes tool allows you to create online assessments (i.e., tests, quizzes, exams, and surveys) for your students or other groups. It was designed primarily to administer tests, but you may also create assessments to gather survey information or informal course feedback. Grading for most question types is done automatically, and grades can be posted automatically to an online gradebook.
This lesson will show you how to create a simple assessment and add a single question.
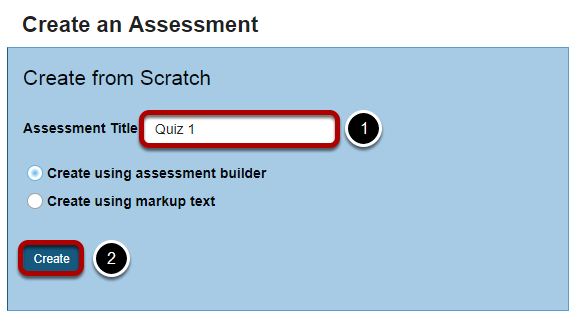
Create a new assessment.
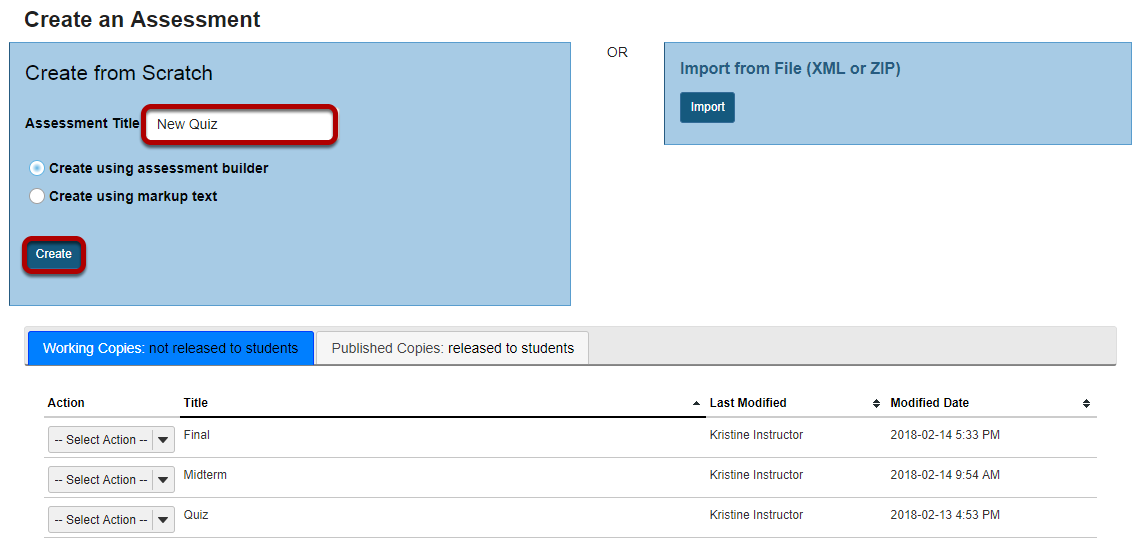
Give your new assessment a title and click the Create button. The "Create using assessment builder" option (shown selected) asks you to write questions one by one, with a simple example given below. For the other methods of creating an assessment, seeand How do I import questions into a new assessment or question pool?
Note: You cannot have more than one assessment with the same title.
Add a question.
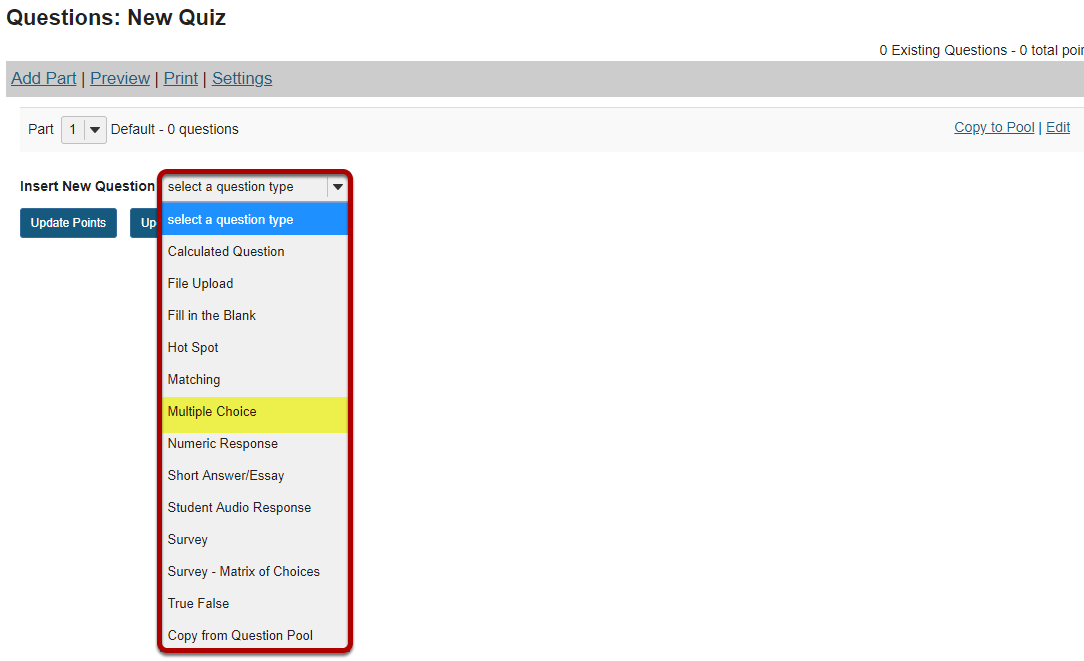
Select the type of question you would like to add from the Insert New Question drop-down menu.
Let's add one of the more common question types. Select Multiple Choice from the drop-down menu.
Set the general question options.
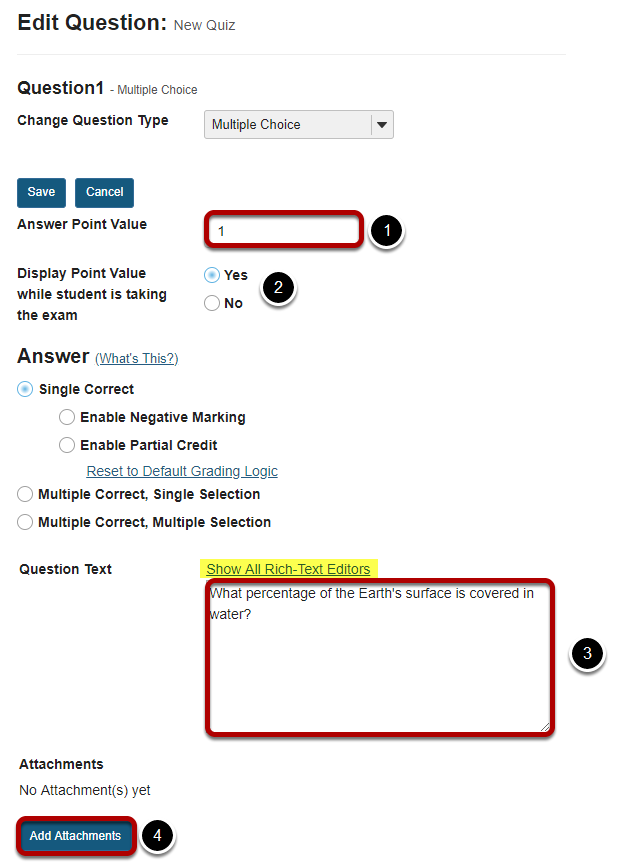
Most question types allow you to specify:
For these general parameters, seeOther options regarding the answer and configuration are specific to the question type.
Note: Theis available for use in composing your questions and answers. Click on the Show All Rich Text Editors link to display the editor.
Choose number of correct responses (for multiple choice).
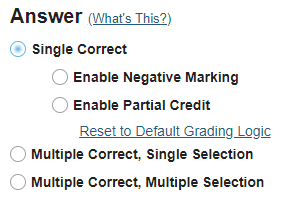
You can choose to have a Single Correct response, Multiple Correct, Single Selection, or Multiple Correct, Multiple Selection.
If you select Single Correct (the default) you also have the option to Enable Negative Marking or Enable Partial Credit if desired. Negative marking deducts points from the student's score if the student selects the wrong answer. Partial credit allows you to specify a percentage of the question points to be awarded for selecting an incorrect but still partially acceptable answer.
Choose the radio button for the correct response option you would like to use. For this example, we will keep the default.
Enter the answer choices (for multiple choice).
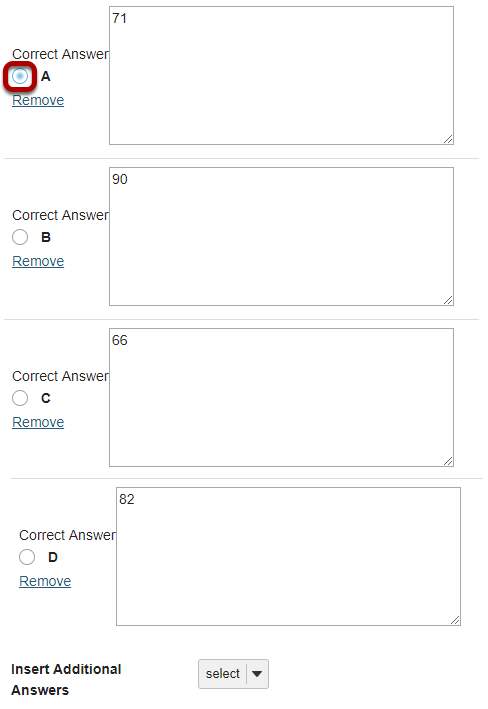
Enter all of the possible answer choices for this question. (Remember that you may use the editor to format your answer choices or add images, links, etc. if desired.)
There are four answer choices provided by default. If you need more choices, use the Insert Additional Answers drop-down menu to indicate the number of additional answer choices needed.
Be sure to indicate the correct answer by selecting the radio button for the correct response.
Choose whether or not to randomize answers (for multiple choice).
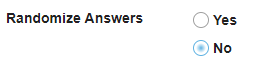
The default setting is No for randomizing answers. If you would like the answer choices to appear in a random order each time a student takes the assessment, select Yes.
Tip: Remember that if you answer choices contain items like "all of the above" or "A and B are correct" randomizing the order could cause confusion with the answer key.
Choose whether or not to require rationale.
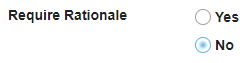
The default setting is No for requiring rationale. If you want students to write an explanation for why they chose a particular response, select Yes.
Assign to part. (Optional)

If you have multiple parts in your assessment, you may assign the question to a different part.
Assign to pool. (Optional)

If you have an existing question pool and would like to copy this question to the pool, select the pool name here.
Provide answer feedback. (Optional)
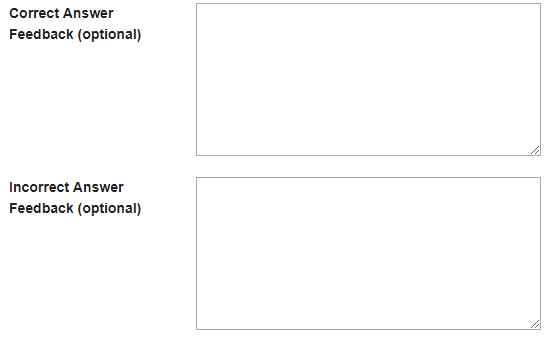
If you would like to provide feedback for students based on if they answer the question correctly or incorrectly, enter your feedback here.
Save your question.
Once you have entered all of your question information, click Save to return to the edit assessment screen.
Continue adding questions.

Repeat the steps above to add additional questions to your assessment. As you add questions, note the following:
Tip: An assessment must have at least one question, and the question must be worth greater than zero in order to add the assessment to the Gradebook.
How to I add multiple parts to an assessment?
This explains how to create additional parts to assessment. Parts are often used to set upthat pull questions from question pools.
Select an assessment.
Parts may be added to any assessment. Select an existing assessment or create a new one.
Create a New Assessment.
For more information on creating new assessments, see How do I create an assessment?
Or edit an existing assessment.
Click Add Part.
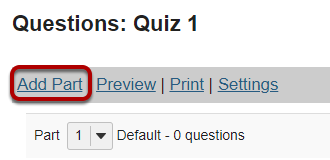
Add a Title.
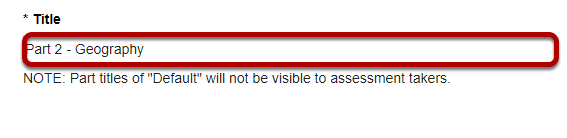
Type a title into the text box provided.
Note: If the part title is marked as the Default, the title will not appear to assessment takers.
Add Information. (Optional)
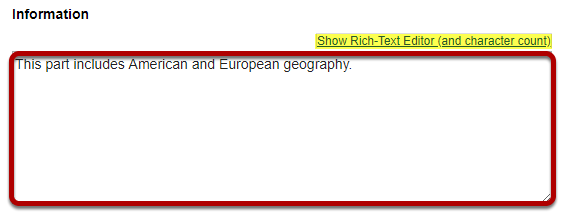
Use the text box provided to type Information about the created part.
Note: To edit with Rich-Text Editor, click the hyperlink to open the full menu.
Add attachment. (Optional)
Click Add Attachments to browse for and select a file attachment if desired.
Select Part Type.
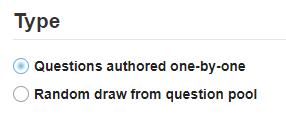
Choose the option to author questions one-on-one or select random draw from question pool.
If "questions authored one-by-one" is selected, the following options will display.

Select the radio button to order the questions As listed on Assessment Questions page, or to order them Random within Part.
If "random draw from question pool" is selected, the following options will display.
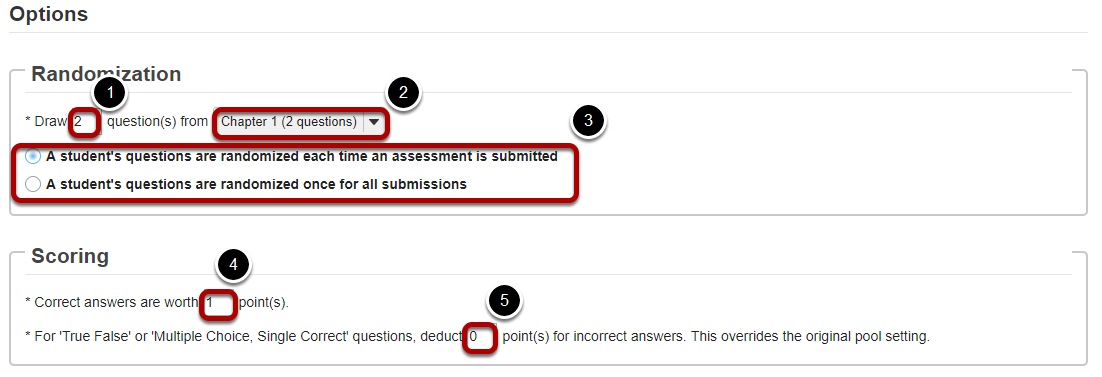
Note: Point values entered here override any value that was specified for individual questions in the corresponding Question Pool.
Add Metadata. (Optional)

Enter Metadata, such as the objective, keyword, and rubric, into the text boxes provided.
Click Save.
Click Save to save the question (or Cancel to exit).
How do I view and modify the settings of an assessment?
The settings of a test or quiz are complex, and offer many options. The modification of a setting in one section will not change settings in other sections.
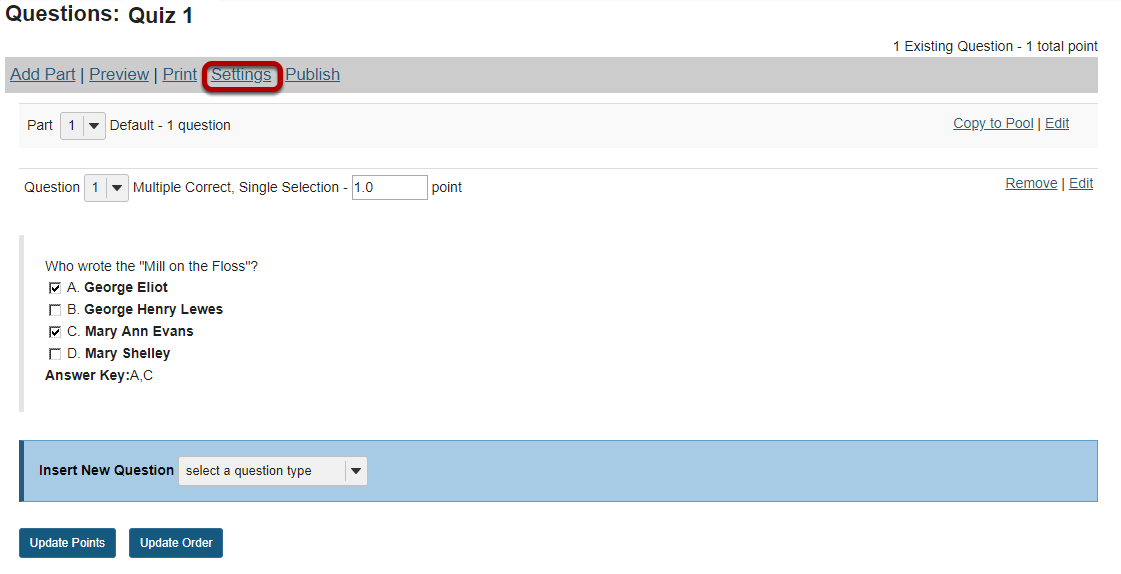
Edit the settings.
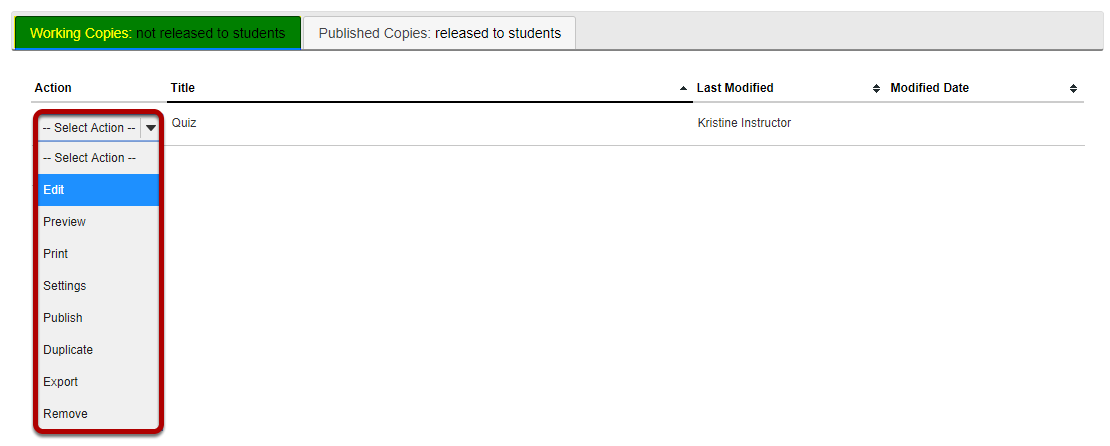
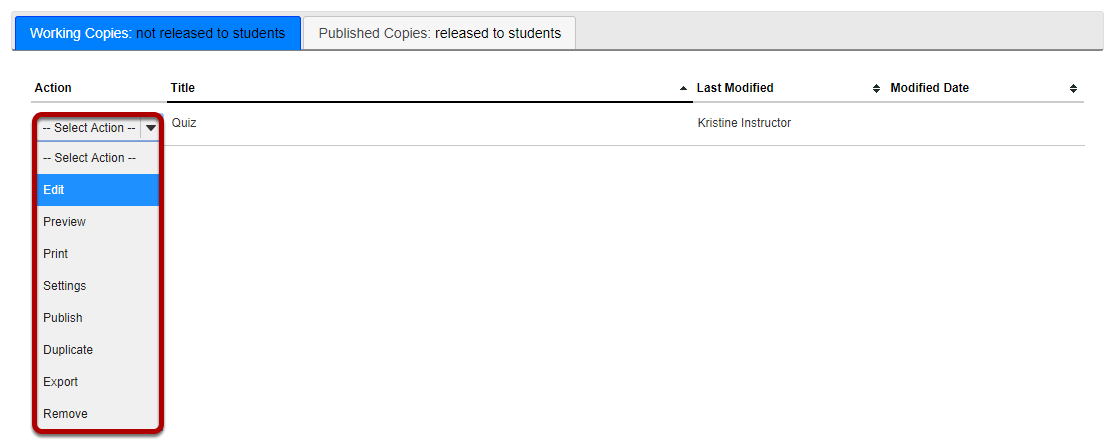
From the Tests & Quizzes tool home screen, choose the Settings option in the drop-down menu for the quiz you would like to publish. Be sure that you are in the Working Copies tab; otherwise, you won't see your unpublished items.
Note: You can review and edit settings on a published assessment by going to the Published Copies tab and selecting Settingsin the drop-down menu for the assessment. It is not recommended to modify the settings of an assessment while testing is in progress, as it may cause loss of student submission data.
Alternatively, you can access assessment settings from the edit assessment screen.

If you are currently editing the Working Copy of the assessment, click the Settings link at the top of the assessment editing screen.
Settings options
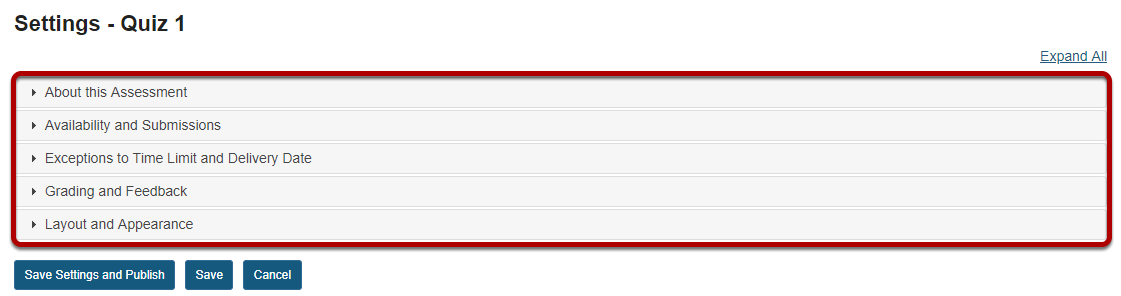
There are five sections of assessment Settings:
Click on the section title in the Settings screen to expand or collapse that section. Below is a summary of the options available to you in each of these sections, and a link to an article that describes the options in greater detail.
About this Assessment
In the About this Assessment section, you can edit the Title of your assessment or add a Description that displays before students begin taking the test. For more information on this section and its options, see How do I edit my assessment title or description?
Availability and Submissions
In Availability and Submissions, you can:
For more information on this section and its options, see What are the Availability and Submissions options for an assessment?
Exceptions to Time Limit and Delivery Date
In the Exceptions to Time Limit and Delivery Date section, you can select users or groups within the site and specify a different availability window for the assessment as well as indicate the time limit allowed for that user/group. For more information on this section and its options, see How do I give specific students different date or time settings for an assessment?
Grading and Feedback
In Grading and Feedback, you can:
For more information on this section and its options, see What are the Grading and Feedback options for an assessment?
Layout and Appearance
Layout and Appearance options control the overall look and feel of the test for students, such as how they navigate from one question to another, and how the assessment questions are numbered if the assessment has multiple parts.
For more information on this section and its options, see How do I adjust the layout and appearance of an assessment?
Effects of settings
You can modify the settings, parts, and questions of any assessment listed under Working Copies. When you publish an assessment, a copy is created and listed under Published Copies. For the published copy, you can make changes to all the settings except Assessment Released To. To edit the settings, select Settings in the Action drop-down menu for that assessment. You cannot edit the questions in a published copy.
Note: After you've published an assessment, if you modify the unpublished version under Working Copies, you'll have to alter the assessment's Title before republishing it. When you publish it, you'll be creating another publication under Published Copies, NOT replacing the existing published copy.
Note: It is not recommended to modify the settings of an assessment while testing is in progress, as it may cause loss of student submission data.
Save Settings and publish the assessment.

When the assessment settings are ready, and the questions are in place, click Save Settings and Publish to publish the assessment so that your students can take it. See the article
Alternatively, if you're not ready to publish the assessment, you can click Save to save your settings selections.
Note: If you're modifying the settings of an assessment in Published Copies, you'll only see the Save and Cancel buttons.
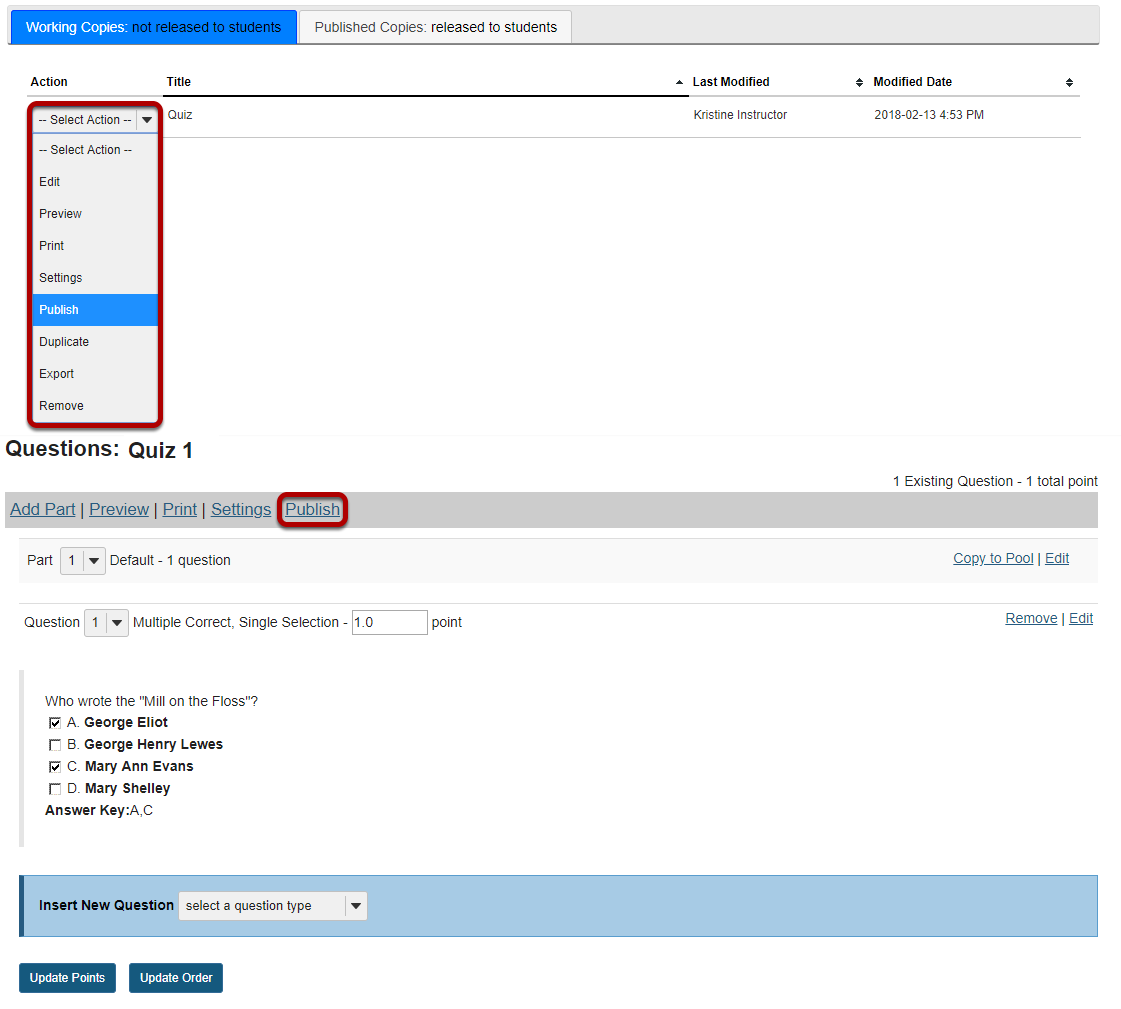
How do I publish an assessment (i.e. test or quiz)?
After you have created an assessment, you must publish it before students can view and submit it.
Publish with current settings.
If you are sure that the default or current settings are appropriate, you can publish from either the action menu or the edit assessment screen.
Edit the settings and then publish.
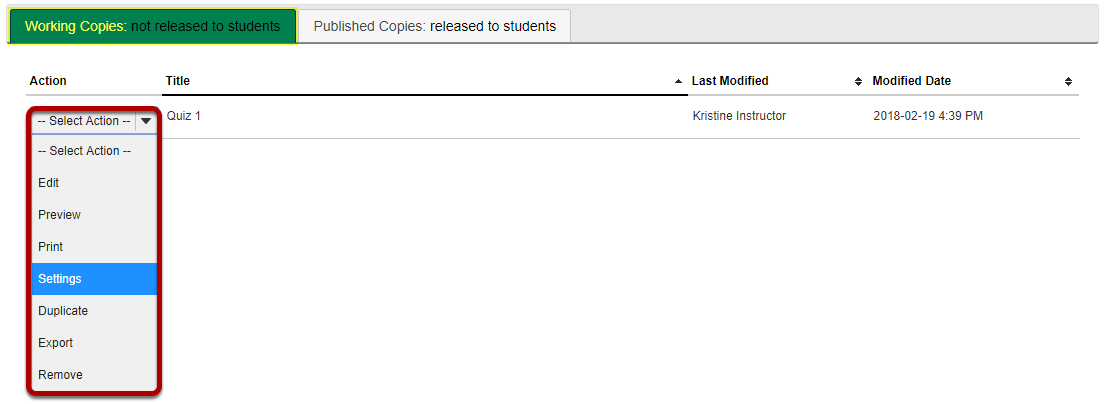
From the Tests & Quizzes tool home screen, choose the Settings option in the drop-down menu for the quiz you would like to publish.
Be sure that you are in the Working Copies tab, otherwise, you won't see your unpublished items.
Alternately, you can access assessment settings from the edit assessment screen.
If you are currently editing the quiz in question, click the Settings link at the top of the assessment editing screen.
Adjust the settings as desired.
See the article
Note: Settings are typically adjusted fully on the Working Copy before publishing.
Save settings and publish.

Once you have completed all of your settings selections, click the Save Settings and Publish button at the bottom of the screen.
Note: You may also choose to Save settings without publishing, or Cancel to cancel the assessment settings.
Review and confirm publishing of assessment.
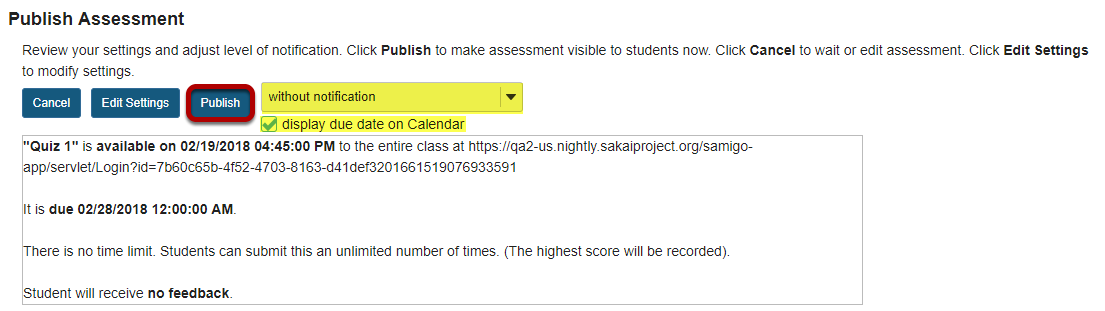
Your setting choices will be summarized for you on the confirmation screen. Review all of the information to make sure it is correct. (If you need to make changes, you can go back by clicking Edit Settings.)
You have the option to notify students when you publish the assessment. The default setting is without notification. Notifying students sends and email to their external email address to let them know the assessment has been published. It sends the message at the time of publication, NOT on the start date of the assessment.
If your assessment has an end date, you may select to Display due date on Calendar. This will post an event on the Schedule/Calendar for the course on the date the assessment is due.
Click Publish to make the assessment available to students.
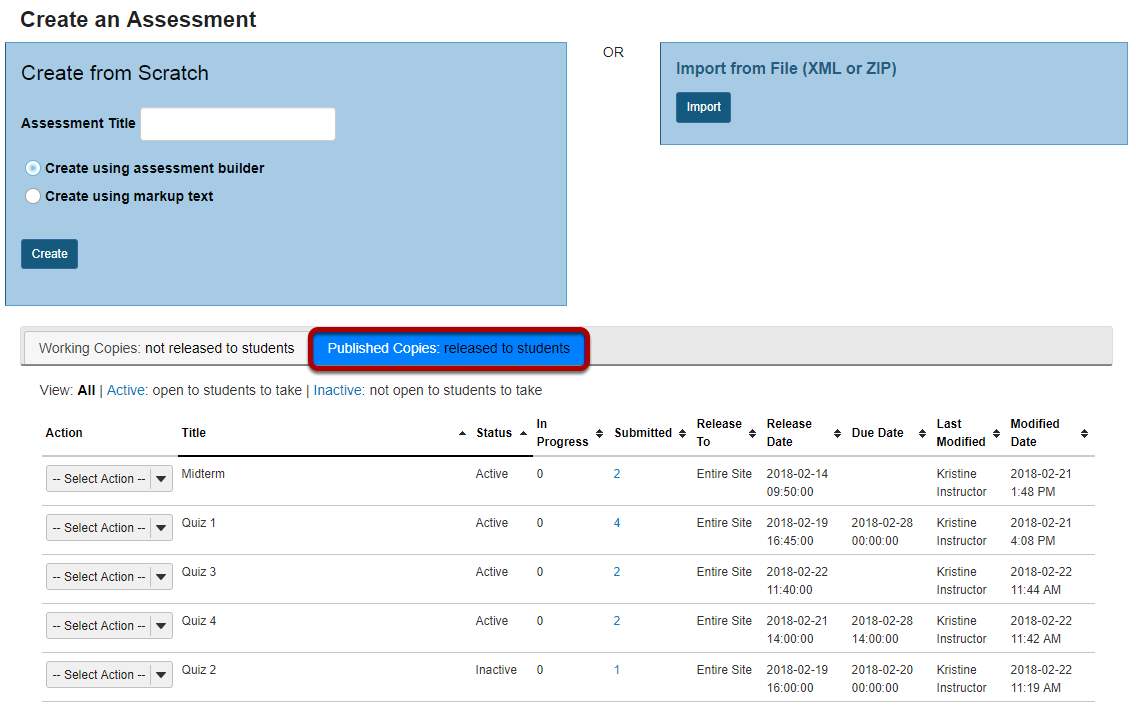
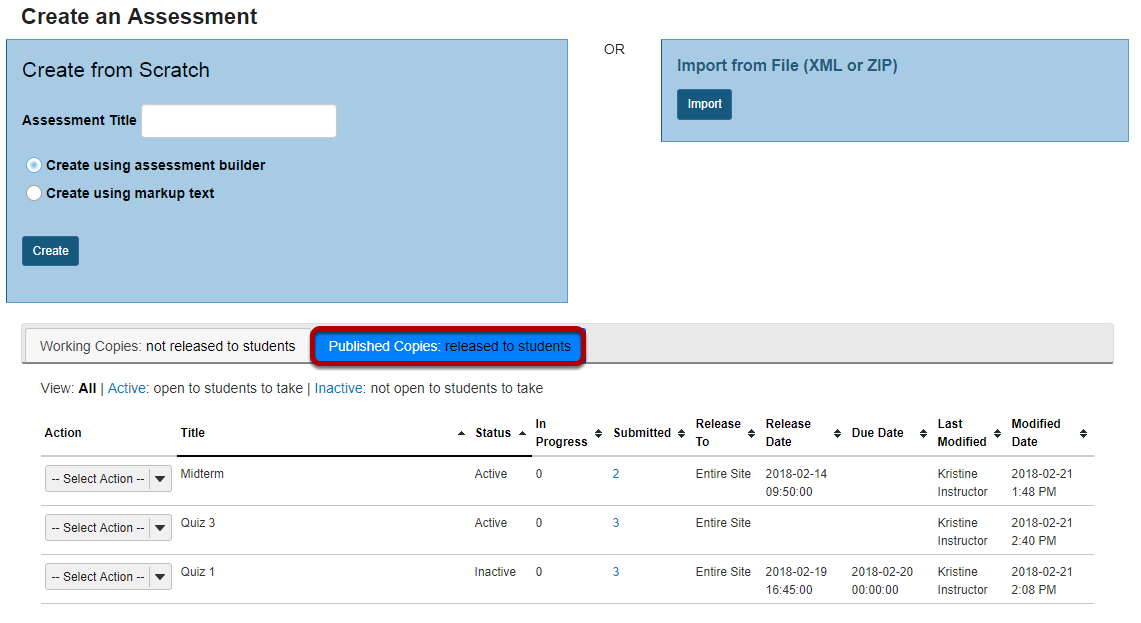
View published assessment.

Click on Published Copies to view your published assessments. Published assessments will be displayed in the list, along with the status, submission and release information, and the user that last modified the item.
How do I preview an assessment (i.e. test or quiz)?
You can preview an assessment either by using the Preview option in the Action menu, or by viewing the site as a student and submitting the assessment.
Note: If you use the Preview option to preview an assessment, you will not be able to submit the assessment or see how feedback displays for your students.
Preview from the Action menu.
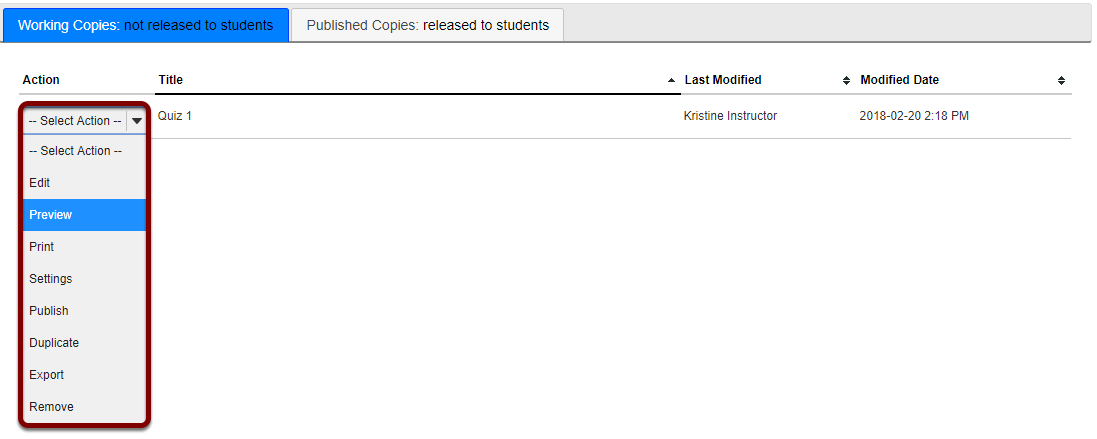
From the Tests & Quizzes tool home screen, choose the Preview option in the drop-down menu for the assessment you would like to preview.
Note: The Preview option is available in both the Working Copies and Published Copies tabs of Tests & Quizzes.
Preview the assessment.
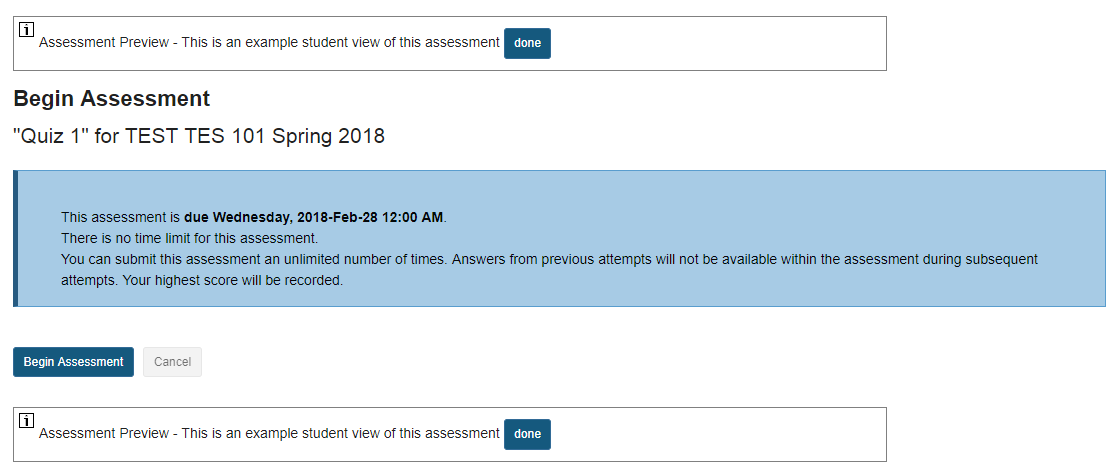
You'll be able to walk through a preview of your assessment, but you won't be able to submit the assessment from this preview.
Note: The assessment preview will be identified with the following text in light grey: "Assessment Preview - This is an example student view of this assessment."
OR View the site as a student.
You can view the Tests & Quizzes tool and submit your assessment as if you were a student using the View Site As... Student option OR by adding your non-university email address to your site as a Student and logging in to submit the assessment.
Select an assessment.
Note: If you submit your test using the View Site As... option, you won't see your submission listed in the Scores screens for grading. Using View Site As..., you WILL be able to see allyou have made available to students that does not require manual grading.
Tip: If you'd like to be able to grade your own submission to the test as an instructor, you'll need to submit the test after logging in with a different user account. Often, instructors will enroll a fake "demo student" account in the site so that they can log in as that user to submit items and practice grading them.
How do I grade Tests & Quizzes?
Most question types in Tests & Quizzes are automatically graded by the system. However, you will need to manually score short answer/essay questions, file uploads, and audio recordings. You may also adjust the auto-graded scores, add comments, or give partial credit.
If you would like to send your assessment scores to the Gradebook so that they can be included in the course grade calculation or allow students to see an answer key or other feedback in Tests & Quizzes, see
On the Total Scores screen for an assessment, you can see the total score each student received based on the points from auto-graded questions (such as multiple choice and true false). You may adjust the students' scores and for students who submitted the assessment, you can add comments.
For more information on manually grading individual student submissions or questions, see the following articles:
Note:
Select the Published Copies tab.
Click on the Published Copies tab to view the assessments that have been released to students in your site.
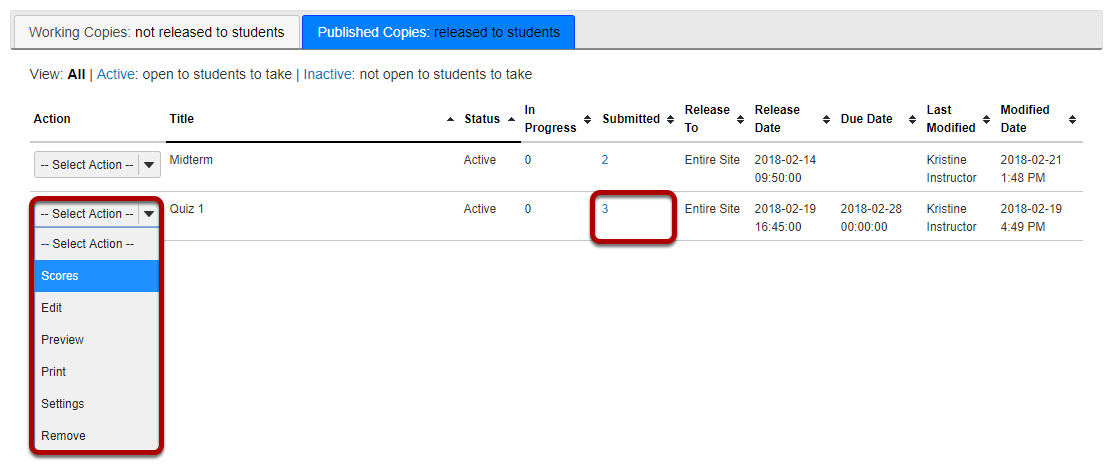
Go to the assessment submissions.
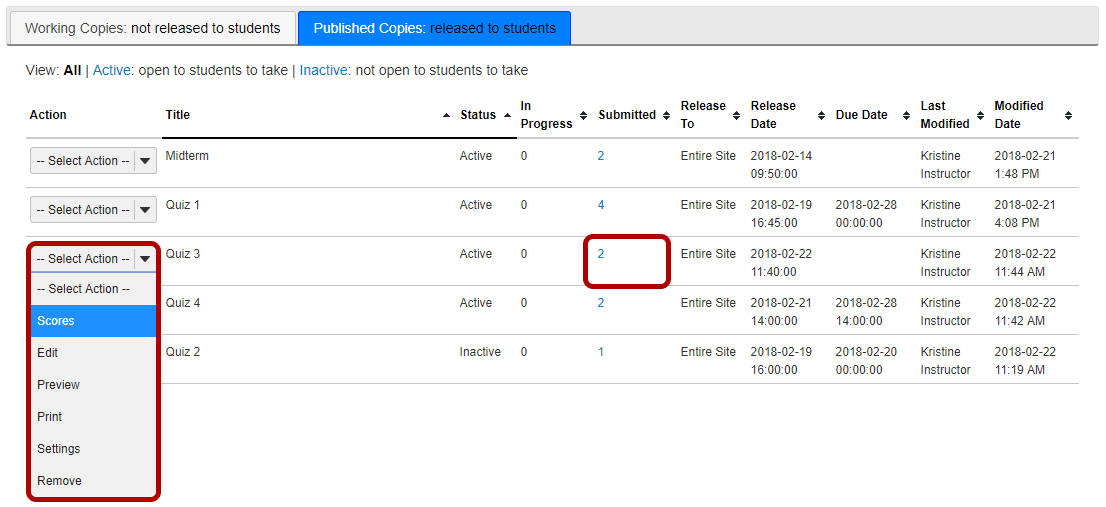
Select the Scores option from the drop-down menu for the assessment you would like to grade.
Alternately, you may also click on the number of student submissions in the Submitted column to view the submissions.
Display multiple submissions for students. (Optional)
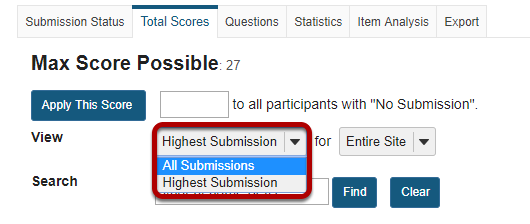
By default, the submission that displays for each student will be based on your assessment's Recorded Score setting. For example, if you accept the highest score, the highest scoring submission will display. If you accept the average score, the average point value of all the student's submissions will display.
If your assessment allows multiple submissions, or if a student has submitted an allowed retake, you can choose to view all student submissions by selecting All Submissions from the View drop-down menu.
Enter score adjustment and overall comments.
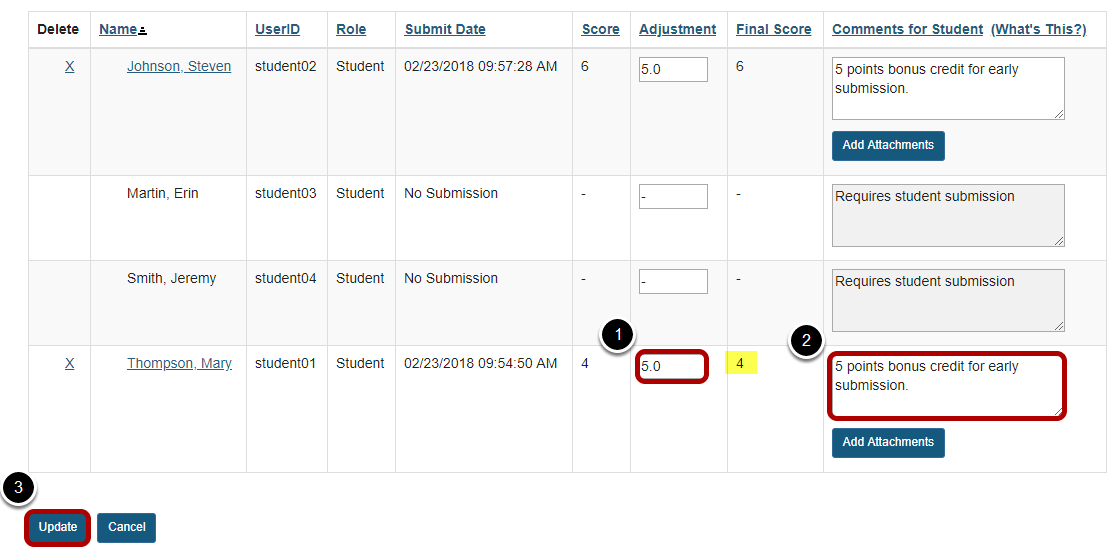
To make a grade adjustment to the overall assessment score:
Note: The Final Score column will display the adjusted score after you save your changes.
How do I download Tests & Quizzes submissions for grading offline?
You can download assessment responses for grading offline, including bulk downloading submissions to aquestion so you can easily access them from a single folder on your computer.
For more information on entering assessment grades and comments, see the following articles:
Select the Published Copies tab.
Click on the Published Copies tab to view the assessments that have been released to students in your site.
Go to the assessment submissions.
Select the Scores option from the drop-down menu for the assessment you would like to grade.
Alternatively, you may click on the number of student submissions in the Submitted column to view the submissions.
Export scores and students' responses as an Excel spreadsheet.
You can export an Excel spreadsheet that contains all the students' responses and scores for an assessment, as well as any comments you entered for students on the Total Scores screen.
Click Export.

On the following screen, click Export.
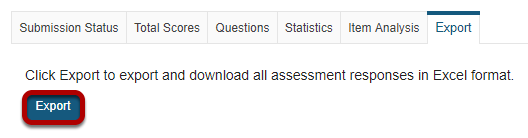
Click the second Export button on the screen to export the file.
Depending on your browser settings, you may be asked to save or open the file. Once downloaded, you can open the file in a spreadsheet program, such as Excel.
View spreadsheet.

The resulting spreadsheet lists the students' names, user names, number of the assessment submission (if multiple submissions were allowed), final scores, any Grader's comments you entered for students in the Total Scores screen, and the students' responses to each question.
Note: Certain question types, such as File Upload questions and Audio Recording questions, which need to be graded within the Tests & Quizzes screen, will not be able to display answers in the spreadsheet.
Download all File Upload submissions.
If your assessment has aquestion, you can download all submissions to it simultaneously (e.g. to add inline comments, or for ease of reading certain types of files from your computer.)
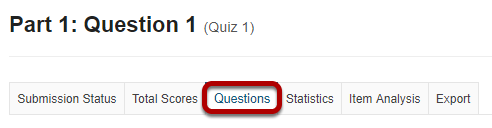
Click on the Questions link in the assessment menu to access the list of questions.
Select the File Upload question.
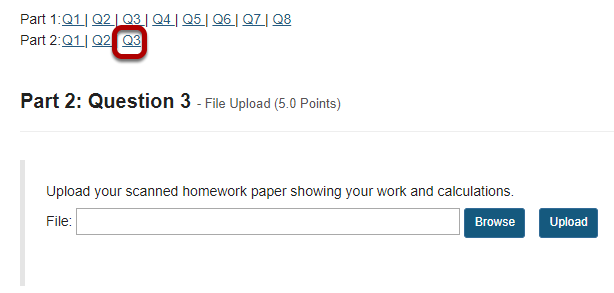
From the list of question numbers, select the File Upload question. Each question is listed as the letter Q with the question number (e.g. Q1, Q2).
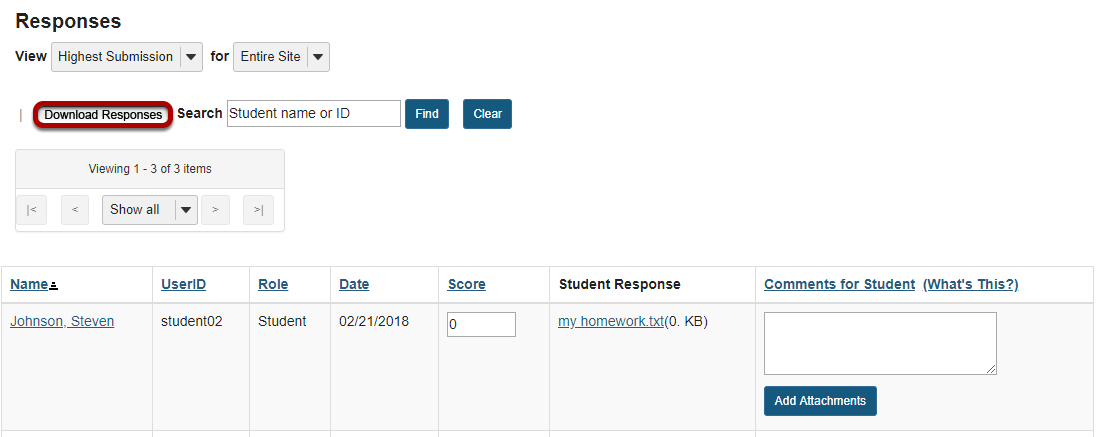
Click Download Responses.
Save and open the ZIP file.
How do students submit an assessment (i.e. test or quiz)?
Test-Taking Tips - In order to avoid potential problems during an assessment, it is recommended that you:
Click on the title of the assessment.
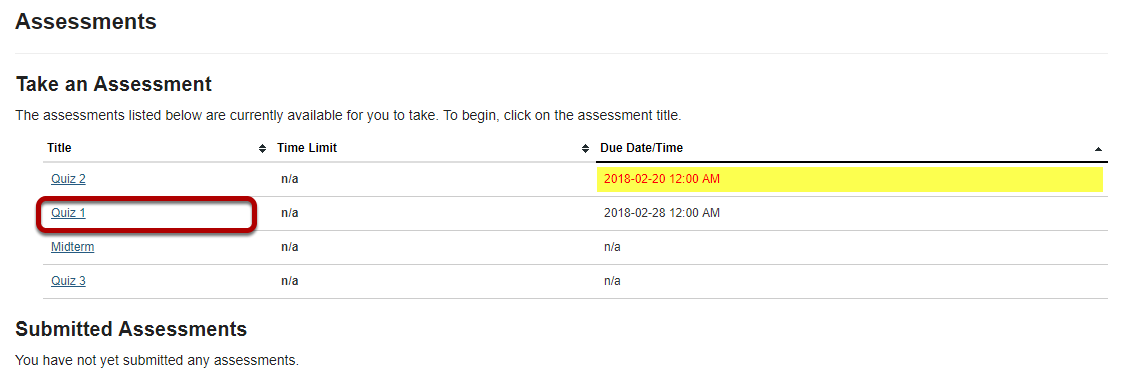
In the Assessments section, click on the title of the assessment that you want to take.
Note: Assessments which are past the due date but still available for late submissions will appear in the list with the Due Date/Time shown in red. Assessments which are not currently available do not show up in the Assessments list at all.
Or, your instructor may have linked to the assessment from other tools in the course, such as Lessons.
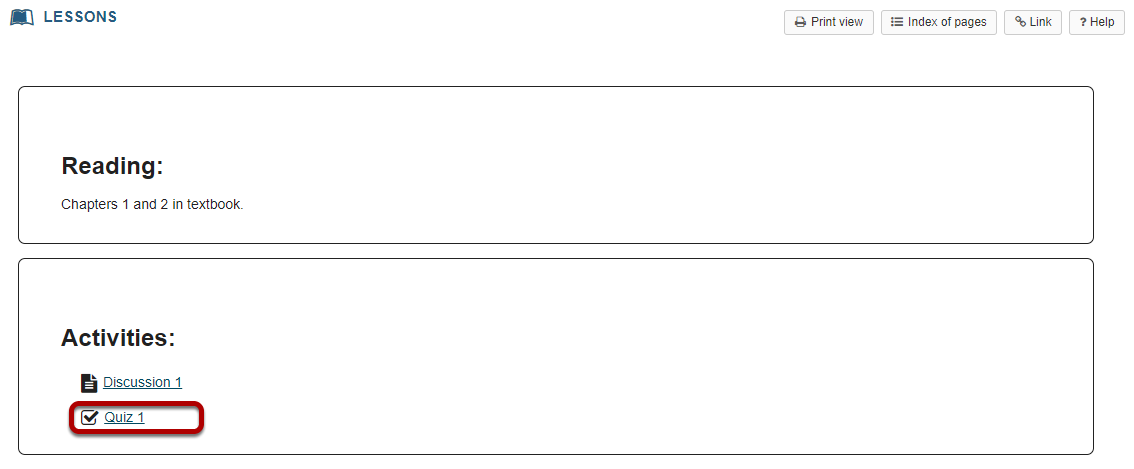
Click on the link to the assessment to go to that item.
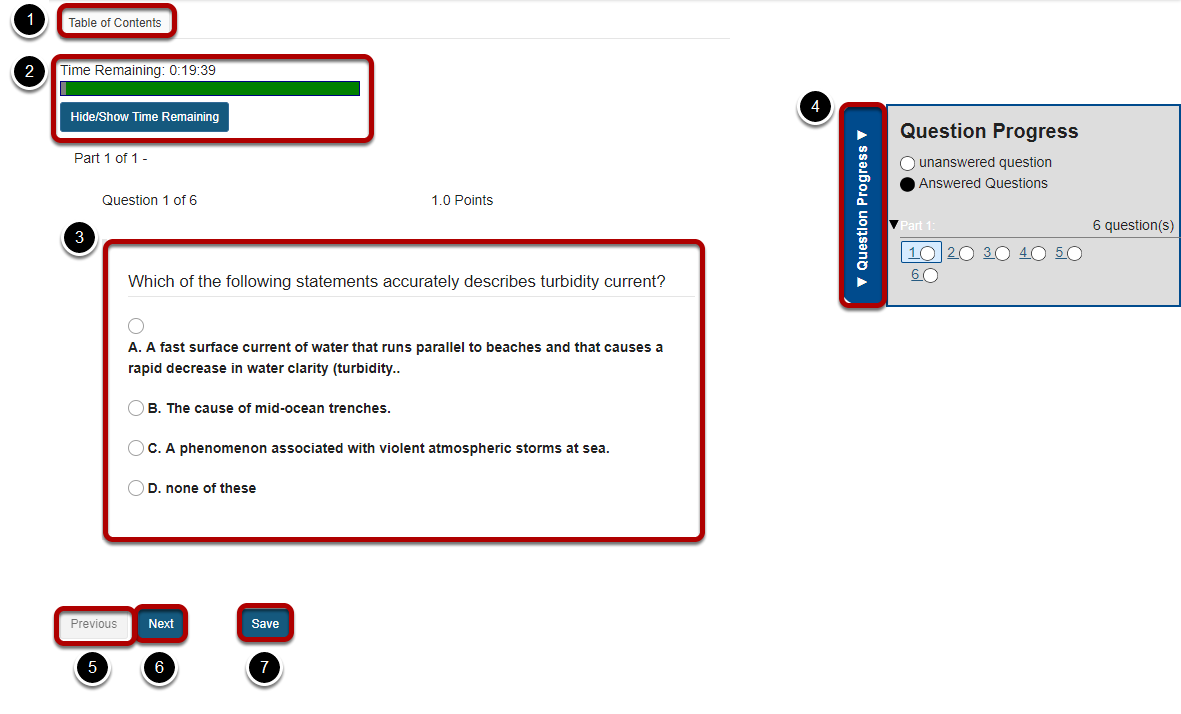
Begin assessment.
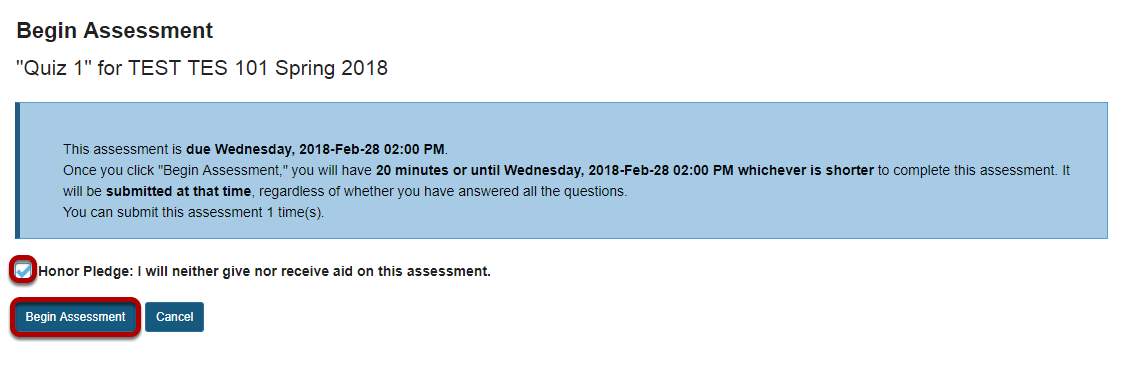
An introductory screen will display which contains summary information about the assessment, its due date, the time allowed for the test, and the number of submissions allowed.
If your instructor has enabled it for your assessment, you must check the box next to the Honor Pledge before you can begin.
When you are ready to start your assessment, click Begin Assessment.
Note: Make sure that you are ready to begin your test before clicking Begin Assessment. If it is a timed test, you will need to submit your test within the time limit or else it will be automatically submitted when your test time expires.
Answer each question.
Save and Submit.
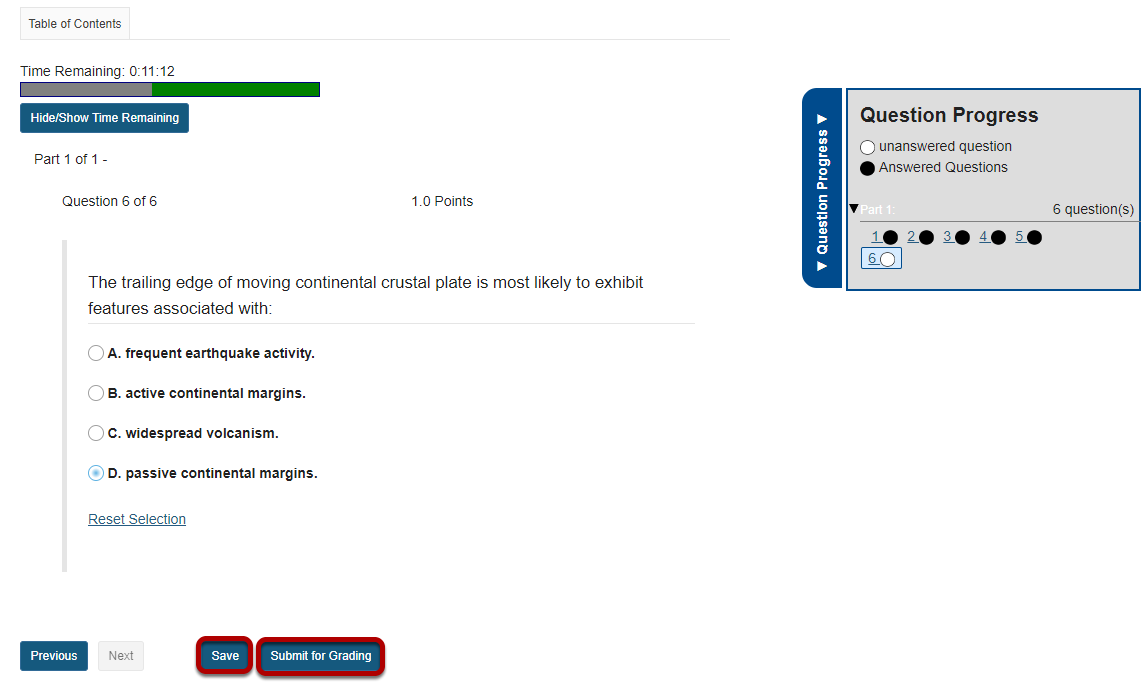
When you have answered all of the questions in the assessment, click Save and then Submit for Grading.
Confirm submission.
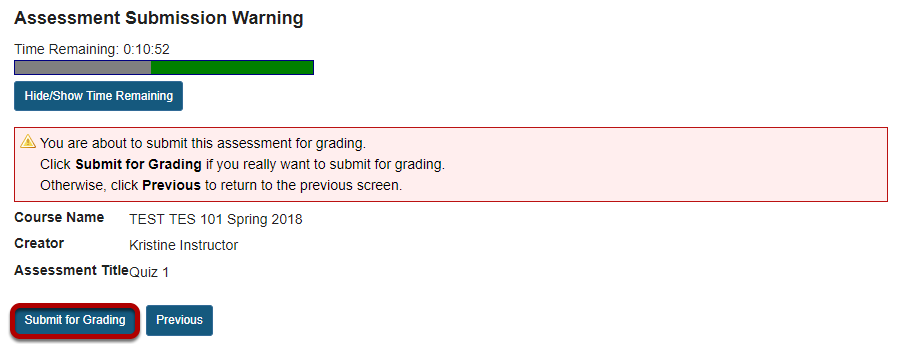
You will be prompted to confirm that you are ready to submit the test. Click Submit for Grading to submit your assessment.
Click Continue.
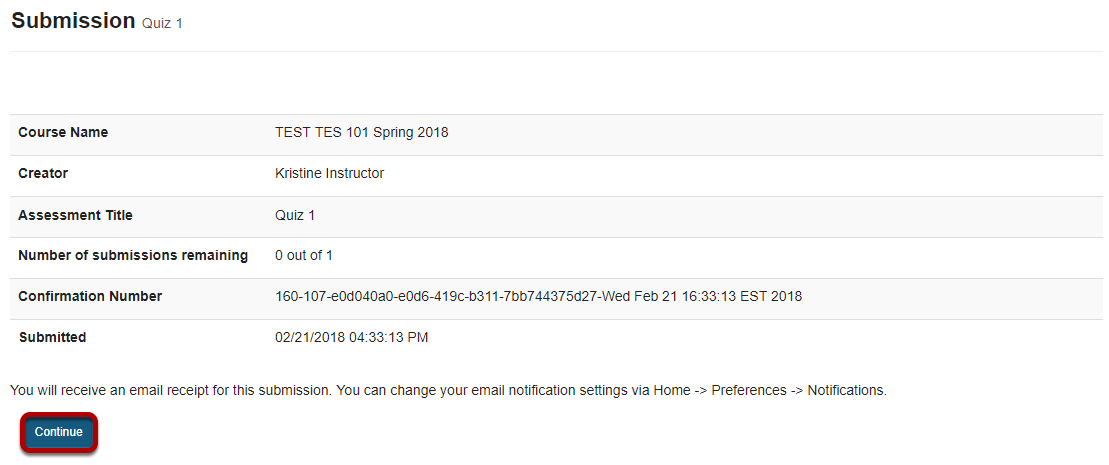
Once you submit, you will see a submission information page with a confirmation number for your submission.
Click Continue to return to the Tests & Quizzes page.
How do I move tests or quizzes to another site?
1.Export tests or quizzes.
First, open the source site, then click Tests & Quizzes in the Tool Menu.
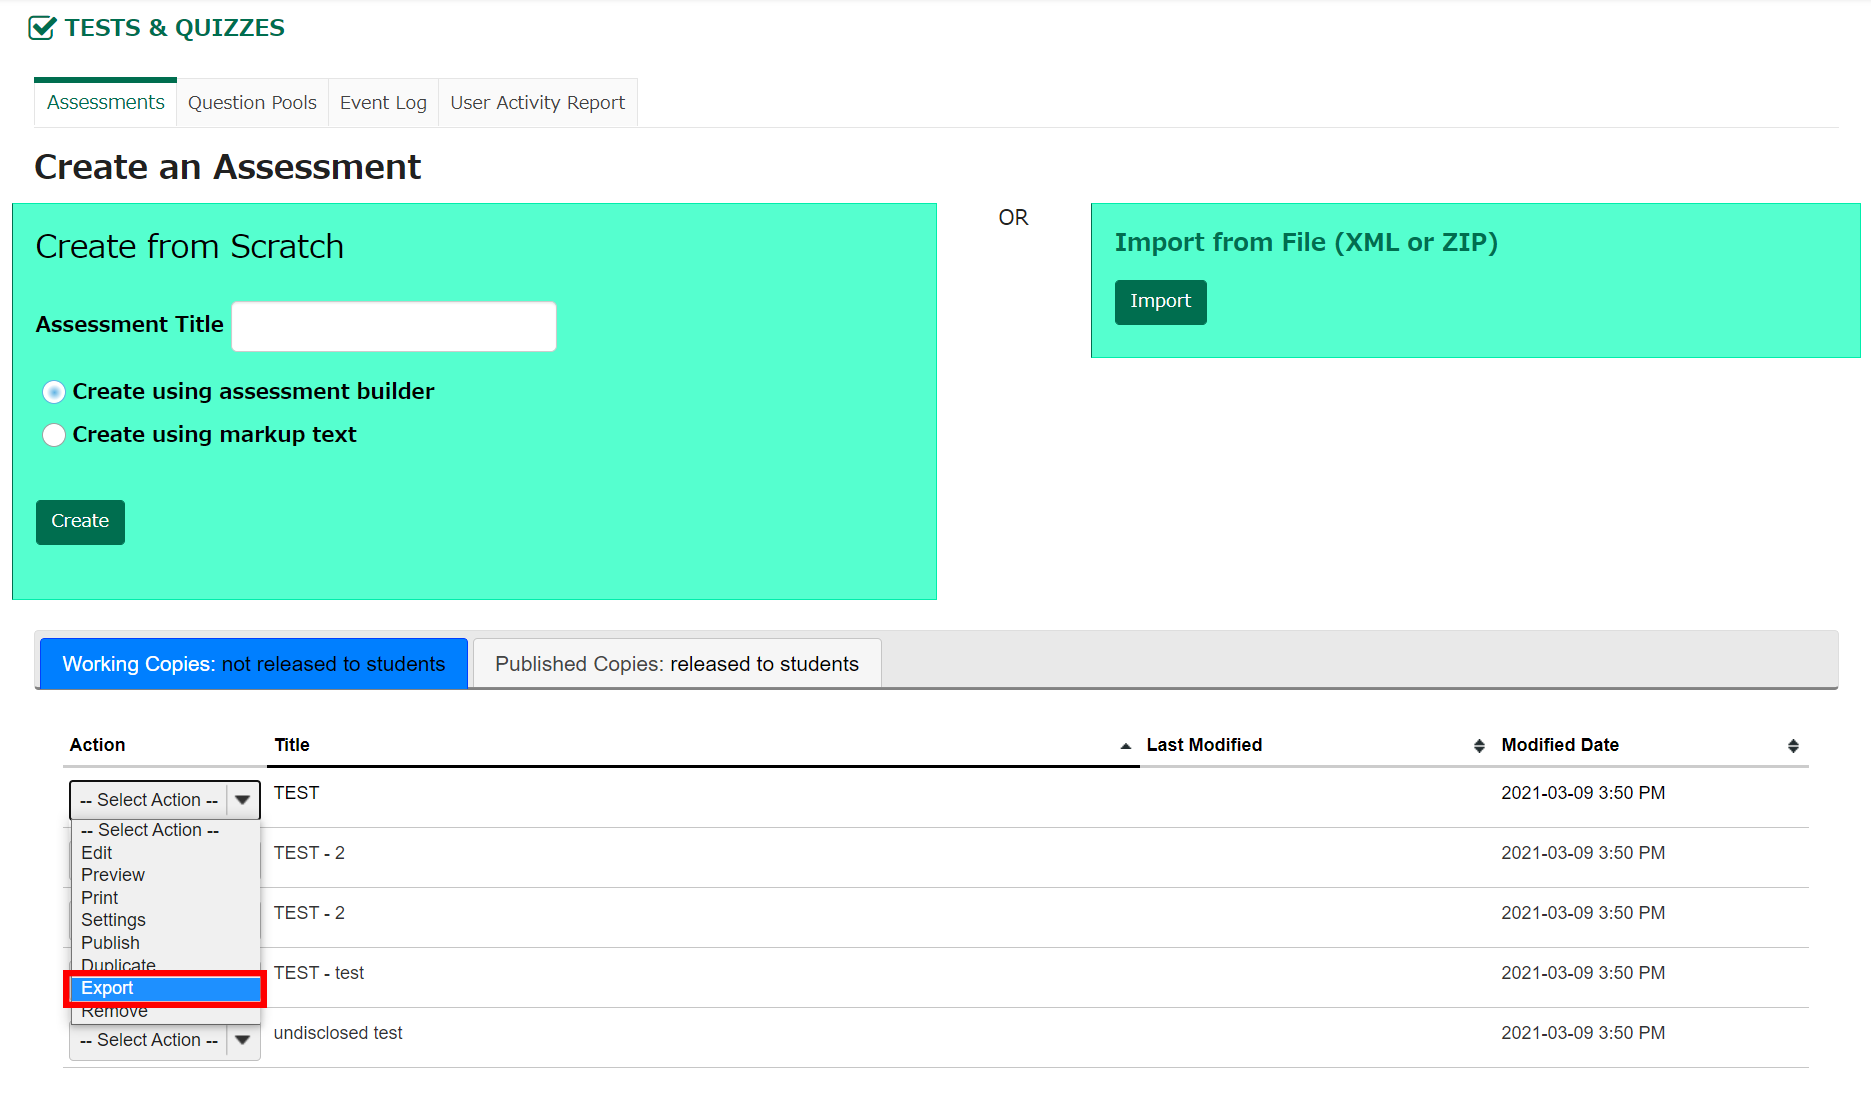
Click the Assessments tab.
Get into the Working Copies or Published Copies tab, and click Select Action for the test or quiz you would like to move. Then click Export.
Select the type of QTI v1.2 or Content Packaging to export, and then you can download the data of the test.
*If there are attachments or HTML tags used in the test, you need to select the type of Content Packaging, to refer to external resources.
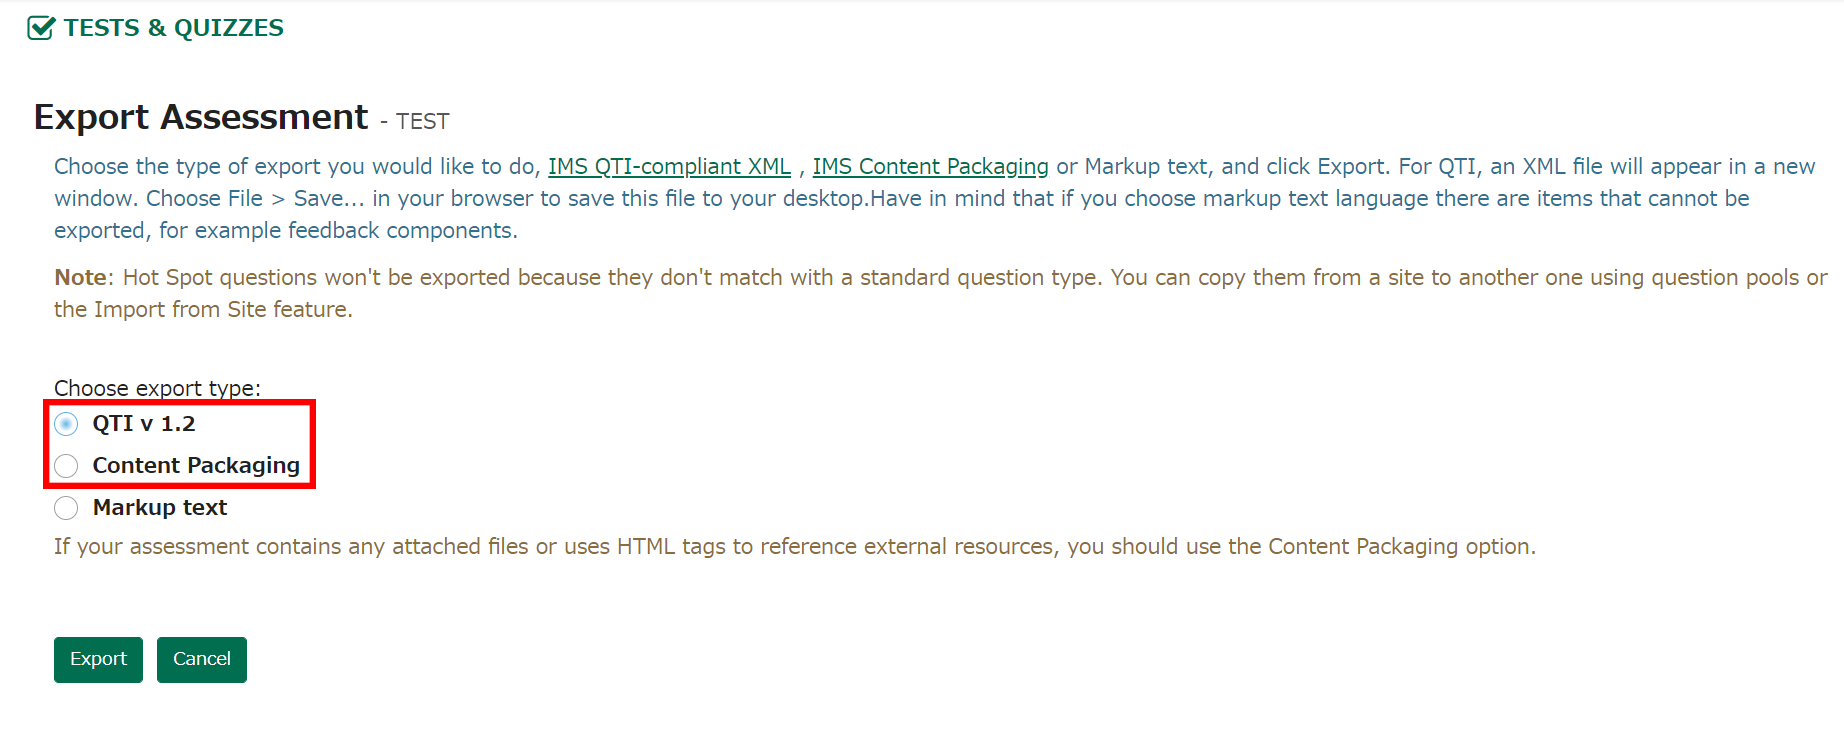
Click Download
2.Import tests or quizzes.
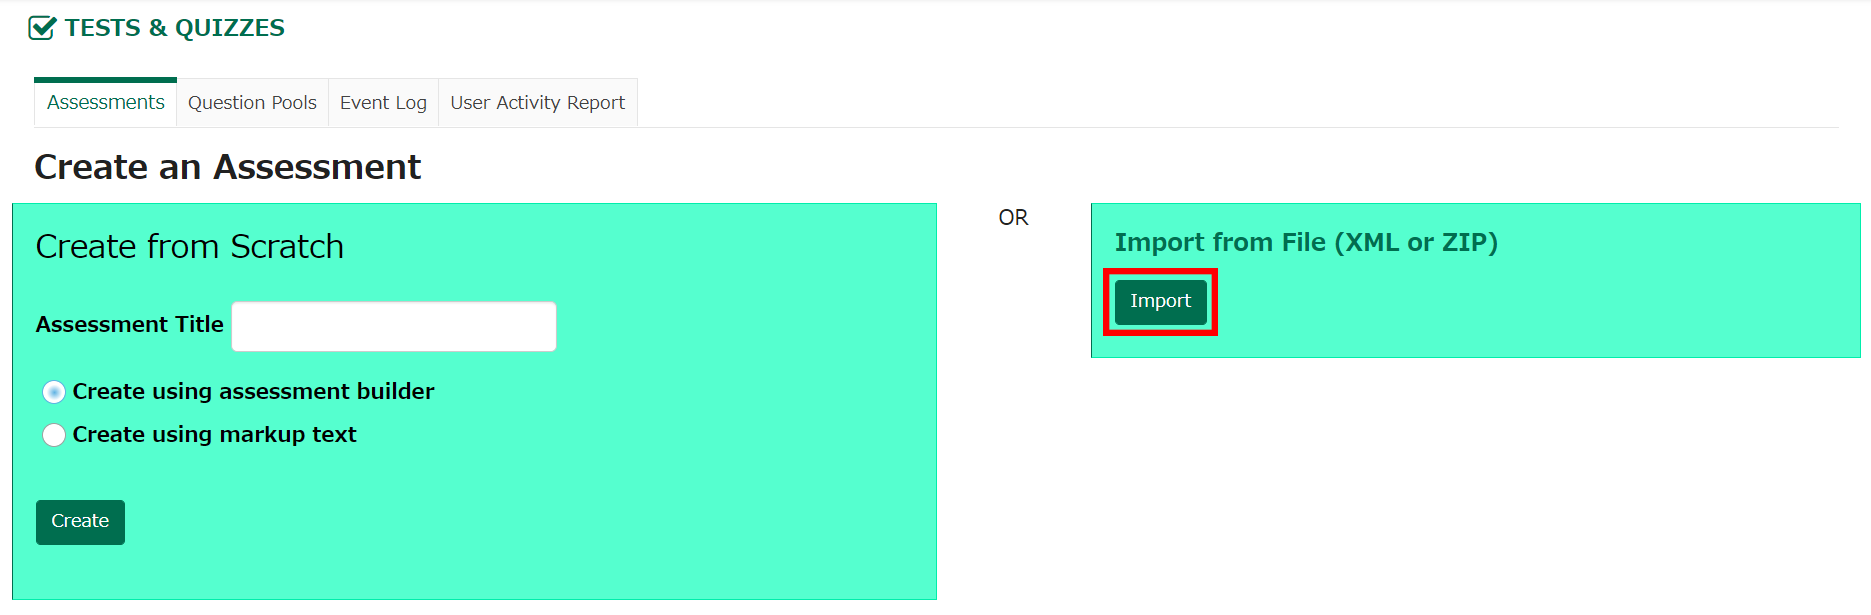
Open the destination site, then click Tests & Quizzes in the Tool Menu. Click the Assessments tab, and then click Import.
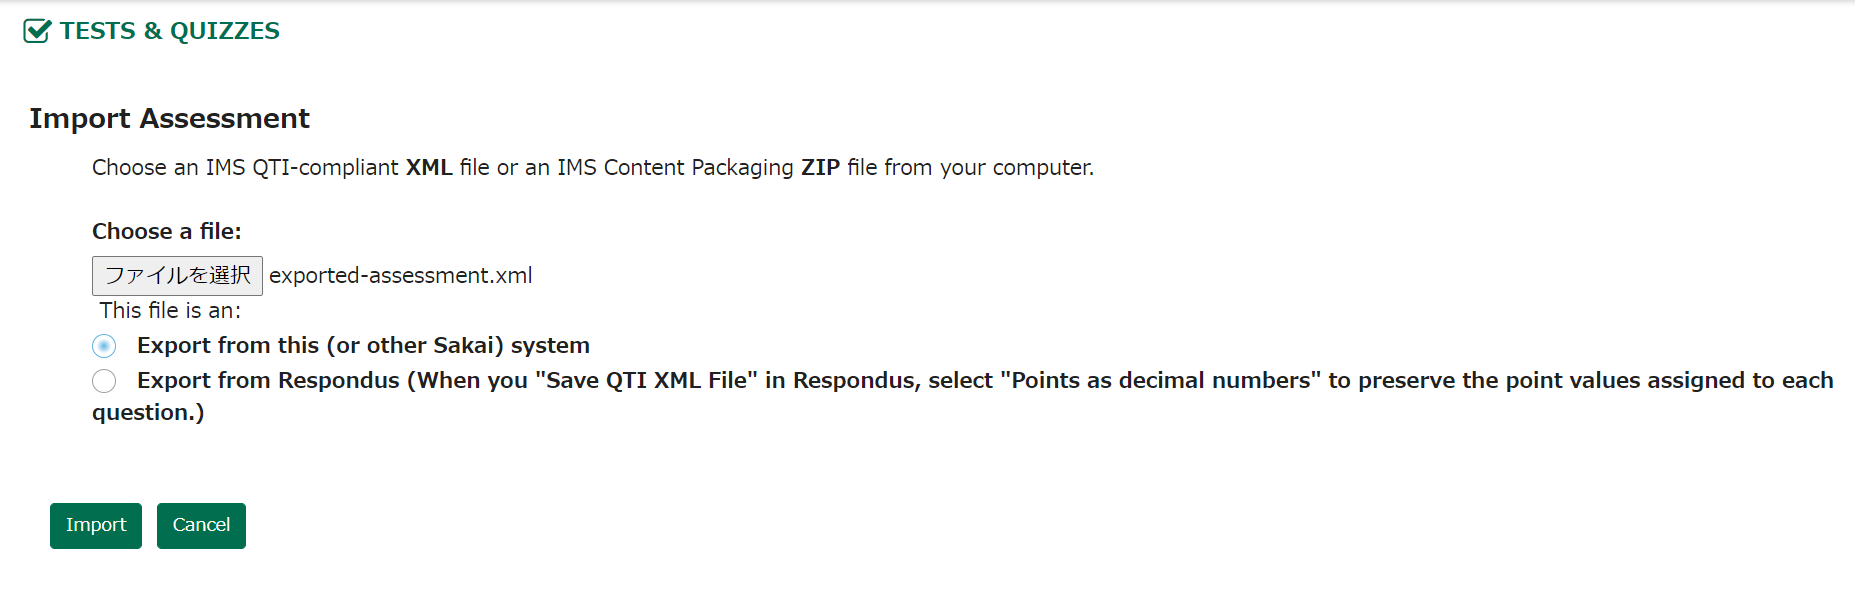
Click Choose a file, then open the data downloaded. Select Export from this (or other Sakai) system and click Import.
*Though it is also possible to copy tests through Site Info>Import from Site, it is only available for tests and quizzes which are unpublished. We recommend that you copy with the above method, as the procedure will be complicated.
Gradebook
What is Gradebook?
Gradebook (previously known as GradebookNG) is a new core tool for instructors to calculate and store grade information and distribute it to students online. It has been designed based on the same back-end as the Gradebook Classic tool, but with a number of new features and enhancements.
The following provides a high-level overview of the functional requirements guiding the development of the enhanced Gradebook.
In Gradebook, Students can view their scores for all items; view their course grades, once an instructor releases them; and sort their items by title, due date, grade, and weight, where applicable.
Gradebook is section aware, so teaching assistants can see grades only for students in their assigned sections.
Using Gradebook, instructors can:
To access this tool, select Gradebook from the Tool Menu of your site.
How do I set up my Gradebook?
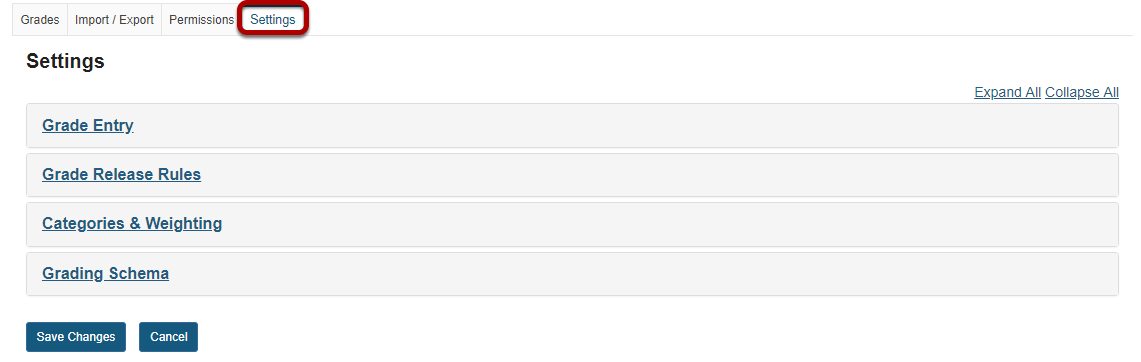
The Gradebook is the hub for all graded activities and points earned in your site. There are several settings you can set up for your site, such as Grade Entry in points/percentages, Grade Release Rules, Categories and Weighting, and Grading Schema.
Click Settings.
Grade Entry.
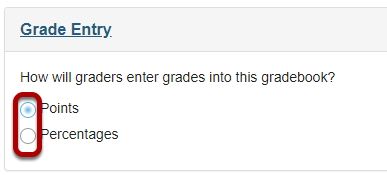
You can select either a Points based gradebook or a Percentages based gradebook, depending on your preferred method for entering grades. Note: If you will be sending grades to the Gradebook from tools such as Assignments, Tests & Quizzes or Forums, you need to select "Points" as your grade entry option.
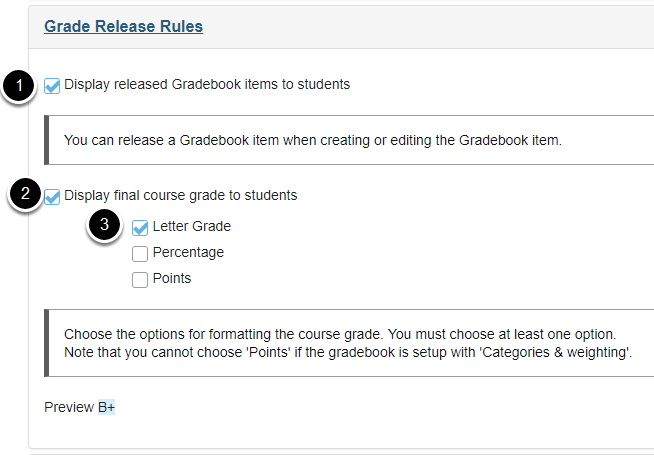
Grade Release Rules.
Categories and Weighting.
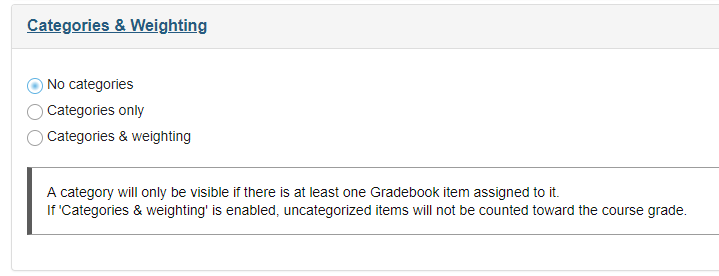
You can choose to have No categories, Categories only, or Categories & Weighting in your gradebook.
The No categories option is used when you want to have a simple grade calculation based strictly on the points or percentages of all your gradebook items, without any groupings, weighting, or dropping of items.
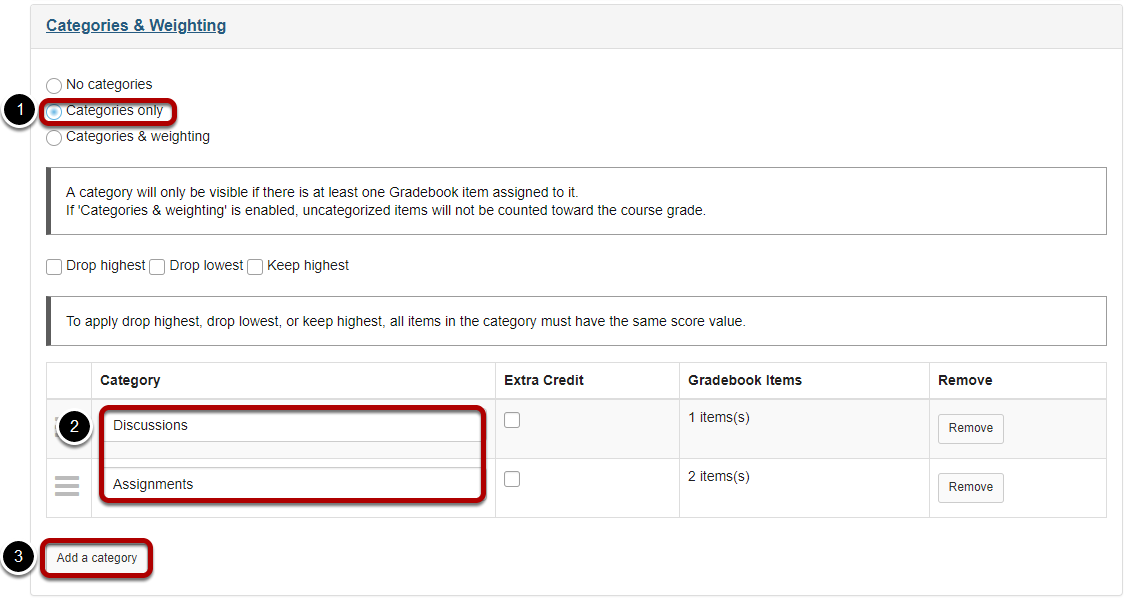
The Categories only option is used for grouping similar gradebook items, like all homework, or all projects. This option also allows you to drop grades within categories. If all items within a category have the same point value, you can choose to drop the highest grade, keep the highest grade, or drop the lowest grade within the category.
The Categories and Weighting option groups items and supports weighting of grades. For example, if all homework assignments added together comprise 20% of the final course grade, projects make up 50% of the course grade, and exams are worth 30% of the final grade, this option will allow you to group the items and weight them accordingly.
Note: If you use Categories, you must have at least one Gradebook Item in each category to enter grades. For example, if you have a Final Exam worth 30% of the final grade, you will need a Final Exam category AND a single Final Exam gradebook item within that category.
Tip: If you would like to be able to drop grades, you should select either Categories only or Categories & Weighting.
Adding categories.
Adding weighting.
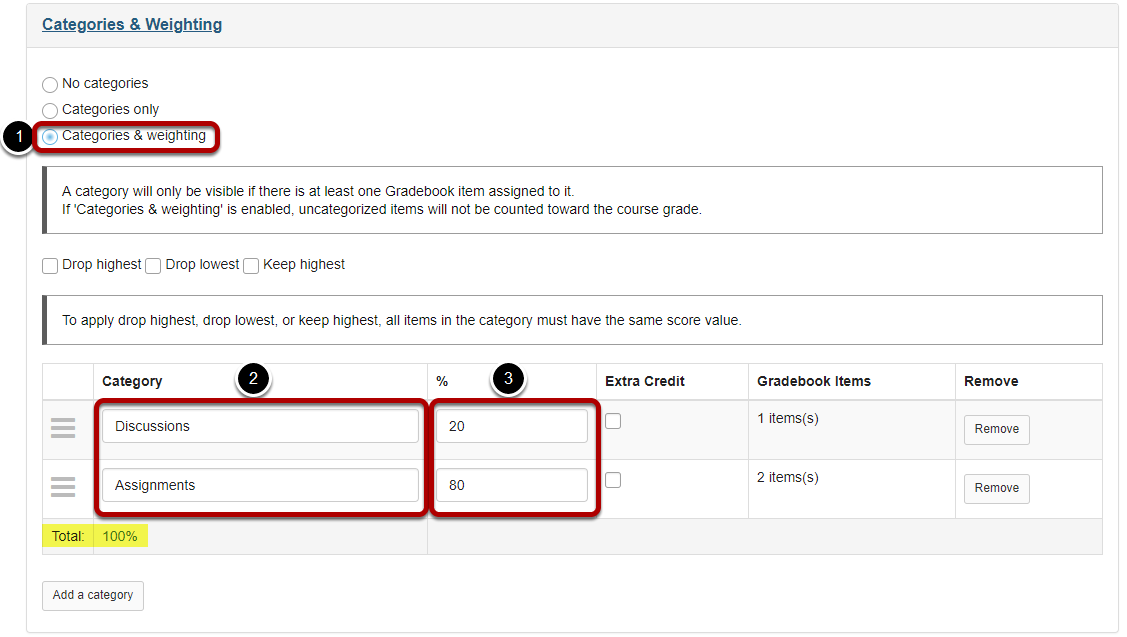
Note: The percentage for all categories taken together must equal 100%.
Enabling drop lowest and/or keep highest.
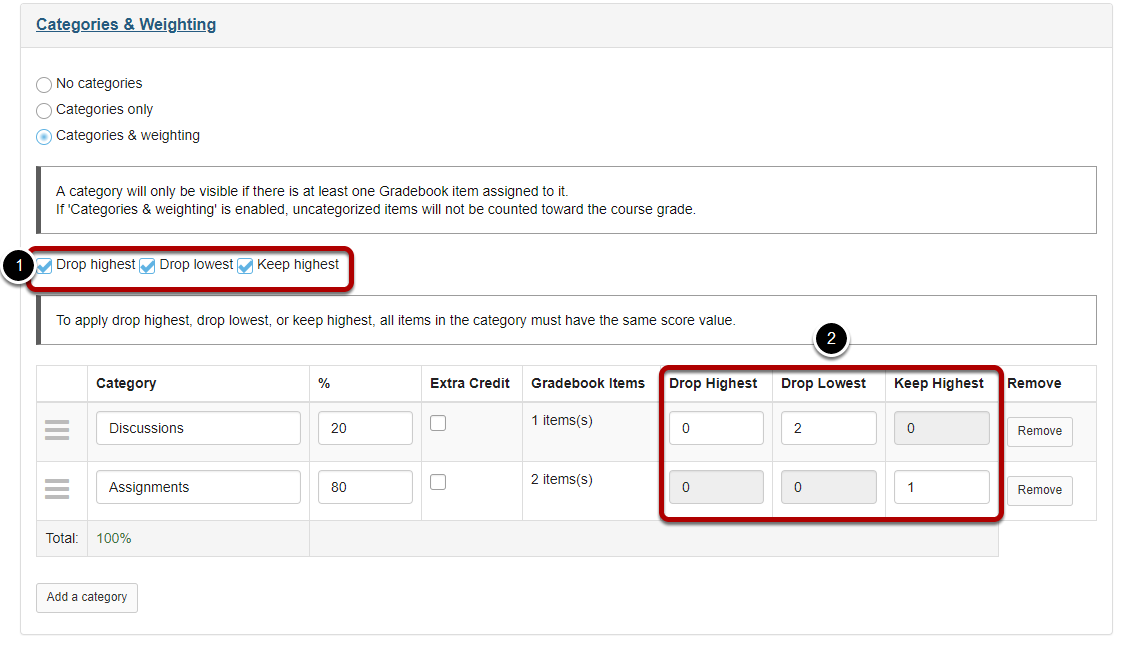
If you selected either Categories only or Categories & Weighting, the enable drop/keep options will appear. All items within a category must have the same score value in order to use the drop/keep options for that category.
Tip: Many faculty prefer to use Keep Highest as opposed to Drop Lowest, since it reflects a more accurate running total of student grades during the course of the term. Items that students have not yet completed are not dropped automatically, so one or more higher scores may be dropped until all items have been completed.
Extra credit category.
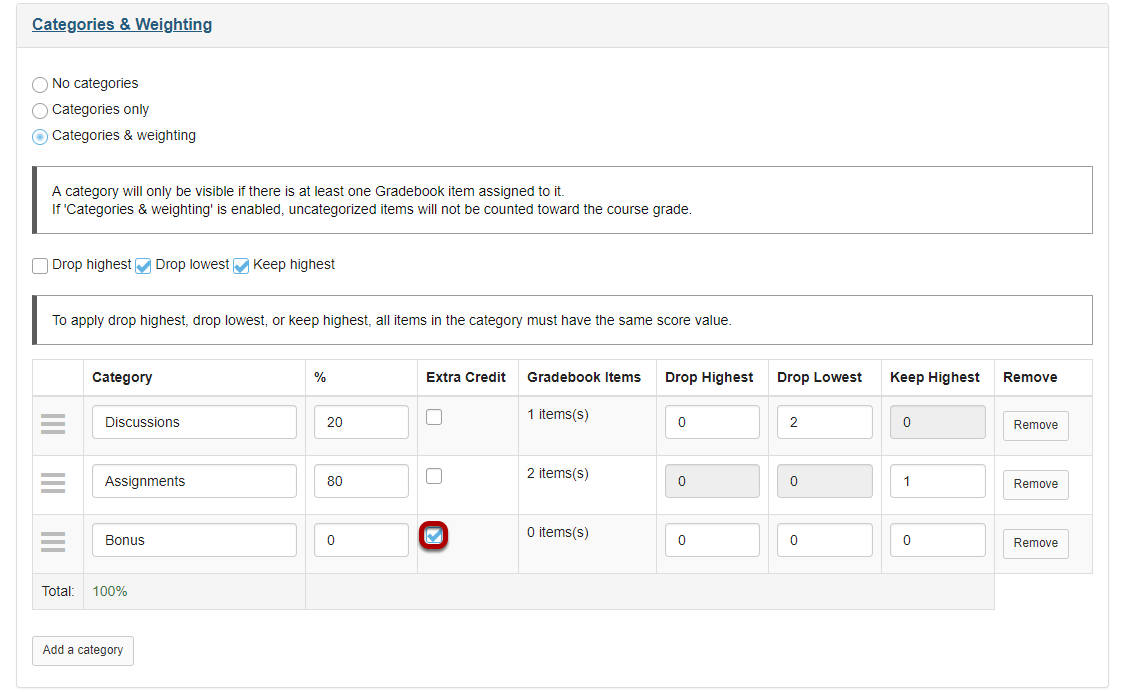
If you would like to designate a category as extra credit, select the check box in the Extra Creditcolumn next to the category. Extra credit items add to the student's total grade, but points do not detract from the overall grade if not completed. For more information on extra credit, see How does extra credit work?
Tip: Both entire categories and individual gradebook items may be designated as extra credit. However, you cannot have an extra credit item within an extra credit category.
Reordering categories.
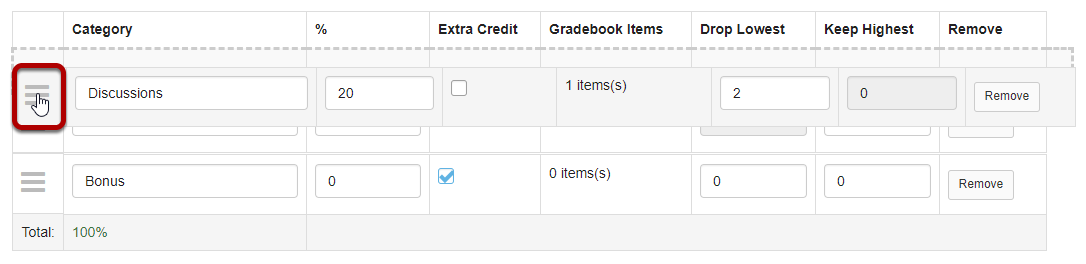
You may drag and drop to reorder categories. Click on the reorder icon to the left of the category and drag it to the new location.
Deleting categories.
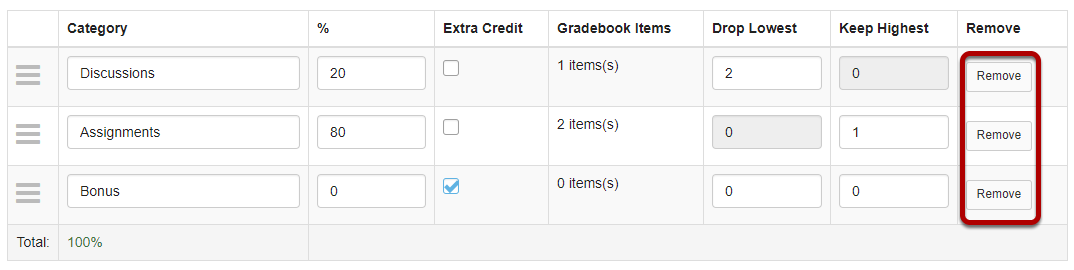
If you would like to delete a category, click the Remove button for that category.
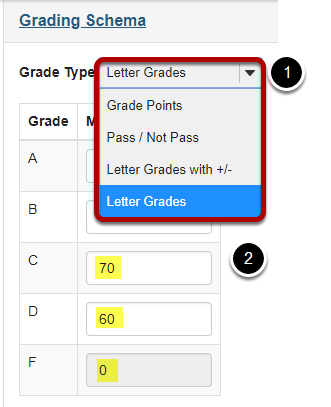
Grading Schema.
Save your changes.
Once you have finished with your gradebook setup, don't forget to click on the Save Changes button at the bottom to save your changes.
How are grades calculated in Gradebook?
Gradebook automatically calculates a course grade based on the number of points scored out of the total points submitted (i.e., a running grade). Ungraded items will not be included in the course grade calculation, so the course grade will not necessarily reflect the student's true score. To include ungraded items in the course grade calculation, you need to enter a 0 (zero) for those items.
To exclude a gradebook item from the course grade, you can edit the gradebook item and deselect Include this item in course grade calculations. A crossed-out calculator icon will appear next to the grade item title to indicate that it is not included in the course grade calculation.
Extra credit points are excluded from the total possible points available, but included in student grade calculations for points awarded. Seefor more information on extra credit gradebook items and categories.
Note: Students can't see their grades for an item unless you select Release this item to students when editing the gradebook item.
Example of a non-weighted gradebook calculation:
If your gradebook does not have weighted categories, the calculation is relatively simple. The Course Grade is the total number of points awarded divided by the total points possible. Let's look at an example of this below.
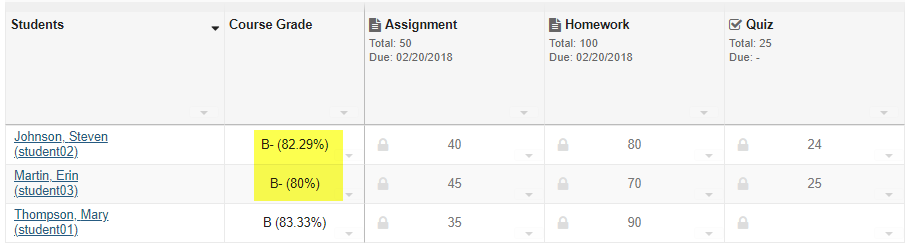
Assignment is worth 50 points.
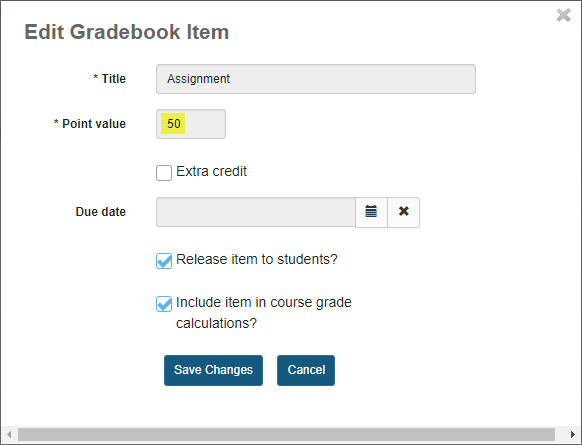
In this example, the Assignment has a total points possible of 50 points.
Only Assignment has been graded.
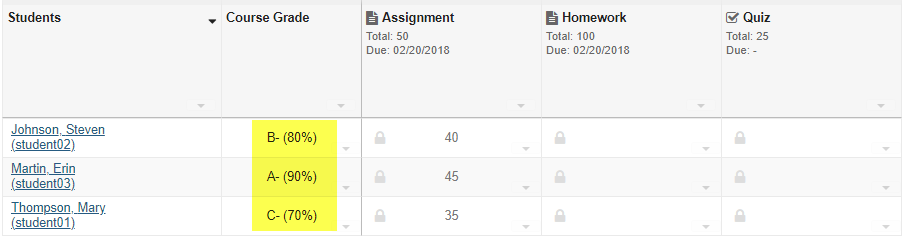
Notice the scores for each student.
The Homework and Quiz are not calculated in the course grade since they have not been assigned any scores.
Homework is worth 100 points.
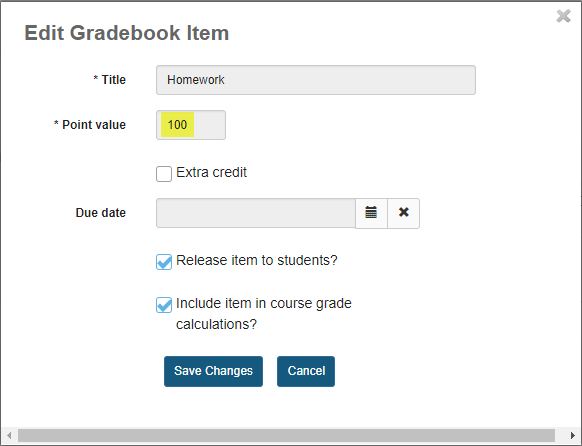
Cumulative grades after Homework is graded.

Now, notice the updated course grades for each student. The scores for Assignment and Homework are added together, and then they are divided by the total possible points for those two items combined.
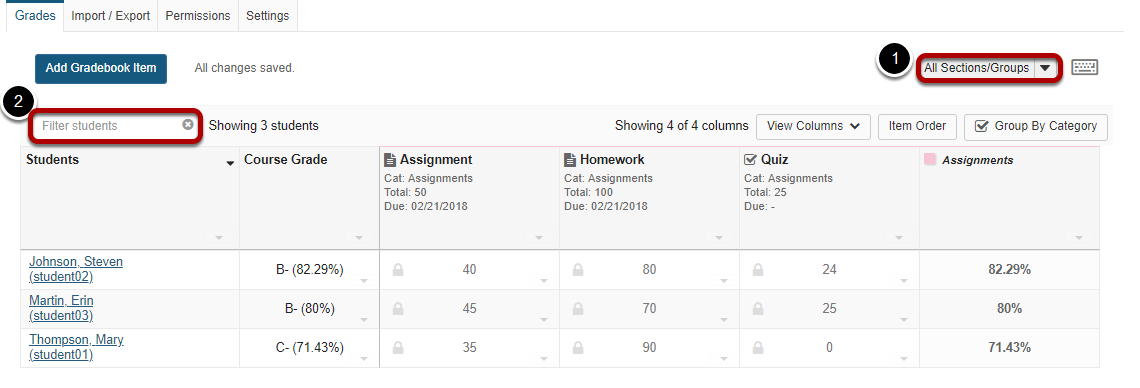
Not all Quizzes have been submitted.
Only the grades that have been entered are calculated. Student01 has not submitted a quiz, so her grade is still (90 + 35) / 150 or 83.33%.
The other students have submitted quizzes. Quizzes are worth 25 points. so their scores are:
The student did not submit the quiz.
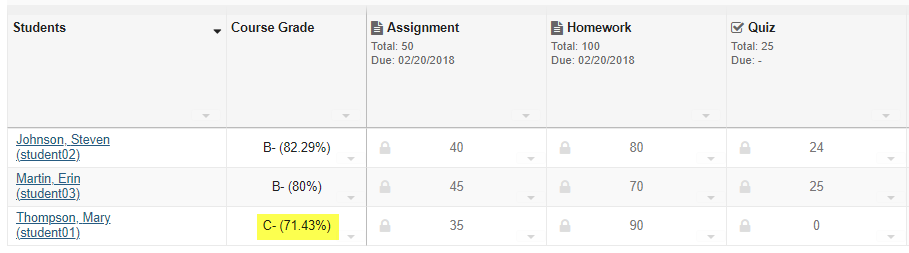
Since student01 did not turn in the quiz and was assigned a zero on that item by the instructor, now the grade is (90 + 35) / 175 = 71.43%
Example of a weighted gradebook calculation:
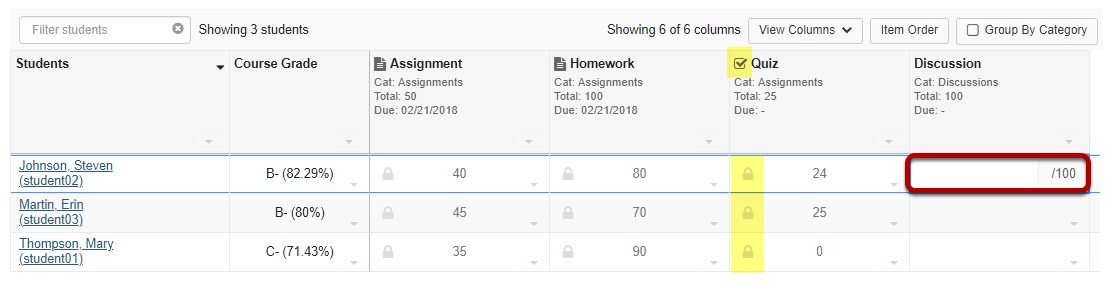
On the other hand, if you have weighted categories in your gradebook, the calculation is a little more complex. First, all of the items within each category are averaged, taking the total points awarded within the category, and dividing that by the total possible points within the category. Then, all category averages are multiplied by the category weighting and added together to determine the final score.
The example below shows the grade for an individual student in a weighted gradebook with three categories: Assignments (50% of course grade), Discussions (20% of course grade), and Quizzes (30% of course grade).
Student01 course grade with ungraded items.

In this example, student01 has not received a score for Assignment 3, Quiz 2, or Quiz 3. Those three items and their associated possible points are automatically excluded from the grade calculation. Therefore, the grade is calculated as follows:
Average within each category = total of awarded points divided by total possible points
Weighted course grade = category averages multiplied by category weighting and added together
Student01 with no ungraded items.
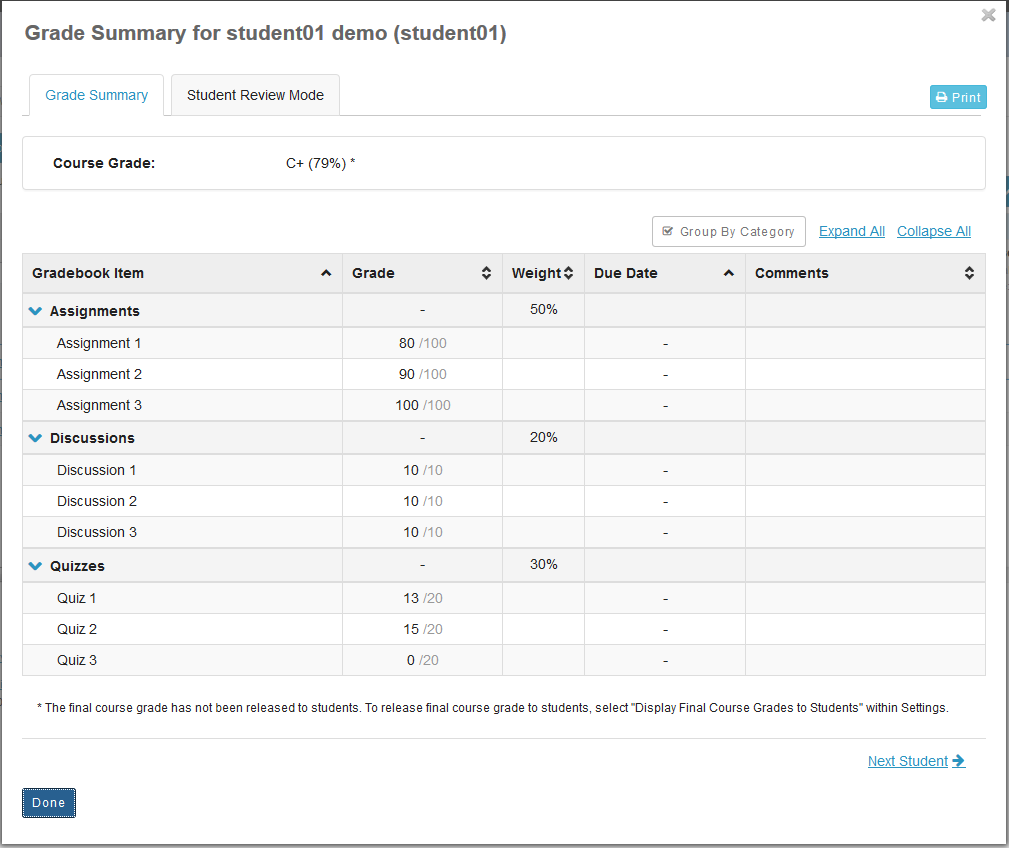
Now, demostudent01 has received grades for all items, including a zero for Quiz 3 which the student failed to submit. The grade is recalculated as follows:
Average within each category = total of awarded points divided by total possible points
Weighted course grade = category averages multiplied by category weighting and added together
Setting all ungraded items to zero.
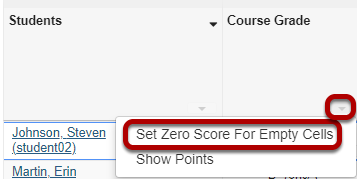
If you would like to enter zeros for all ungraded items in the course, select the down arrow in the Course Grade column and then select the Set Zero Score for Empty Cells option to update all items at once.
Note: This option should be used with caution, as it will enter a zero for any items not yet scored. It is best used at the end of the term after all submitted work has been graded.
How do I add items to the Gradebook?
Click the Add Gradebook Item button.
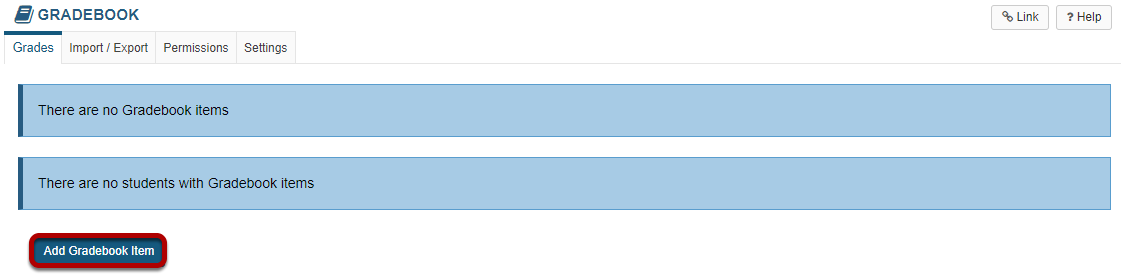
Note: Assignments, Tests & Quizzes, and Student Content in Lessons can be sent to the gradebook from within the respective tools when the item is posted or published. There is no need to add those items manually in the gradebook.
Instructors typically add items to the gradebook manually for things such as:
Click the Add Gradebook Items button to manually add items to your gradebook.
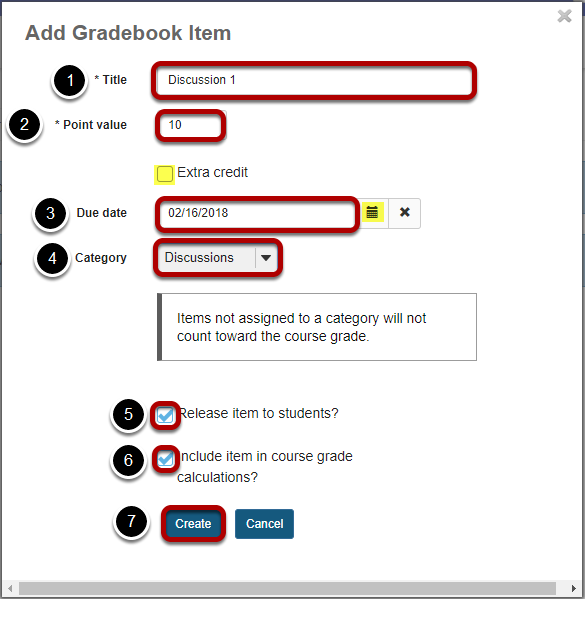
Item settings.
View gradebook items.
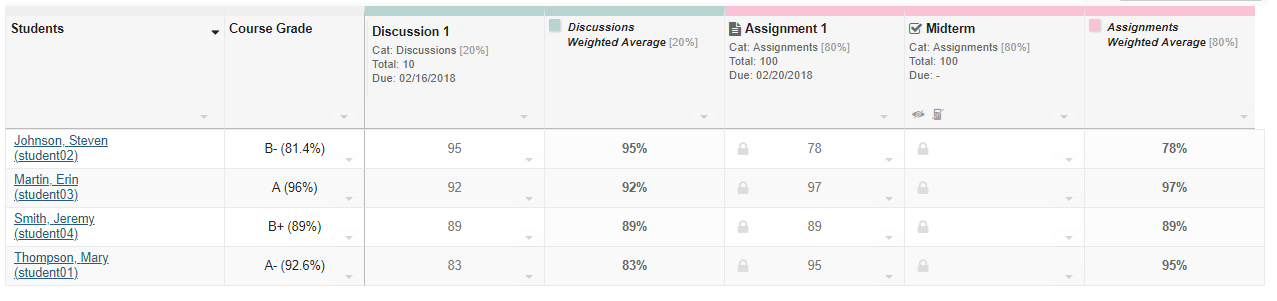
After you have added items to your gradebook, you will be able to view a list of all gradebook items on the Gradestab (which is also the tool landing page).
If you have categories and your gradebook and the Group by Category option is enabled, each category will be color-coded and you will also see the category averages displayed at the far right of each category.
Items coming from other tools.
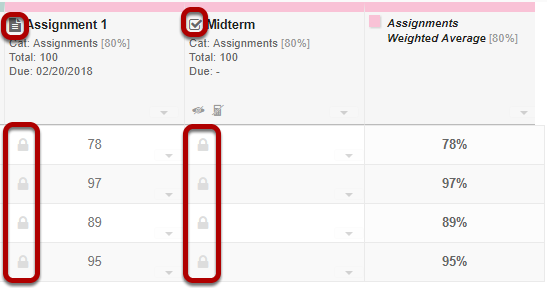
Notice that any items which are coming from Assignments or Tests & Quizzes will show a grayed out padlock icon in each cell and will also display the tool icon in the column label.
Items not included in grade calculation.
Any items not included in the grade calculation will display a crossed out calculator icon.
Items not released to students.
Any items which are not released to students will have crossed out eye icon and a crossed out calculator icon to indicate that they are not visible to students, and that they are not being calculated as part of the course grade.
How do I enter and/or edit grades in Gradebook?
Gradebook allows instructors to calculate and store grade information for items that are completed either online or offline. Manually added items may be entered and edited directly within the Gradebook interface.
Note: Grades that are being sent to the Gradebook from other tools, such as Assignments or Tests & Quizzes, are managed within their respective tools. You do not need to enter or edit them via the Gradebook.
Search or filter your list of students. (Optional)
Gradebook displays a list of all the students enrolled and active in your site. You may also filter the gradebook to view students by:
Click in the appropriate cell to enter a grade.
You will see a spreadsheet view of all the existing gradebook items in your course.
Click within the appropriate cell to enter a grade. The cell contents will change to show a score entry field out of the total number of points for that item. You may click out of the cell, select the Enter key, or use the up or down arrows to navigate to different cells. Gradebook supports spreadsheet-style data entry, similar to Excel or Google Sheets.
Note: Items with the tool icon in the column header and grayed-out padlock icons in the cells (highlighted in yellow in the image above) are being sent to the Gradebook from other tools. You cannot edit those grades from the Gradebook, although you can view them from here.
Saved grades.

You will see a green check mark and highlighted cells displaying your changes to indicate when a grade has been saved.
Set score for empty cells.
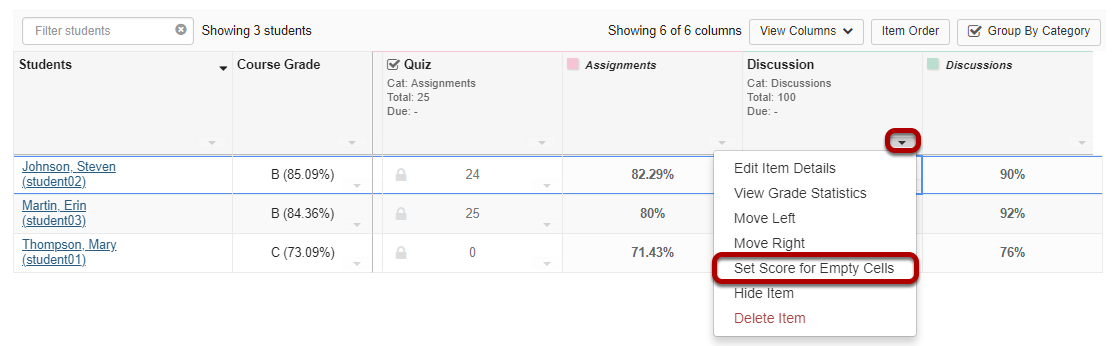
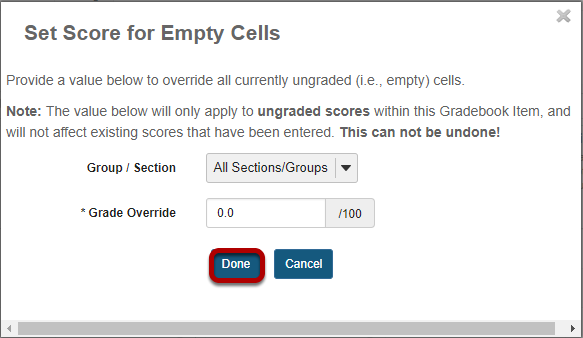
If you would like to set a score for all empty cells for a specific gradebook item, select the down arrow within the column header row and then choose the Set Score for Empty Cells option.
Enter the desired score and click Done.
View grade log.
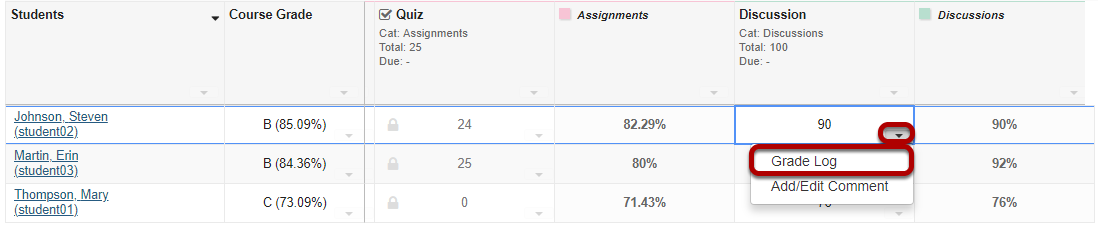
To view the grade log, select the down arrow within the cell for a particular student score and then choose the Grade Log option.
The grade log will display.
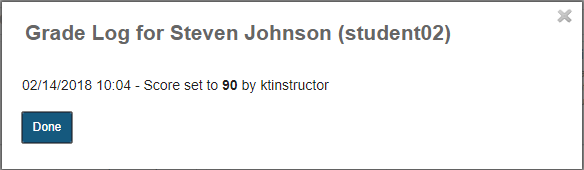
The grade log shows any changes to student score, including the date and time of the change, as well as the change in score and the username of the user that made the change.
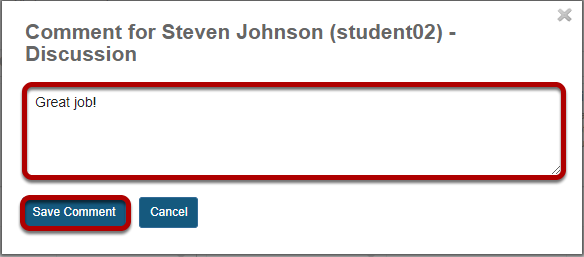
Add/edit comments.

If you would like to enter comments along with the score, select the down arrow within the cell for a particular student score and then choose the Add/Edit Comment option.
Enter your comment and click Save Comment.
View comment icon.
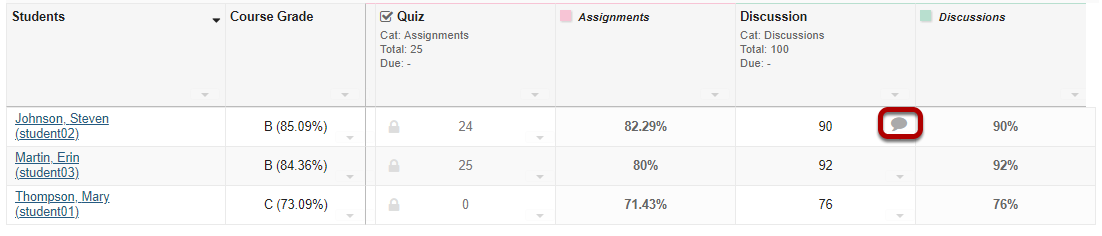
The comment icon will display within the cell, indicating that there is an instructor comment associated with the score. Click on the comment icon to view the comment.
How do I export grades from Gradebook?
Click Import/Export.

Select Custom Export. (Optional)
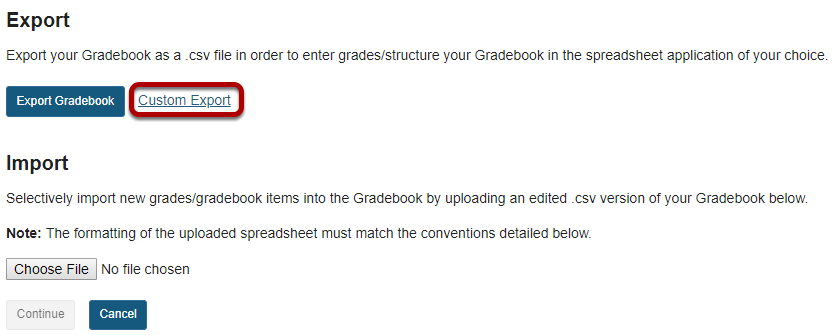
You may set the options for customized exports by clicking the Custom Export link.
Choose the items you would like to include in your export.
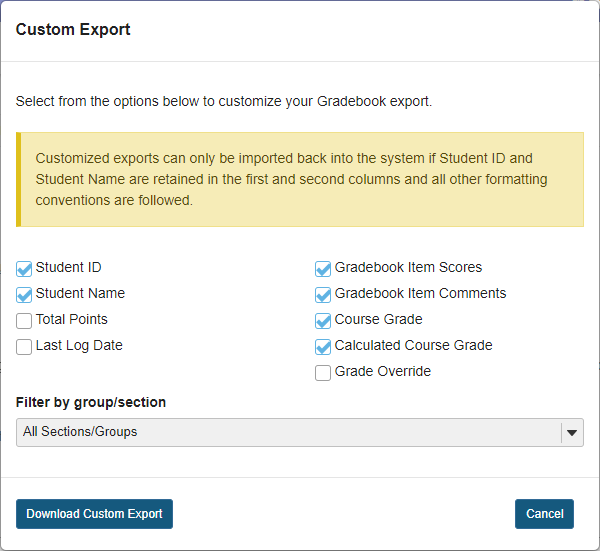
Click Download Custom Export.

How do I format my file for importing grades into Gradebook?
Instructors can manage grades offline in a spreadsheet and then import the file to update the course Gradebook. You can also import a file as a method for quickly creating several gradebook items at once.
The easiest way to obtain a file in the proper import format is to export your Gradebook and use that file as a template. This way it will contain all of the student information in your site, as well as any existing gradebook item information in your site.
Note: You can only update graded items that have been created within the Gradebook. Graded items that come from other tools, such as Assignments or Tests & Quizzes, cannot be updated via file import.
Click Import/Export.

Click Export Gradebook.
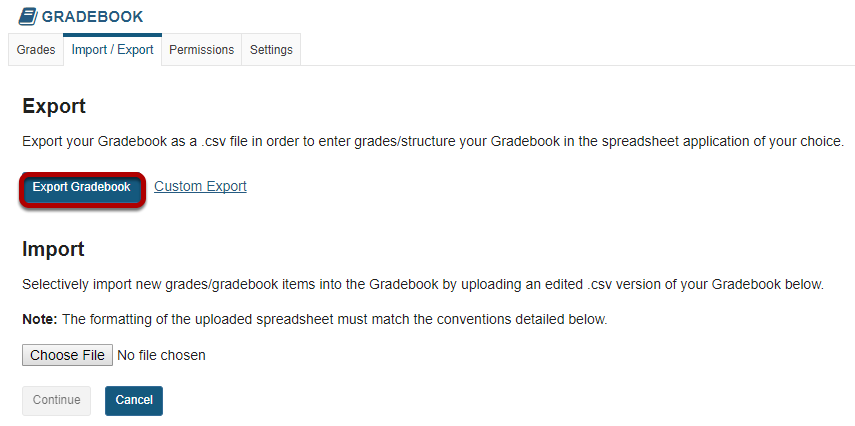
The export will download as a .csv file.

Open the file in your preferred spreadsheet application.
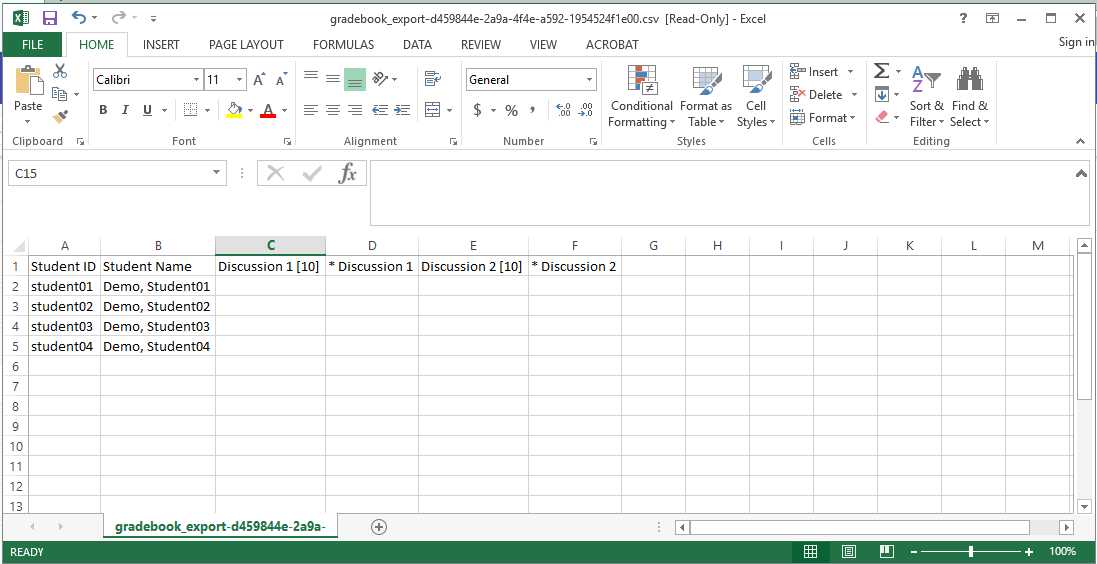
Add columns, grades, and/or feedback as needed, and save your file.
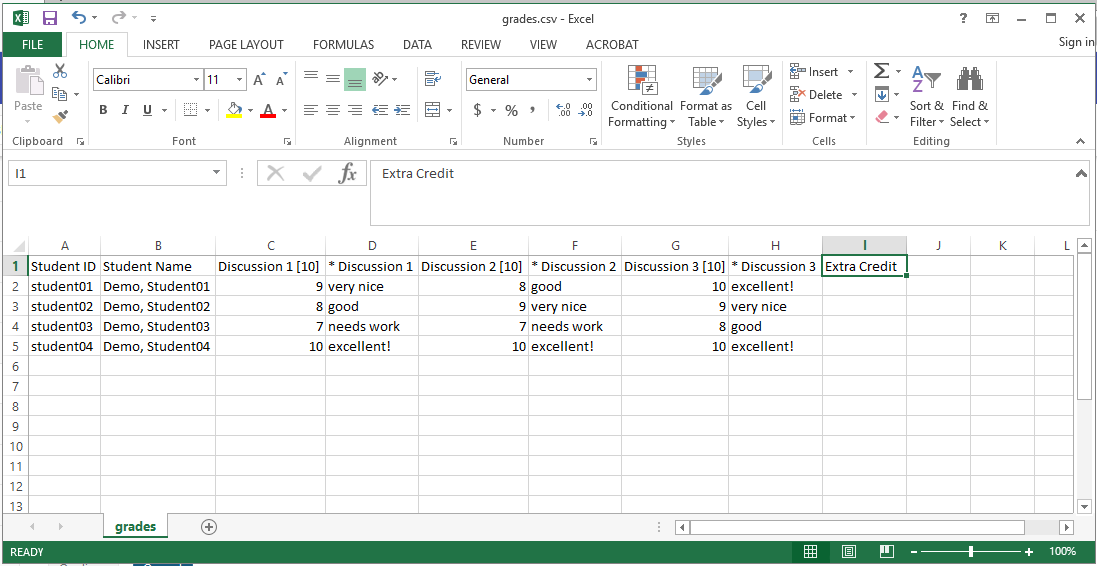
The import file must be in .csv file format. Also, be sure to use the following conventions:
Note: You may add new items to the gradebook by including new columns in your file. If you add any new columns without a point value in brackets, Sakai will prompt you to indicated the number of points upon import.
Return to Gradebook > Import/Export to browse for and select your import file.
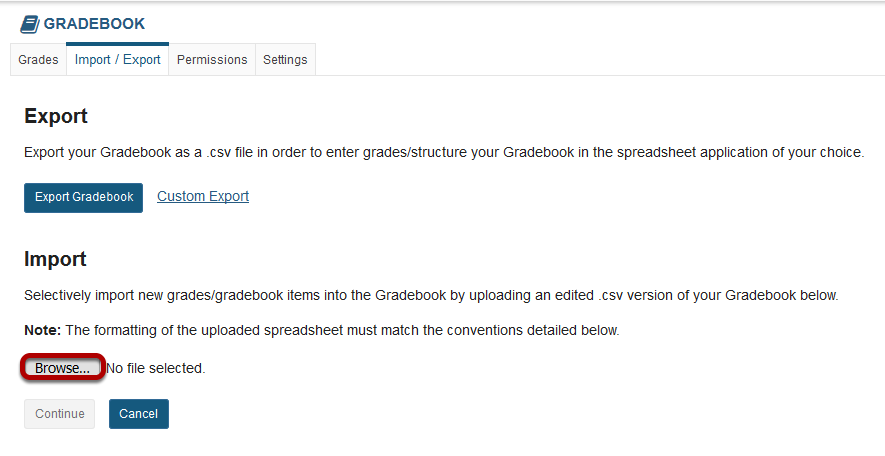
For more information on importing your items into Gradebook, see How do I import grades into Gradebook?
How do students view their grades in the Gradebook?
View your grade report.
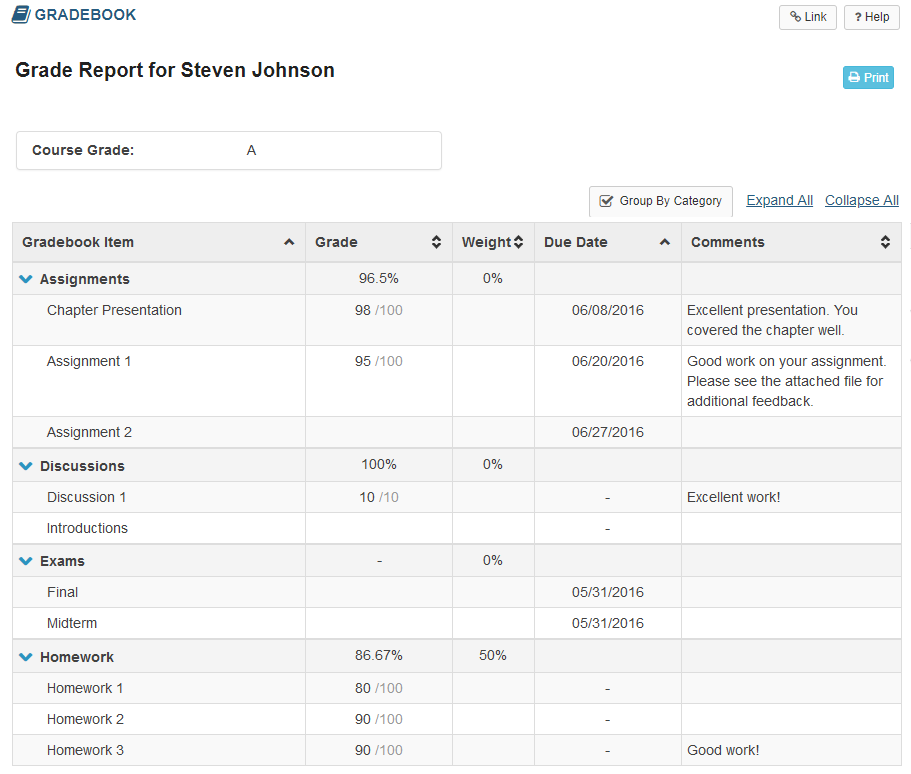
Note: While grader comments will appear in the Gradebook for items such as assignments and quizzes, remember that additional instructor feedback and/or graded file attachments may also be available via the Assignments and Tests & Quizzes tools.
Site Info
What is the Site Info tool?
The Site Info tool contains many of the course management features needed for instructors to customize and manage their courses. Instructors may edit and rearrange the tools on their course toolbar, add participants, manage groups, publish or unpublish their course, import content from another site, and track participant enrollment activity.
If you have limited site permissions (i.e. participant), you'll see only the site's description and your group memberships, if applicable, in Site Info.
Note: The functions of the Site Info tool are also available through the tool, which is available from the Tool Menu when you are in My Workspace.
To access this tool, select Site Info from the Tool Menu of your site.
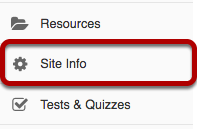
Select the Site Info tool from the Tool Menu of your site.
View Tabs, Site Information, and Participant List.
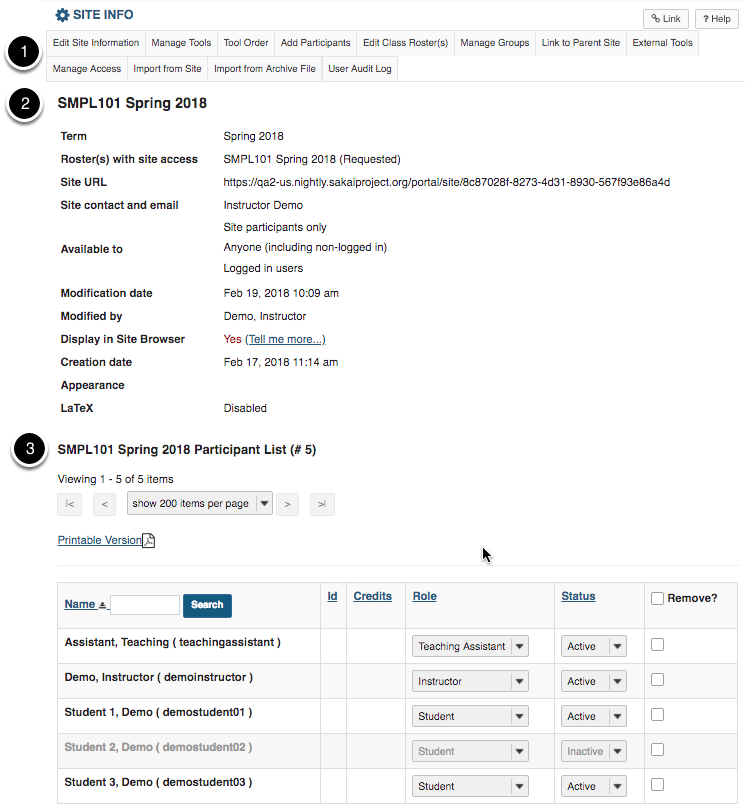
View Site Info screen including:
- Site Info Tabs - Tabs for instructors to customize and manage the site.
- Site Information - Information about the site such as Site Title, Term, Roster, Site URL, and Contact Information.
- Participant List - A list of site participants with their Name, Role, and Status.
How do I edit the site information?
Click Edit Site Information.

Click Edit Site Information from Site Info tabs.
View Site Title and Term

Select site language.

If desired, you can change the default language for your site to any of the available languages listed. Languages in this list will vary depending upon the language pack(s) installed on your instance.
Click on the desired language to select it.
Enter a site description.
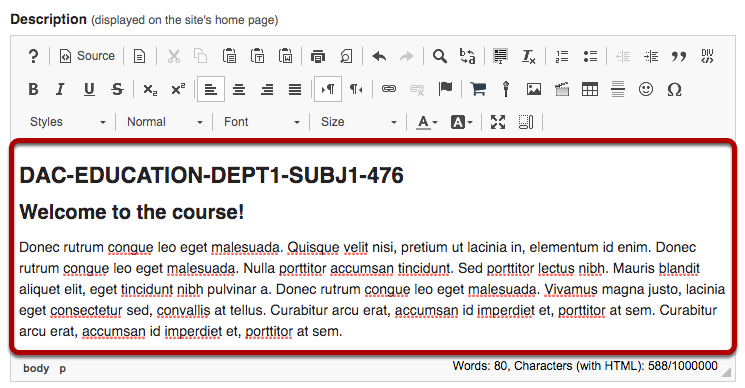
The information entered into the description area will appear on the site's home page. You may use the Rich Text Editor here to enter your description.
Enter a short description.

You may also enter a short description (with a maximum of 80 characters). This short description will display in the publicly viewable list of sites.
Select a theme.
If your instance has a selection of themes or "skins" installed, you may select a theme from the drop-down menu. Click the down arrow to view available themes. The theme controls the banners, colors and images displayed throughout your site.
Enter the site contact information.
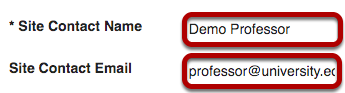
Enter theSite Contact Name andSite Contact Email for the site contact. (This is typically the site creator, owner, or instructor.)
Click Continue.
Click Continue to save your changes.
How do I add tools to my site?
Sakai has many different tools available to use in your course or project site. You may choose which tools you want to use and may add or remove tools at any point.
Click Manage Tools.

Select your set of tools.
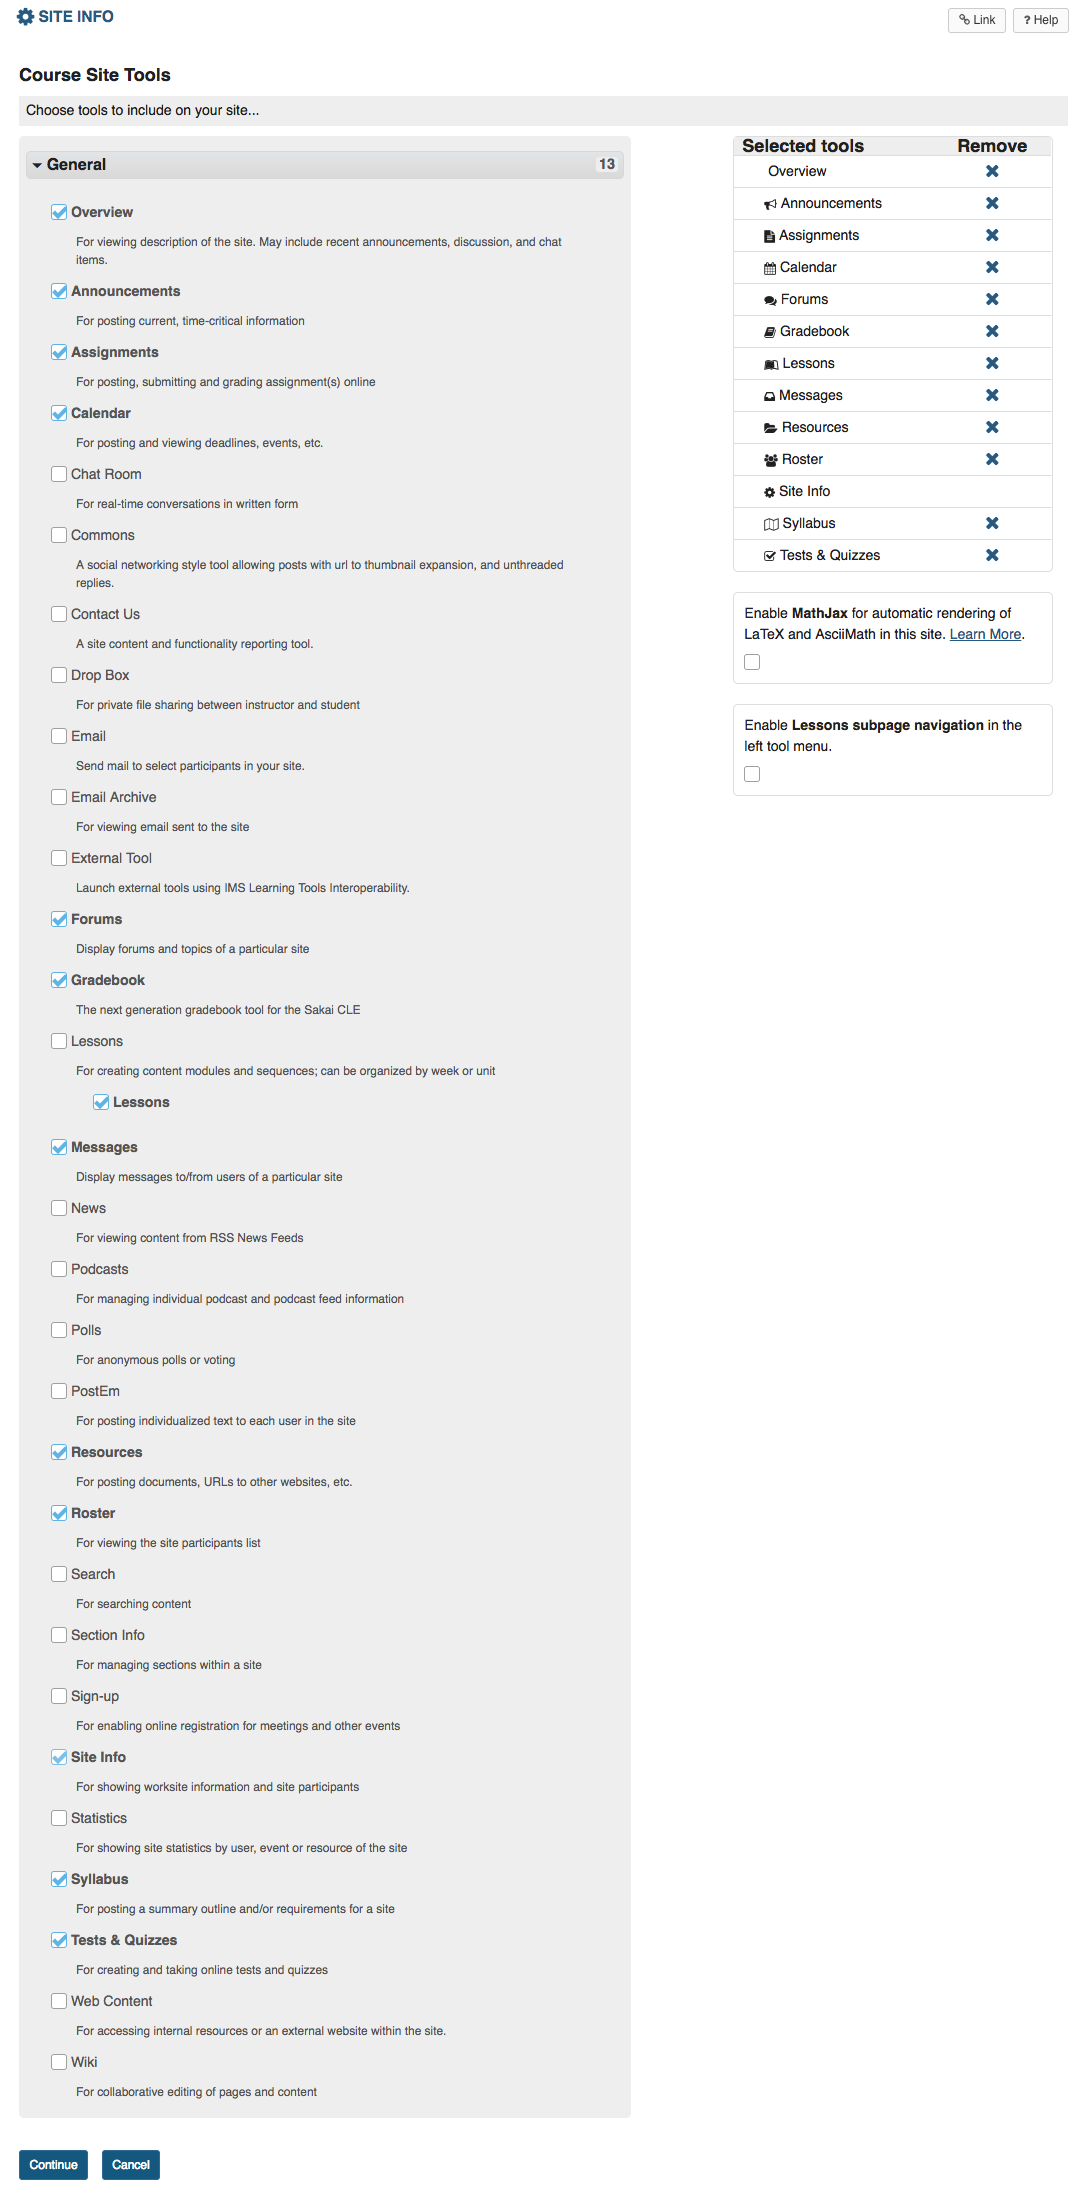
As you select tools from the General list on the left side of the screen, they are added to the Selected tools list on the right side of the screen. The right side of the screen displays the tools you have selected.
Below the Selected tools you can enable MathJax for specific tools in your site by checking the box. See more information on enabling LaTeX at "How do I add LaTex language to my course site?"
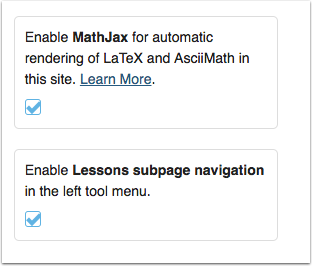
In addition, you can enable Lessons subpage navigation in the left tool menu by checking the box. See "How do I enable Lessons subpage navigation in the Tool Menu?" for more information.
Add multiple instances of some tools. (Optional)
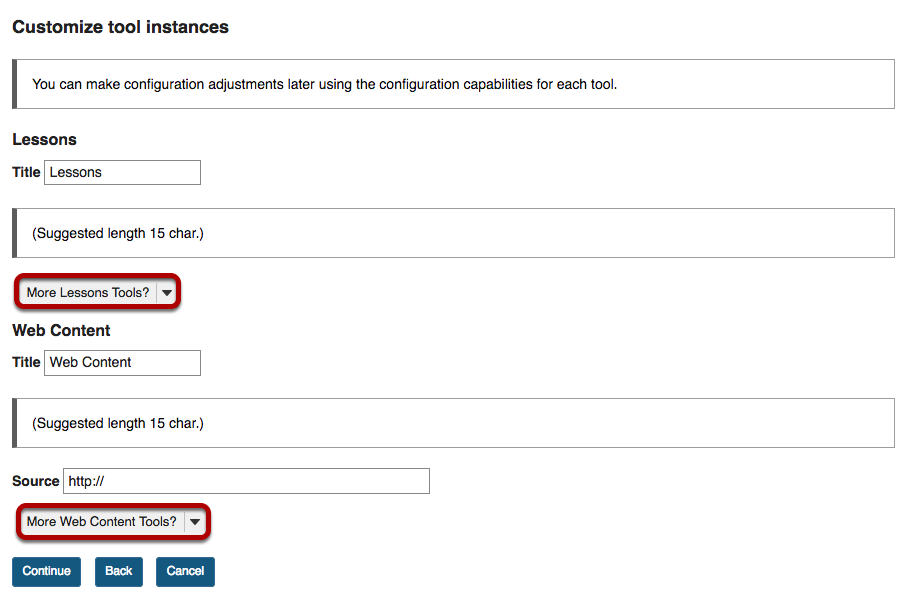
For some tools such as Lessons and Web Content, you can add multiple instances of the tool.
The Lessons tool may be used as a single tool on the Tool Menu where students click to see all Lessons, or there can be multiple Lessons tools added to the Tool Menu so that each tool is a separate Lesson. See the "Lessons tool tutorial" for more information.
The Web Content tool points to any URL you enter and you may create as many of these as you want.
Click on the More Lessons Tools? or More Web Content Tools? drop-down menus to add additional instances of these tools.
Example: Multiple tool instances.
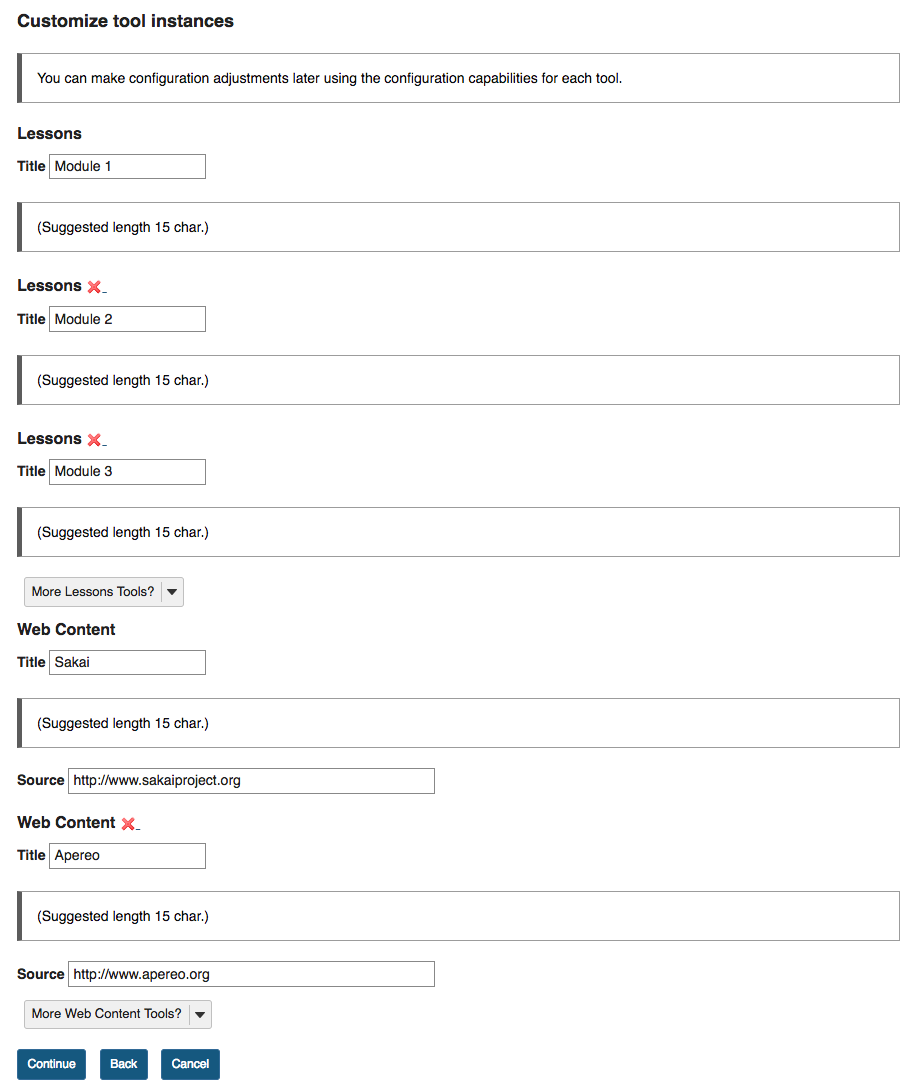
The example above shows three Lessons tools (Module 1, Module 2 and Module 3) and two Web Content tools (Sakai and Apereo).
Click Continue.
Once you have made all of your tool selections, scroll down and click the Continue button to save your customizations.
Confirm tool selection
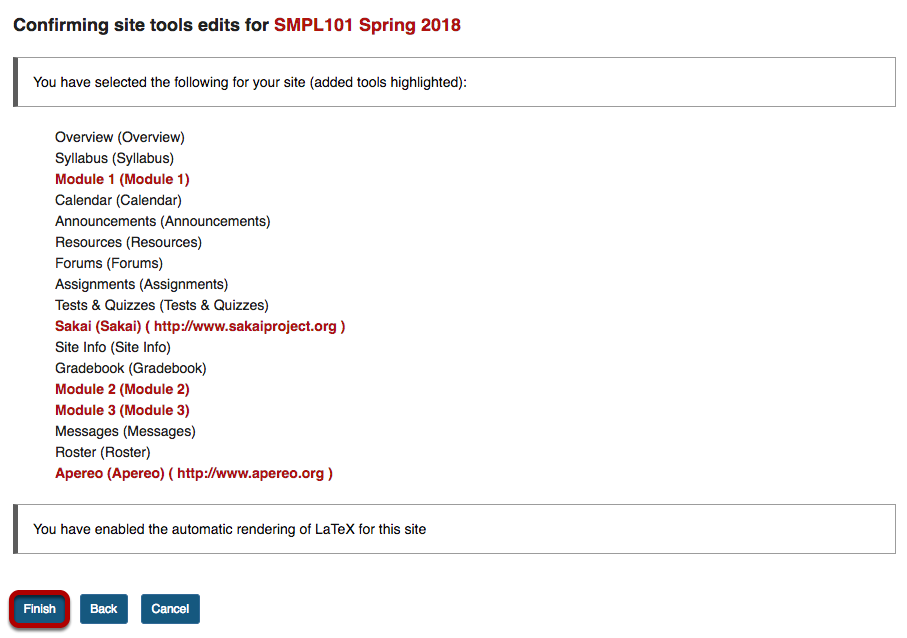
New tools added are shown in red font. Confirm that these are tools you want to add and click the Finishbutton. New tools are typically added to the bottom of the Tool Menu once you save your changes. See the "How do I rearrange or rename the items in the Tool Menu?" tutorial for instructions on how to change the tool order.
How do I rearrange or rename the items in the Tool Menu?
The Tool Menu can be customized by the instructor of the course to modify the order or appearance of menu items in the site. Tools can be renamed, hidden from students, locked, or deleted.
Click Tool Order.

Click Tool Order from Site Info tabs.
Drag and Drop items to rearrange the tool order.
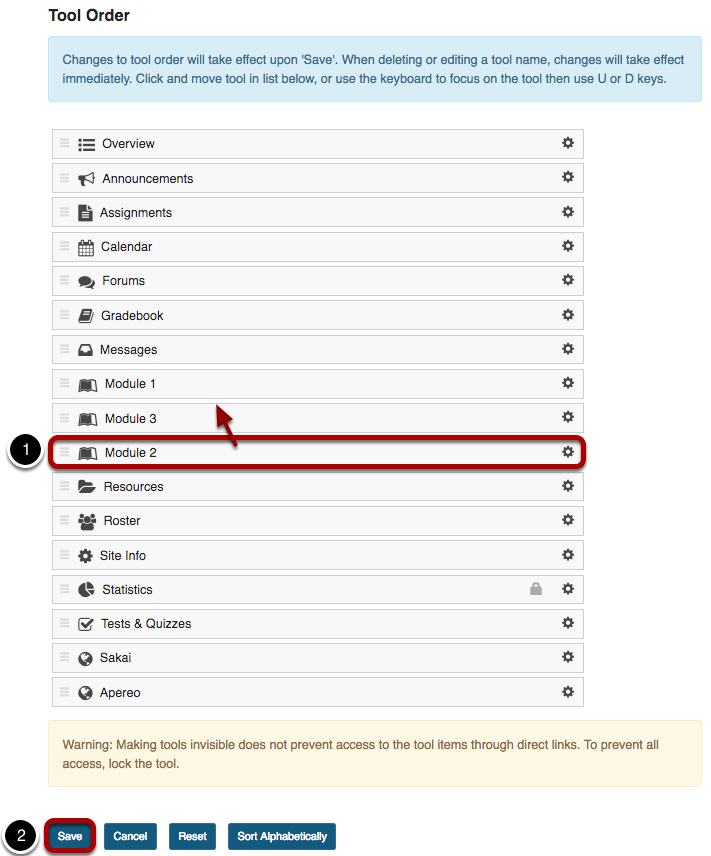
- Drag and drop tools to rearrange the order of tools in the menu.
- Click Save at the bottom of the screen to save your reorder.
Sort tools alphabetically.

Click the Sort Alphabetically button at the bottom of the page to arrange all of the tools in alphabetical order by title.
Rename a tool.
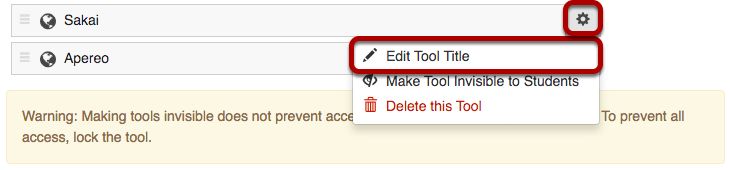
Click the gear icon to go to the tool settings. Then, select Edit Tool Title from the drop-down menu.
Type the new name for the tool.
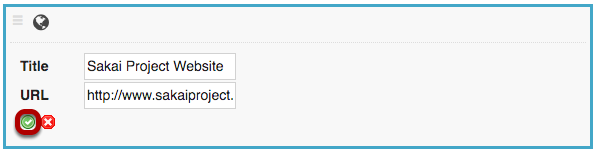
In this example, the Sakai tool was renamed as Sakai Project Website. Click the green check mark to save your changes.
Hide a tool from students.
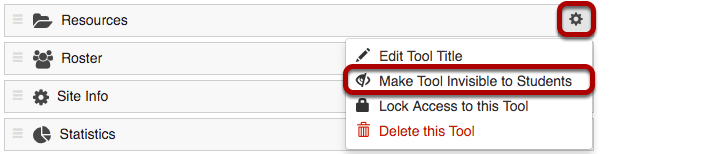
Hiding a tool from students allows them to access the tool from other areas of the site, but they do not see it listed in the Tool Menu.
Click the gear icon to go to the tool settings. Then, select Make Tool Invisible to Students from the drop-down menu.
Invisible tools are indicated by a "hidden" icon in the menu.
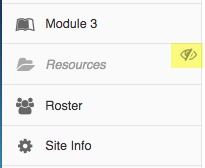
In this example, the Resources tool is hidden from students. But instructors see the tool as gray and italicized with a "hidden" icon to the right of the tool.
Lock access to a tool.
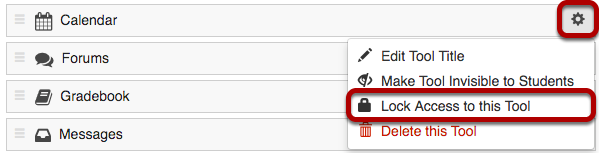
Locking access to a tool disables it for student use. Students will not see it in the menu, and they also will not be able to access that tool from other areas of the site.
Click the gear icon to go to the tool settings. Then, select Lock Access to this Tool from the drop-down menu.
Note: Not all tools are lockable. If the tool cannot be locked, that option will not appear in the drop-down menu.
Locked tools are indicated by a "padlock" icon Tool Order list.

In this example, the Calendar tool is locked with a padlock icon to the right of the tool.
Locked tools are hidden by default in the site Tool Menu.
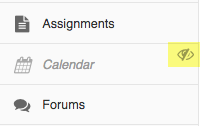
In this example, the Calendar tool is both hidden and locked. Instructors see the tool as gray and italicized with a "hidden" icon to the right of the tool, but students do not have access to the tool so they do not see it in the menu at all.
Delete a tool.

Deleting a tool has the same affect as removing a tool using the option in Site Info. It will remove the tool from the menu and deactivate it in the site, but it will not delete any content that exists within the tool.
Click the gear icon to go to the tool settings. Then, select Delete this Tool from the drop-down menu.
Note: Not all tools can be deleted. If the tool cannot be deleted, that option will not appear in the drop-down menu.
Save your work.

Once you have completed all of your changes, click the Save button at the bottom of the list.
How do I add users to my course or project?
For most institutions, student enrollment for registered courses is handled automatically through integration with the institutional student information system. However, if your institution allows site owners to add other participants such as TAs, Designers, etc., this article will walk you through the steps on how to add users.
Click Add Participants.

Click Add Participants from Site Info tabs.
Add participant information.
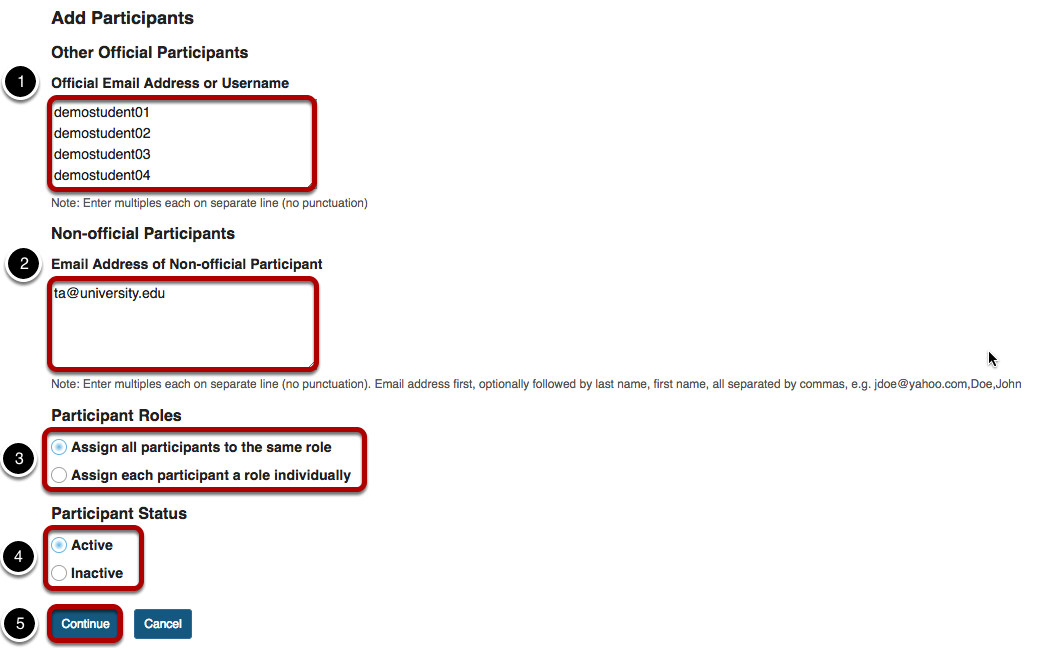
- For participants with official usernames, under "Other Official Participants", type each participant's username, one per line.
- For participants without official usernames, under "Non-official Participants", enter their email addresses, one per line.
- Under "Participant Roles", choose whether to give all your newly added participants the same role or different roles (i.e. student, instructor, TA, etc.).
- Under "Participant Status", choose whether to let your newly added participants use the site right away by selecting Active, or keep them from accessing the site for now by selecting Inactive.
- Click the Continue button to save.
Choose participant role.
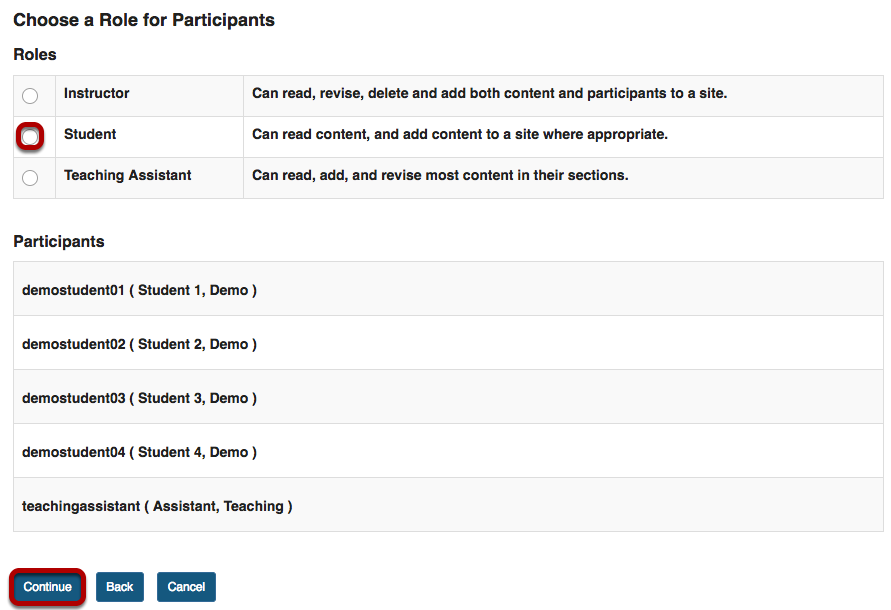
For the default option of Assign all participants the same role, select the radio button for the desired role and then click the Continue button.
Select individual participant roles.
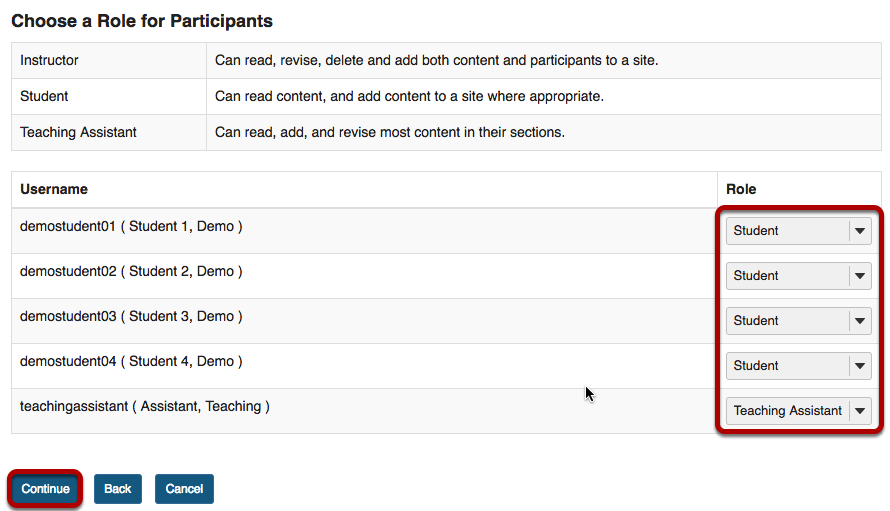
If you chose to Assign each participant a role individually, use the drop-down menus to the right of the participants names to select each participant's role, and then click Continue.
Choose to send or not send a notification email.
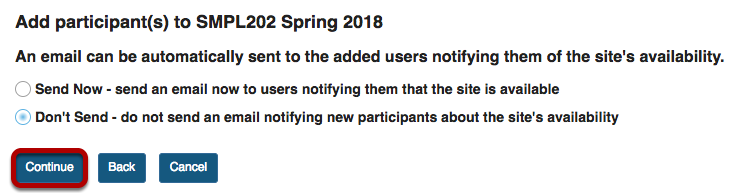
You may choose the Send Now option to send a notification email to participants if desired. The default setting is Don't Send.
Click the Continue button.
Confirm addition of participants.
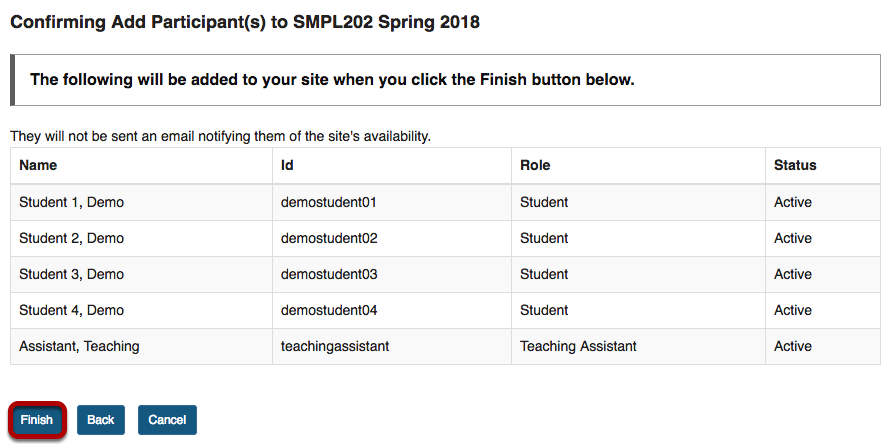
Review the list of site participants and their roles to confirm that they will be added to your site.
If the information is correct, click the Finish button.
How do I remove users from my course or project?
Note: Sakai does not destructively delete user data when removing users from a site. Therefore, if you remove a user from your site, and then later reinstate that user, all of the user's activity within the site will remain intact once you add the user back into the course or project.
Select user(s) to remove.
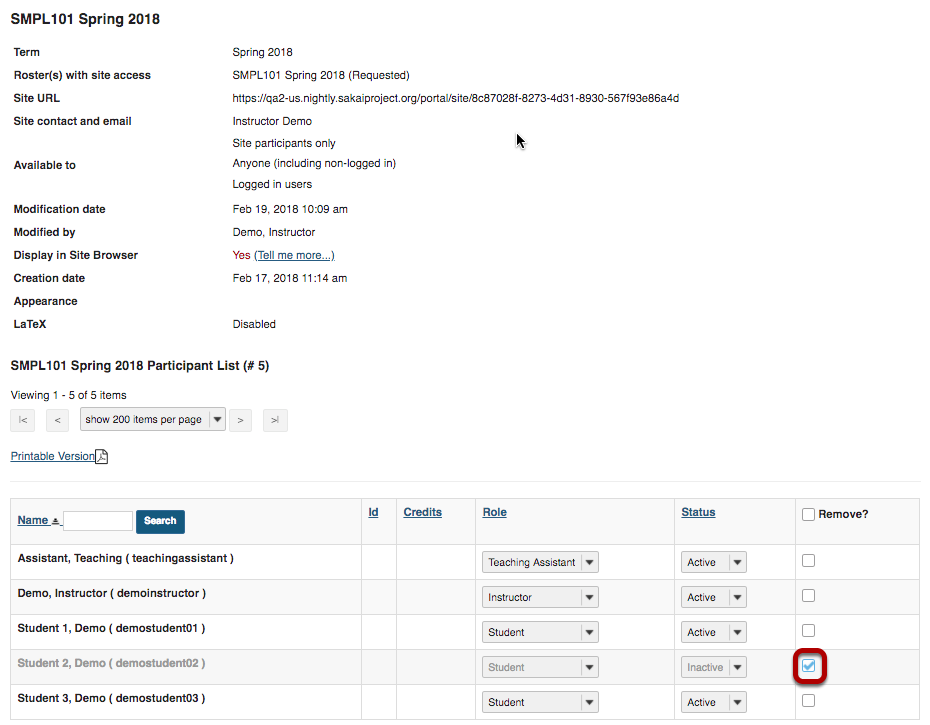 Zoom: Site Info participant list with checkbox in Remove? column selected fo studnet 02.
In the Remove? column, check the box in the row for the user(s) you want to remove from your site.
Tip: You can remove all users from the site by checking the box at the top of the column right next to the Remove? column header. However, be sure that you uncheck yourself so you don't remove your own access!
Click Update Participants.

Click the Update Participants button to save your changes.
How do I create groups?
You may create groups in your site in several different ways:
Once groups are created, group aware tools such as Assignments, Email, Resources, or Tests & Quizzes have options for restricting access by group.
Click on Manage Groups.

Click on the Manage Groups tab from Site Info tabs..
Manually create a group.

Click the Create New Group button.
Enter group information.
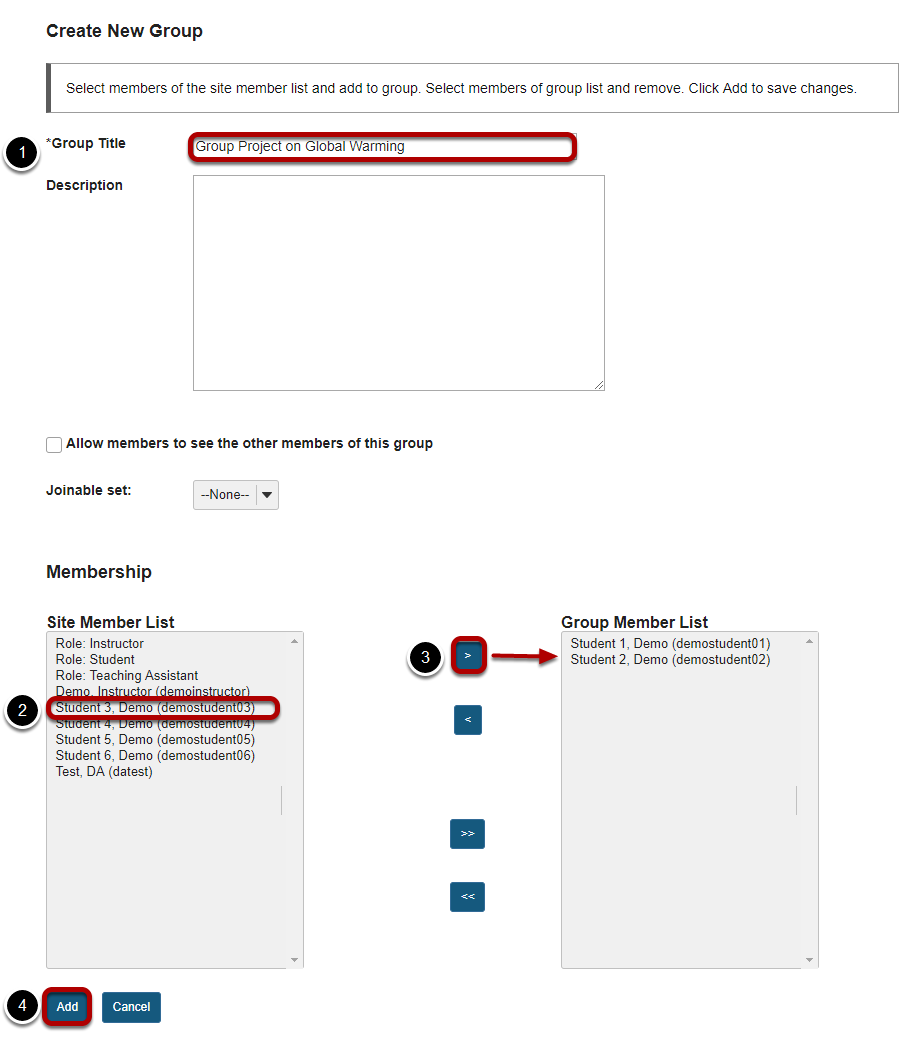
- Enter a Group Title for the group.
- In the Site Member List, click on a site participant/s in the membership list to select the user/s.
- Click on the right arrow button > to move the selected participant/s over to the Group Member List area.
- Once you have selected all of the desired group members, click on the Add button to create the group.
Tip: You may select more than one name at a time in the participant list by using SHIFT+Click to select a range of consecutive names, or CTRL+Click to select more than one non-consecutive name.
Create a joinable group.

Click the Create New Joinable Set button.
Specify the joinable set details.
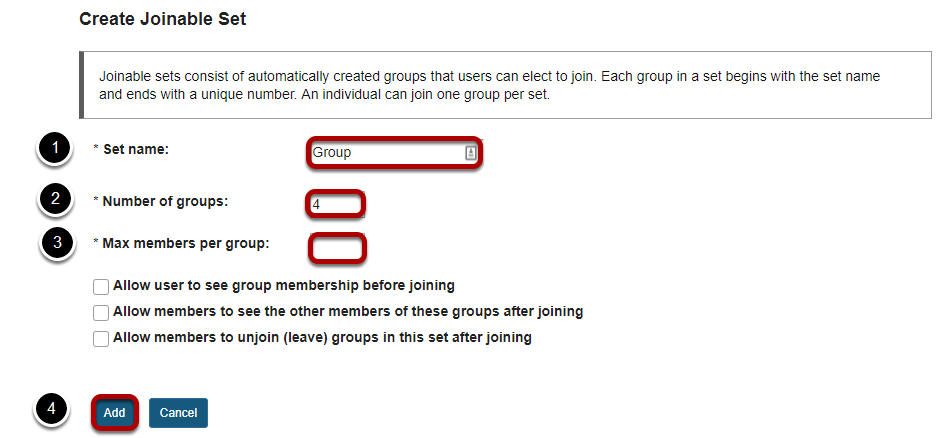
- You will need to enter a Set name for the set of groups. Each group will begin with the same name and end with a unique number.
- Indicate the Number of groups.
- Enter the Max members per groups.
- Click Add to create the joinable set.
Optionally, you may also select any of the following options:
- Allow users to see group membership before joining
- Allow members to see the other members of these groups after joining
- Allow members to unjoin (leave) groups in this set after joining
Note: Students will need access to Site Info to see and join any joinable sets of groups.
Automatically generate groups.

Click on the Auto Groups button.
Create groups by role.
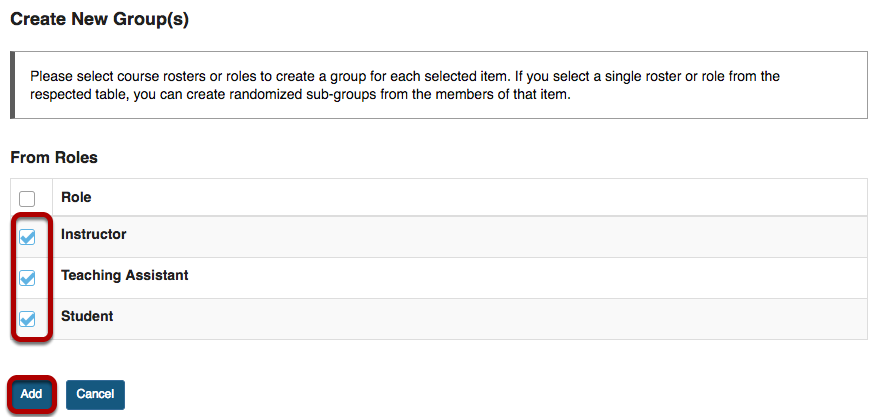
To create separate groups for different user roles in the course, select one or more roles and then click the Addbutton.
Tip: Click the Role checkbox to select all roles at once; click again to de-select.
Create random groups by number of groups.
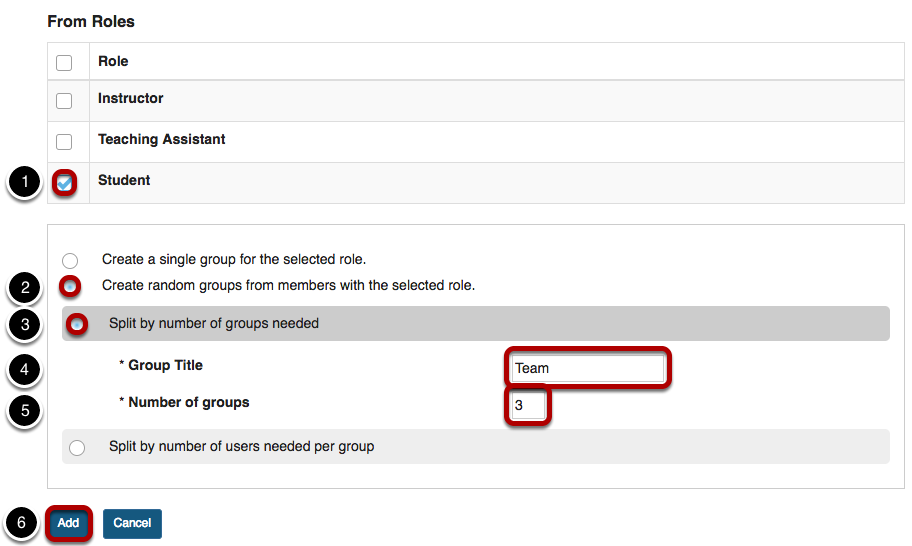
- Select a single role from which to create subgroups (e.g. Student).
- Select the Create random groups from members with selected role radio button.
- Select the Split by number of groups needed radio button.
- Enter a Group Title. This title will serve as the basis for all of the group names. Unique numbers will be appended to the title.
- Enter the Number of groups you would like to have for the site. Users will be randomly assigned to each group and distributed as equally as possible.
- Click the Add button to auto-generate your groups.
Create random groups by number of users per group.
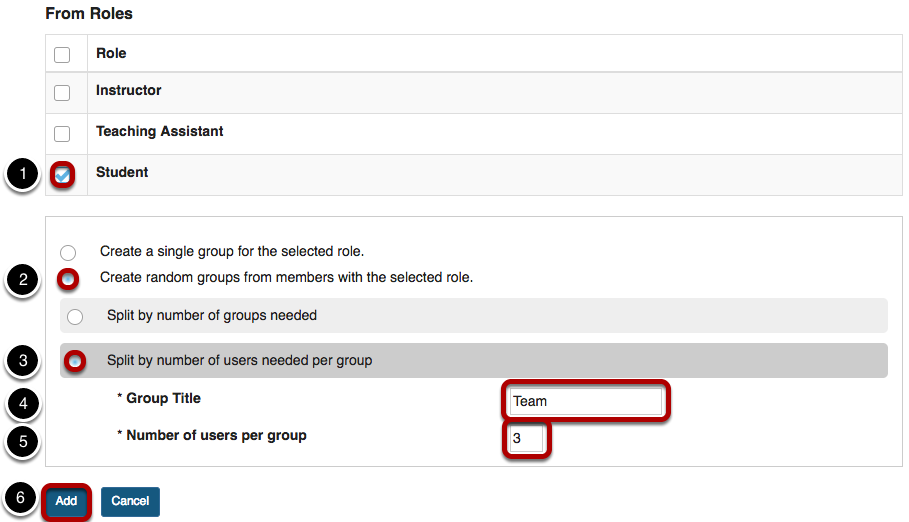
- Select a single role from which to create subgroups (e.g. Student).
- Select the Create random groups from members with selected role radio button.
- Select the Split by number of users needed per group radio button.
- Enter a Group Title. This title will serve as the basis for all of the group names. Unique numbers will be appended to the title.
- Enter the Number of users per group you would like to have. Users will be randomly assigned to each group and the number of groups is determined by the class size divided by number of users per group.
- Click the Add button to auto-generate your groups.
Import from file.

Click on the Import from file button.
Choose file.
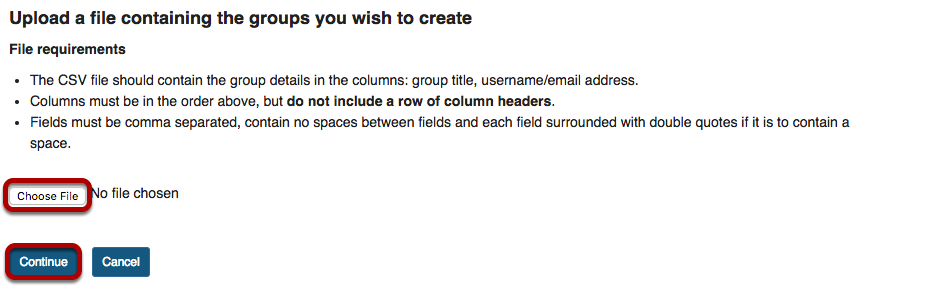
Click the Choose File button to browse for and select your import file.
Your import file should be in comma-separated (CSV) format with two columns of data. The first column should contain the group title, and the second column should contain the username of the site participant. Do not include a column header row and do not include spaces.
Once you have uploaded your file, click the Continuebutton.
Example: CSV file for importing groups

How do I import content from other sites?
It is possible to import content from former sites into later sites.
How to import
First, open the destination site (or the later site), and click Site Info in the Tool Menu. Then click Import from Site.

There are 2 ways to import data from another site.
- Replace: All data of the destination site will be removed, and only data imported will be reserved.
- Merge: Data imported will be added to the destination site, and data that already exists will be reserved also.
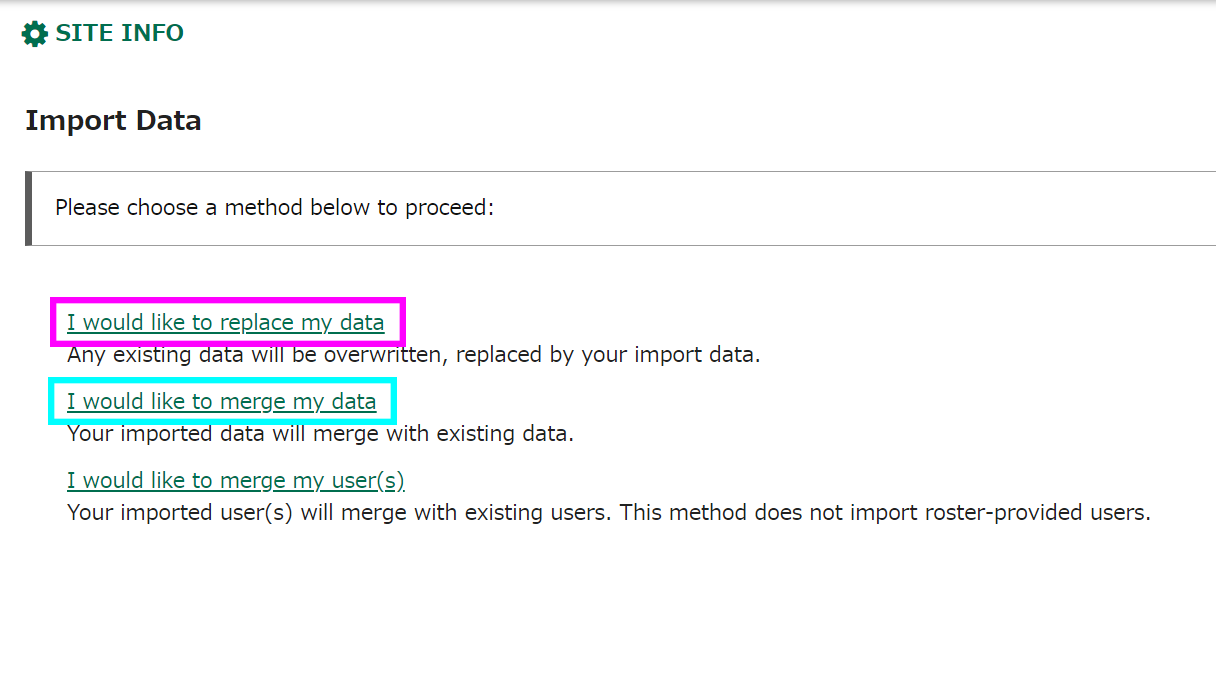
Replace
It is possible to import the materials (Announcements, "Resources", etc.) from other sites and replace the data of the destination site.
Click I would like to replace my data.
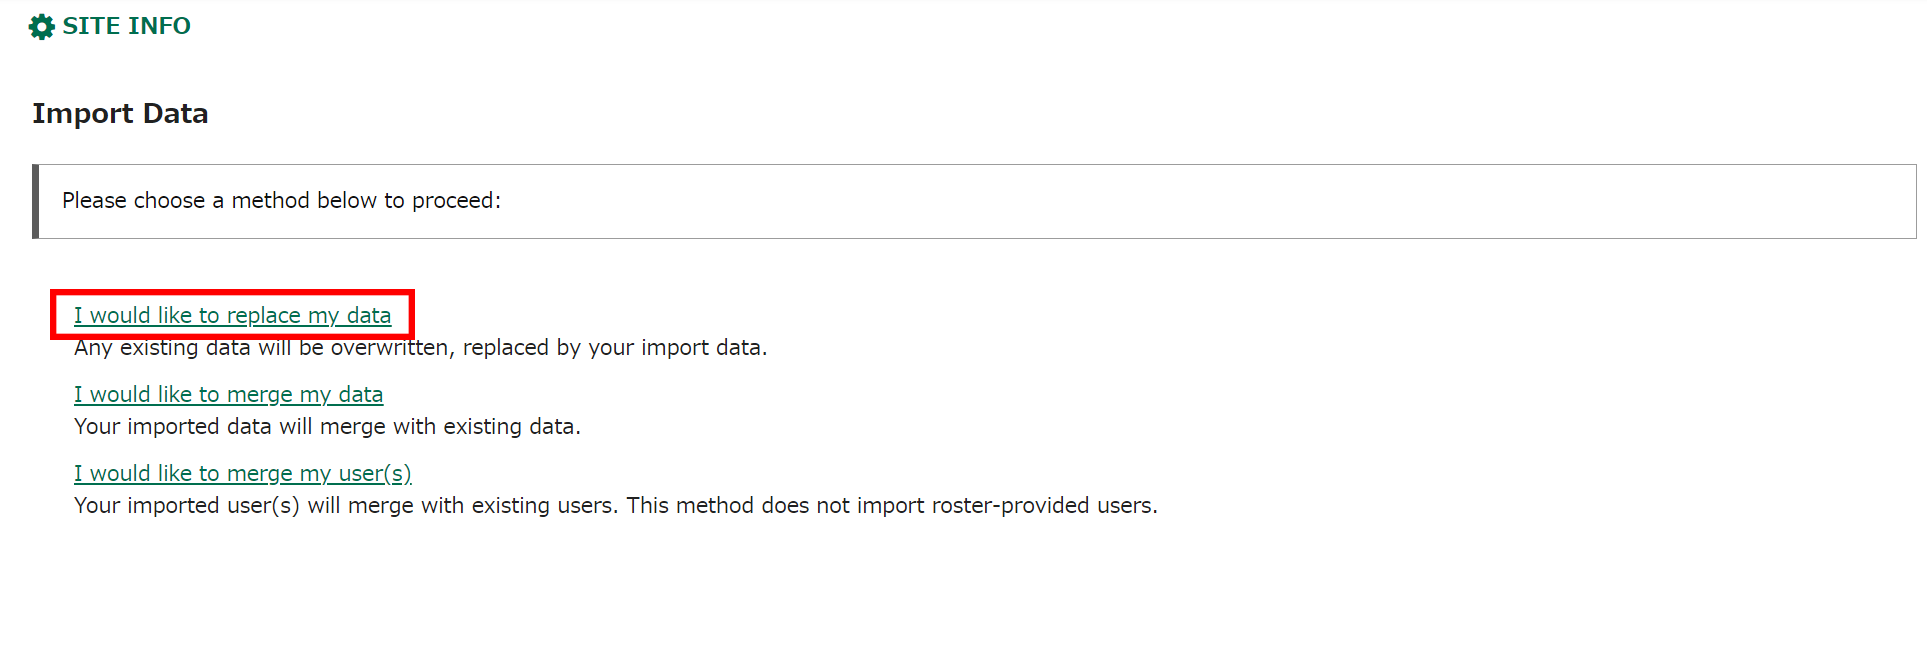
Select the source site, then "Continue".

A list of materials will be displayed. Select the items you would like to import. If you would like to select all, select the item of the course name.
And then "Finish".
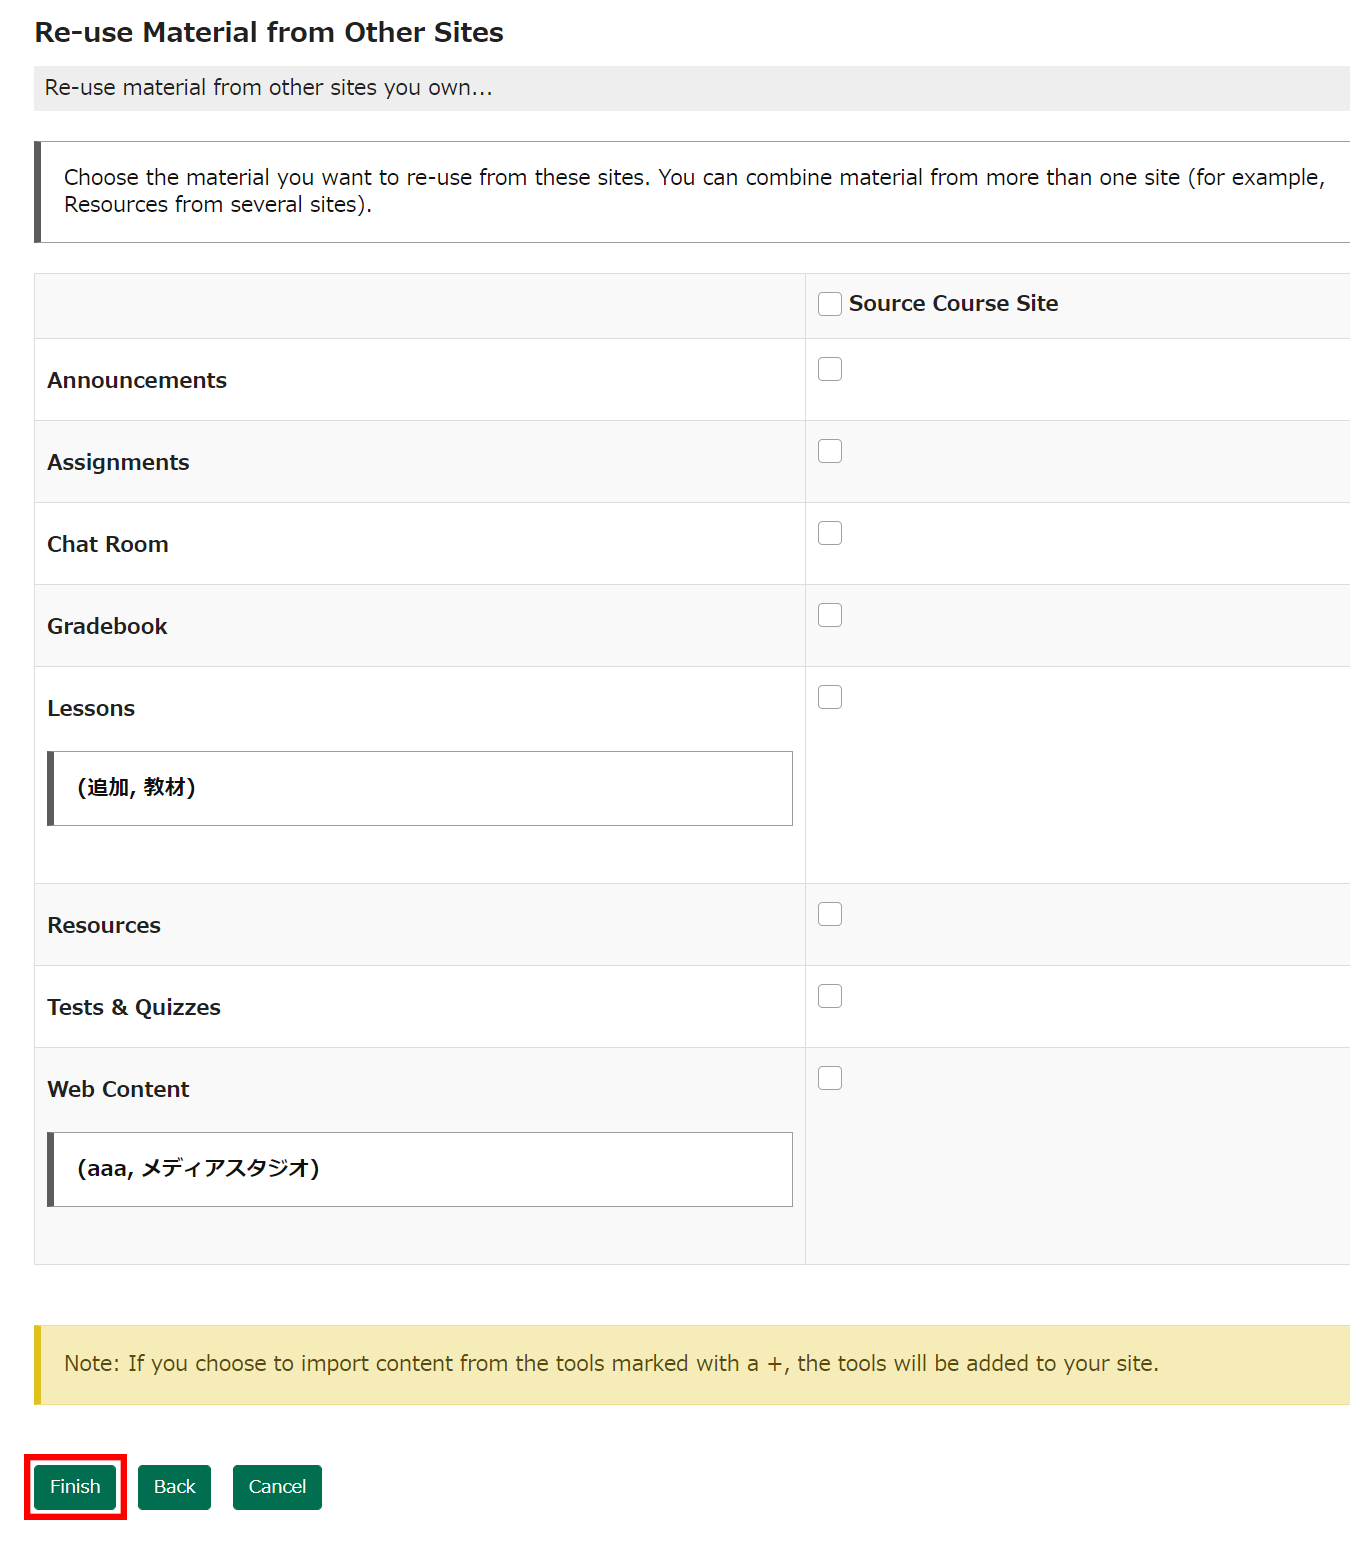
A notice of Your import process has been queued. You should receive an email when the import has been completed. The email should appear within 15 minutes. Until you receive this email no imported material will appear in this course. will be displayed when all procedures are done.
Merge
It is possible to import materials (Resources, etc.) from other sites and add them to the destination site. You can also combine materials from one or more sites in this way.
Click I would like to merge my data.
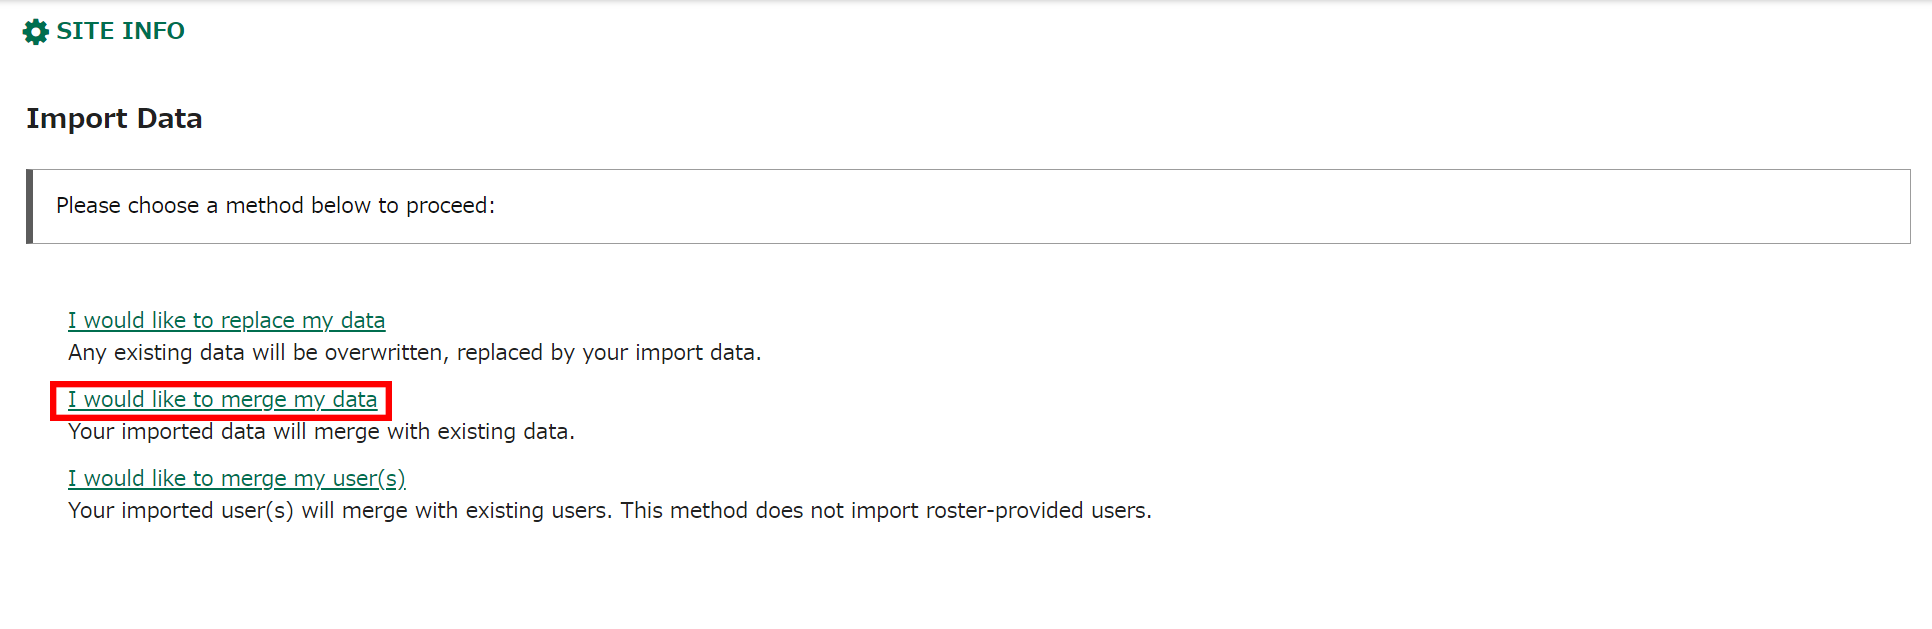
Select the source site, then "Continue".
A list of materials will be displayed. Select the items you would like to import. If you would like to select all, select the item of the course name.
And then "Finish".
A notice of Your import process has been queued. You should receive an email when the import has been completed. The email should appear within 15 minutes. Until you receive this email no imported material will appear in this course. will be displayed when all procedures are done.
Merge Users
It is possible to import users from other sites and add them to the destination site. You can also combine users from one or more sites in this way.
Click I would like to merge my user(s).
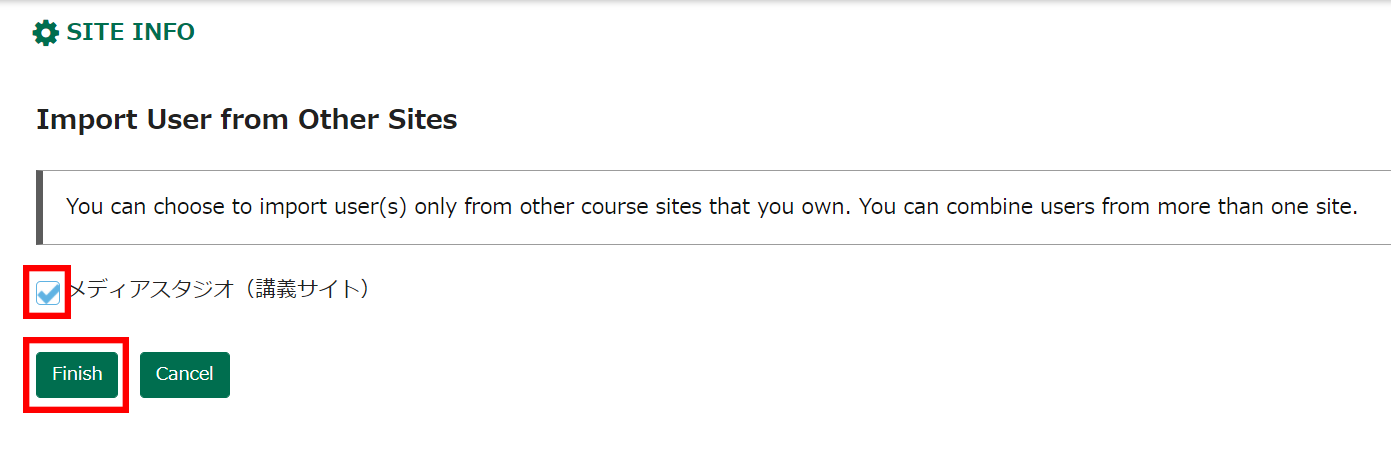
*Cautions: Announcements, "Resources", "Tests & Quizzes", and Assignments can be imported in this way.
Announcements, "Tests & Quizzes", and Assignments imported will be unpublished, so please set the availability date if necessary.
"Resources" will be available after imported if the availability date is unset, so please set the date before importing if necessary.
Set the availability date for Announcements.
After imported with the above method, Announcements will be the status of drafts.
Click Edit for the announcement you would like to edit.
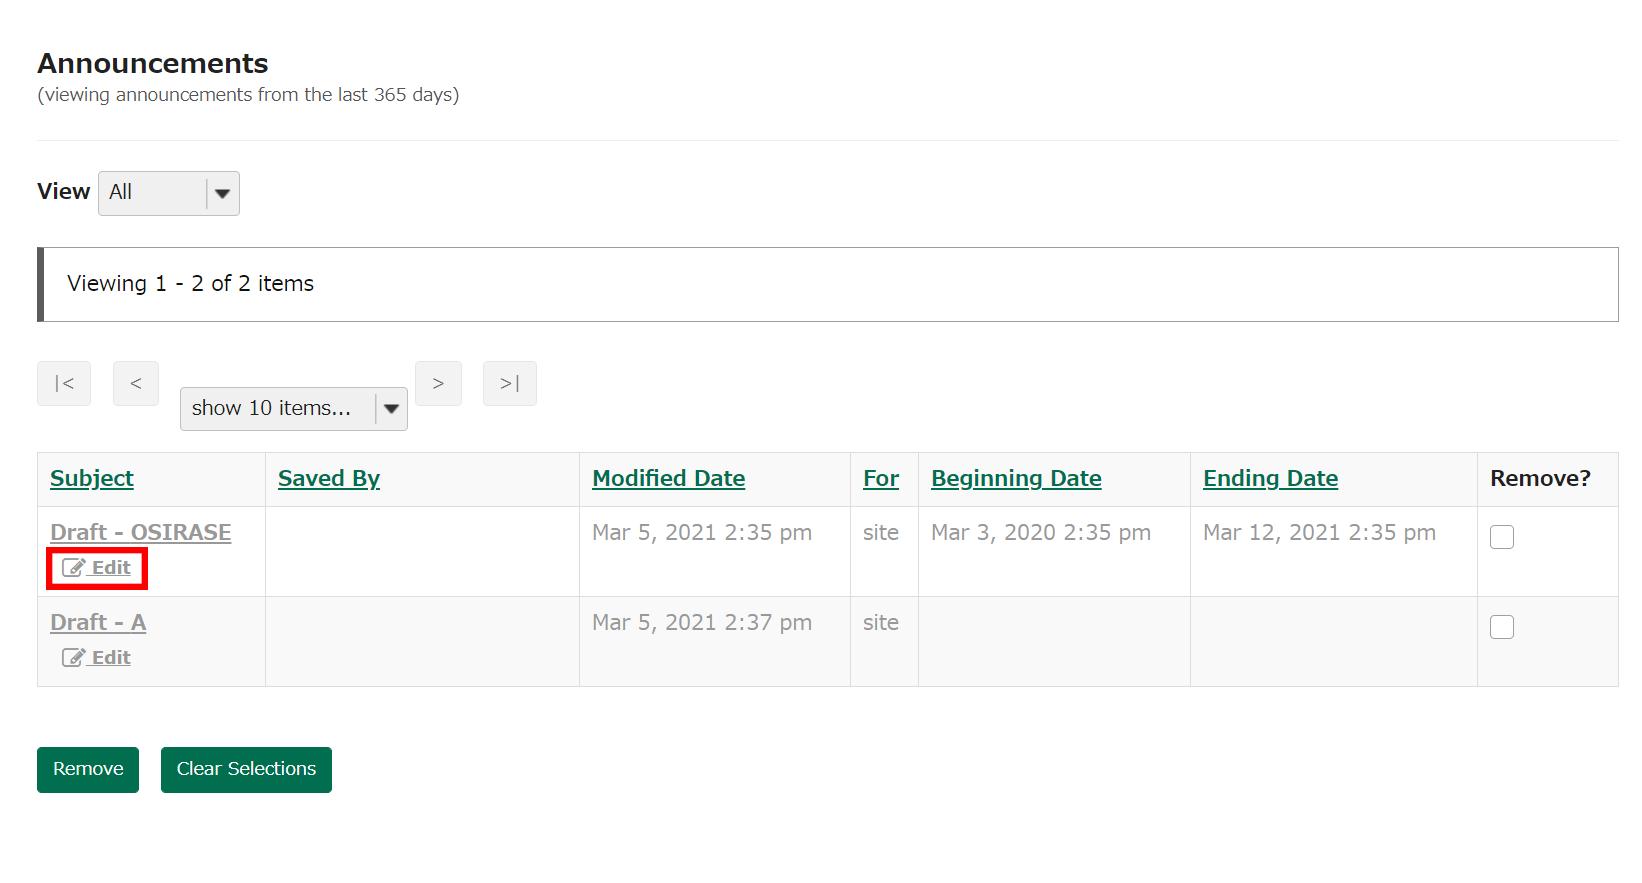
On the following page, you can set the availability date.
After editing, click Save Changes.
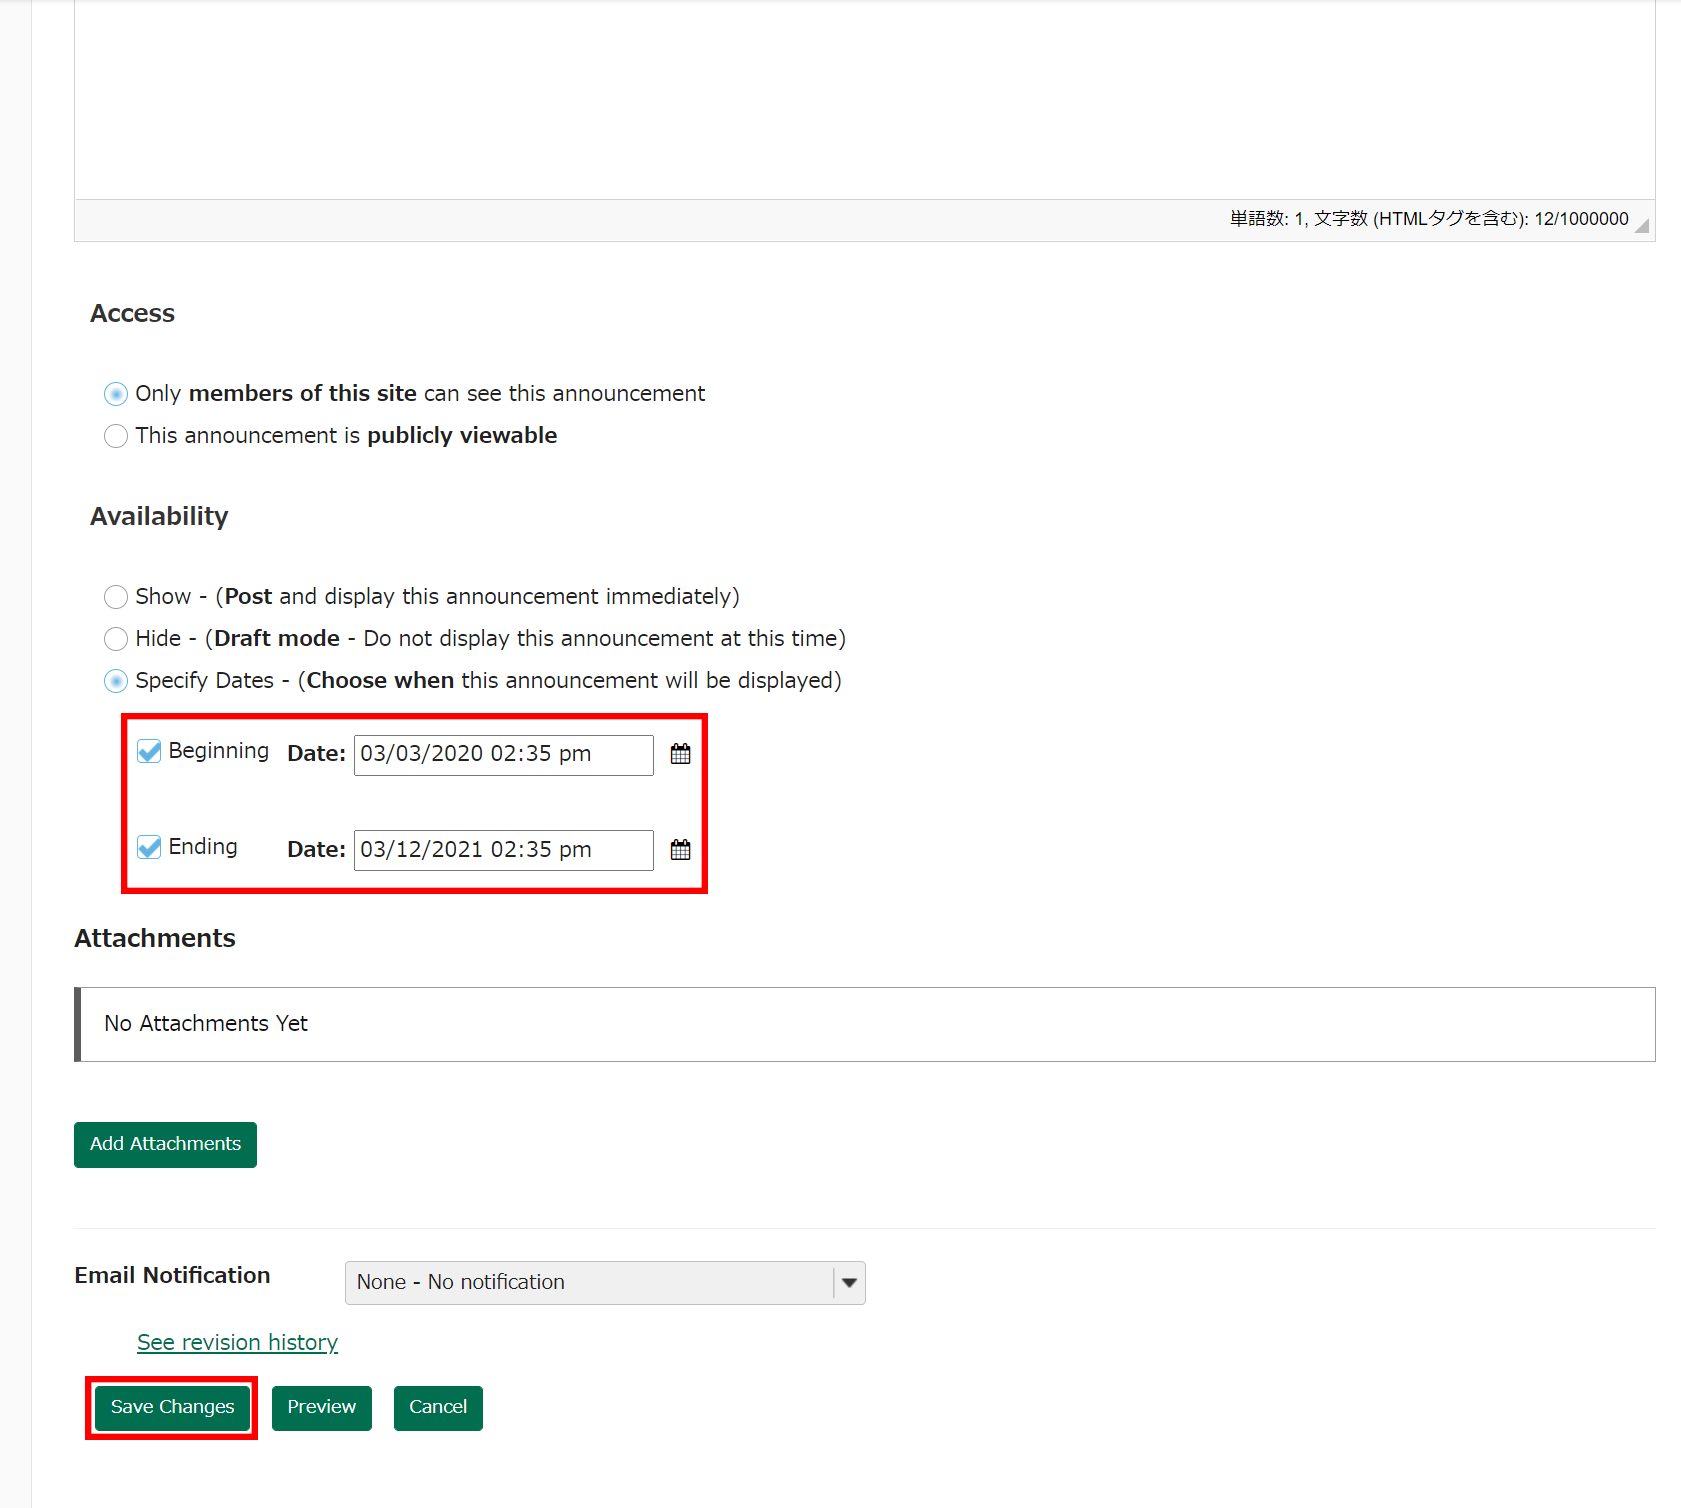
Set the availability dates for Resources.
After imported with the above method, Resources will be the same status as the source site.
Click "Actions" for the folder or file you would like to edit, then "Edit Details".
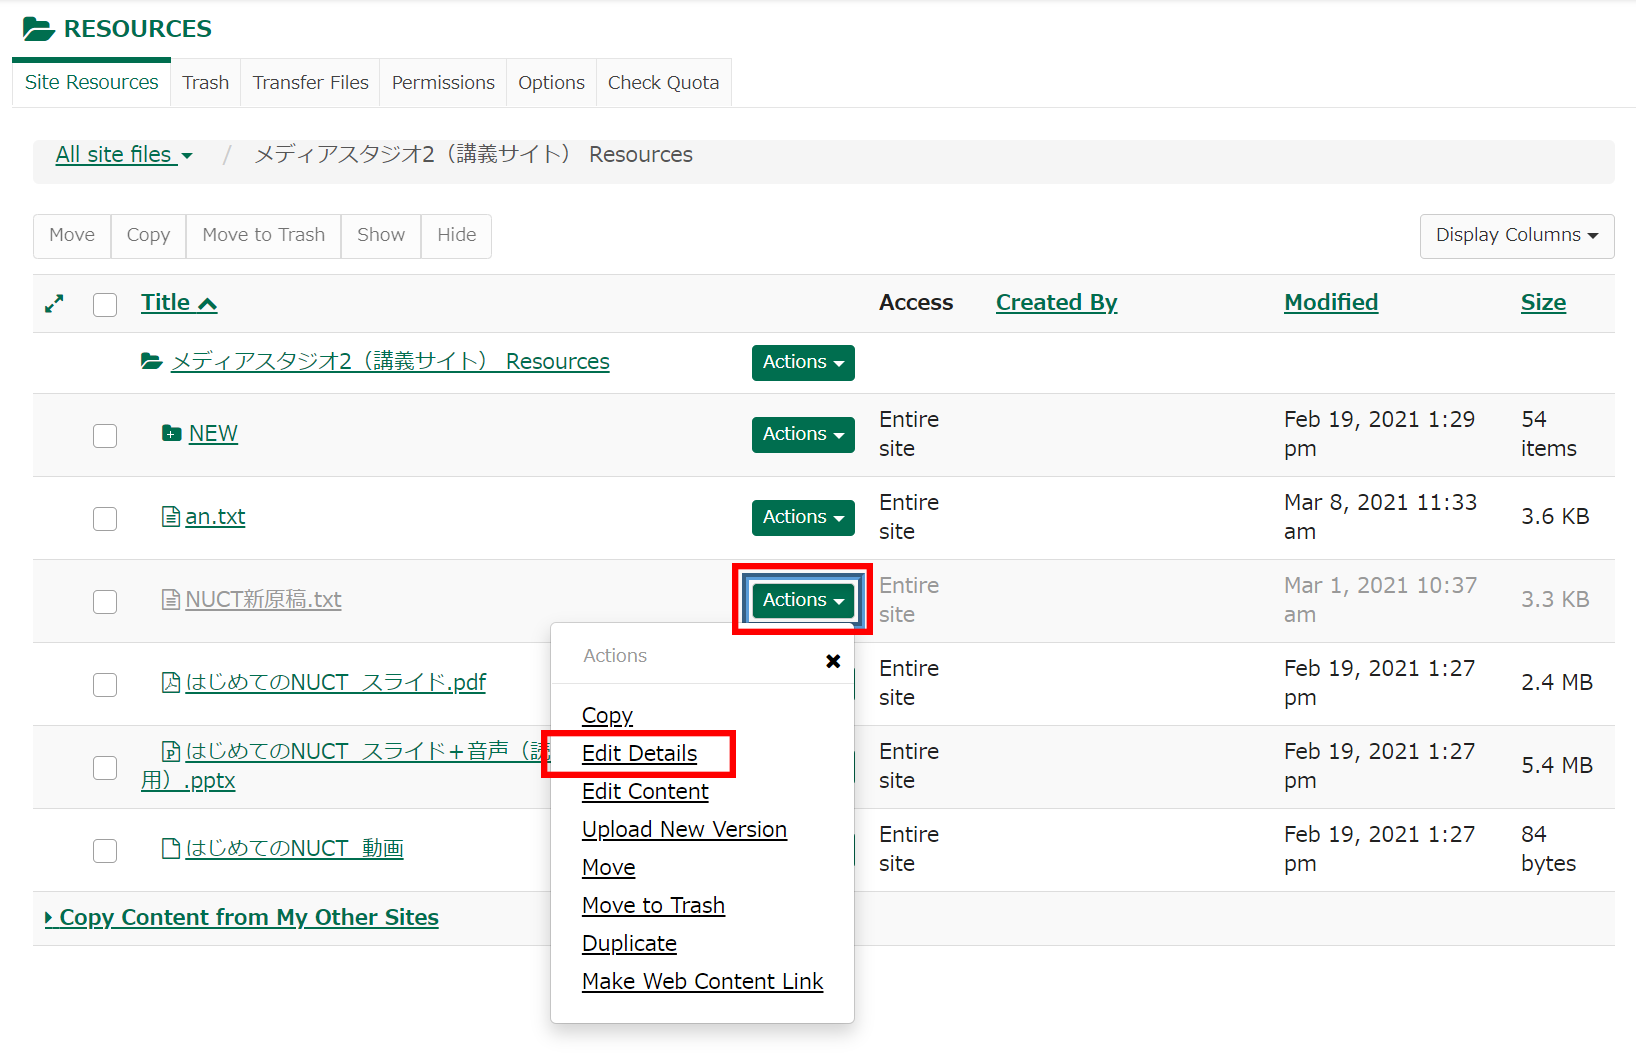
On the following page, you can set the availability date in the Availability and Access item.
After editing, click Update.
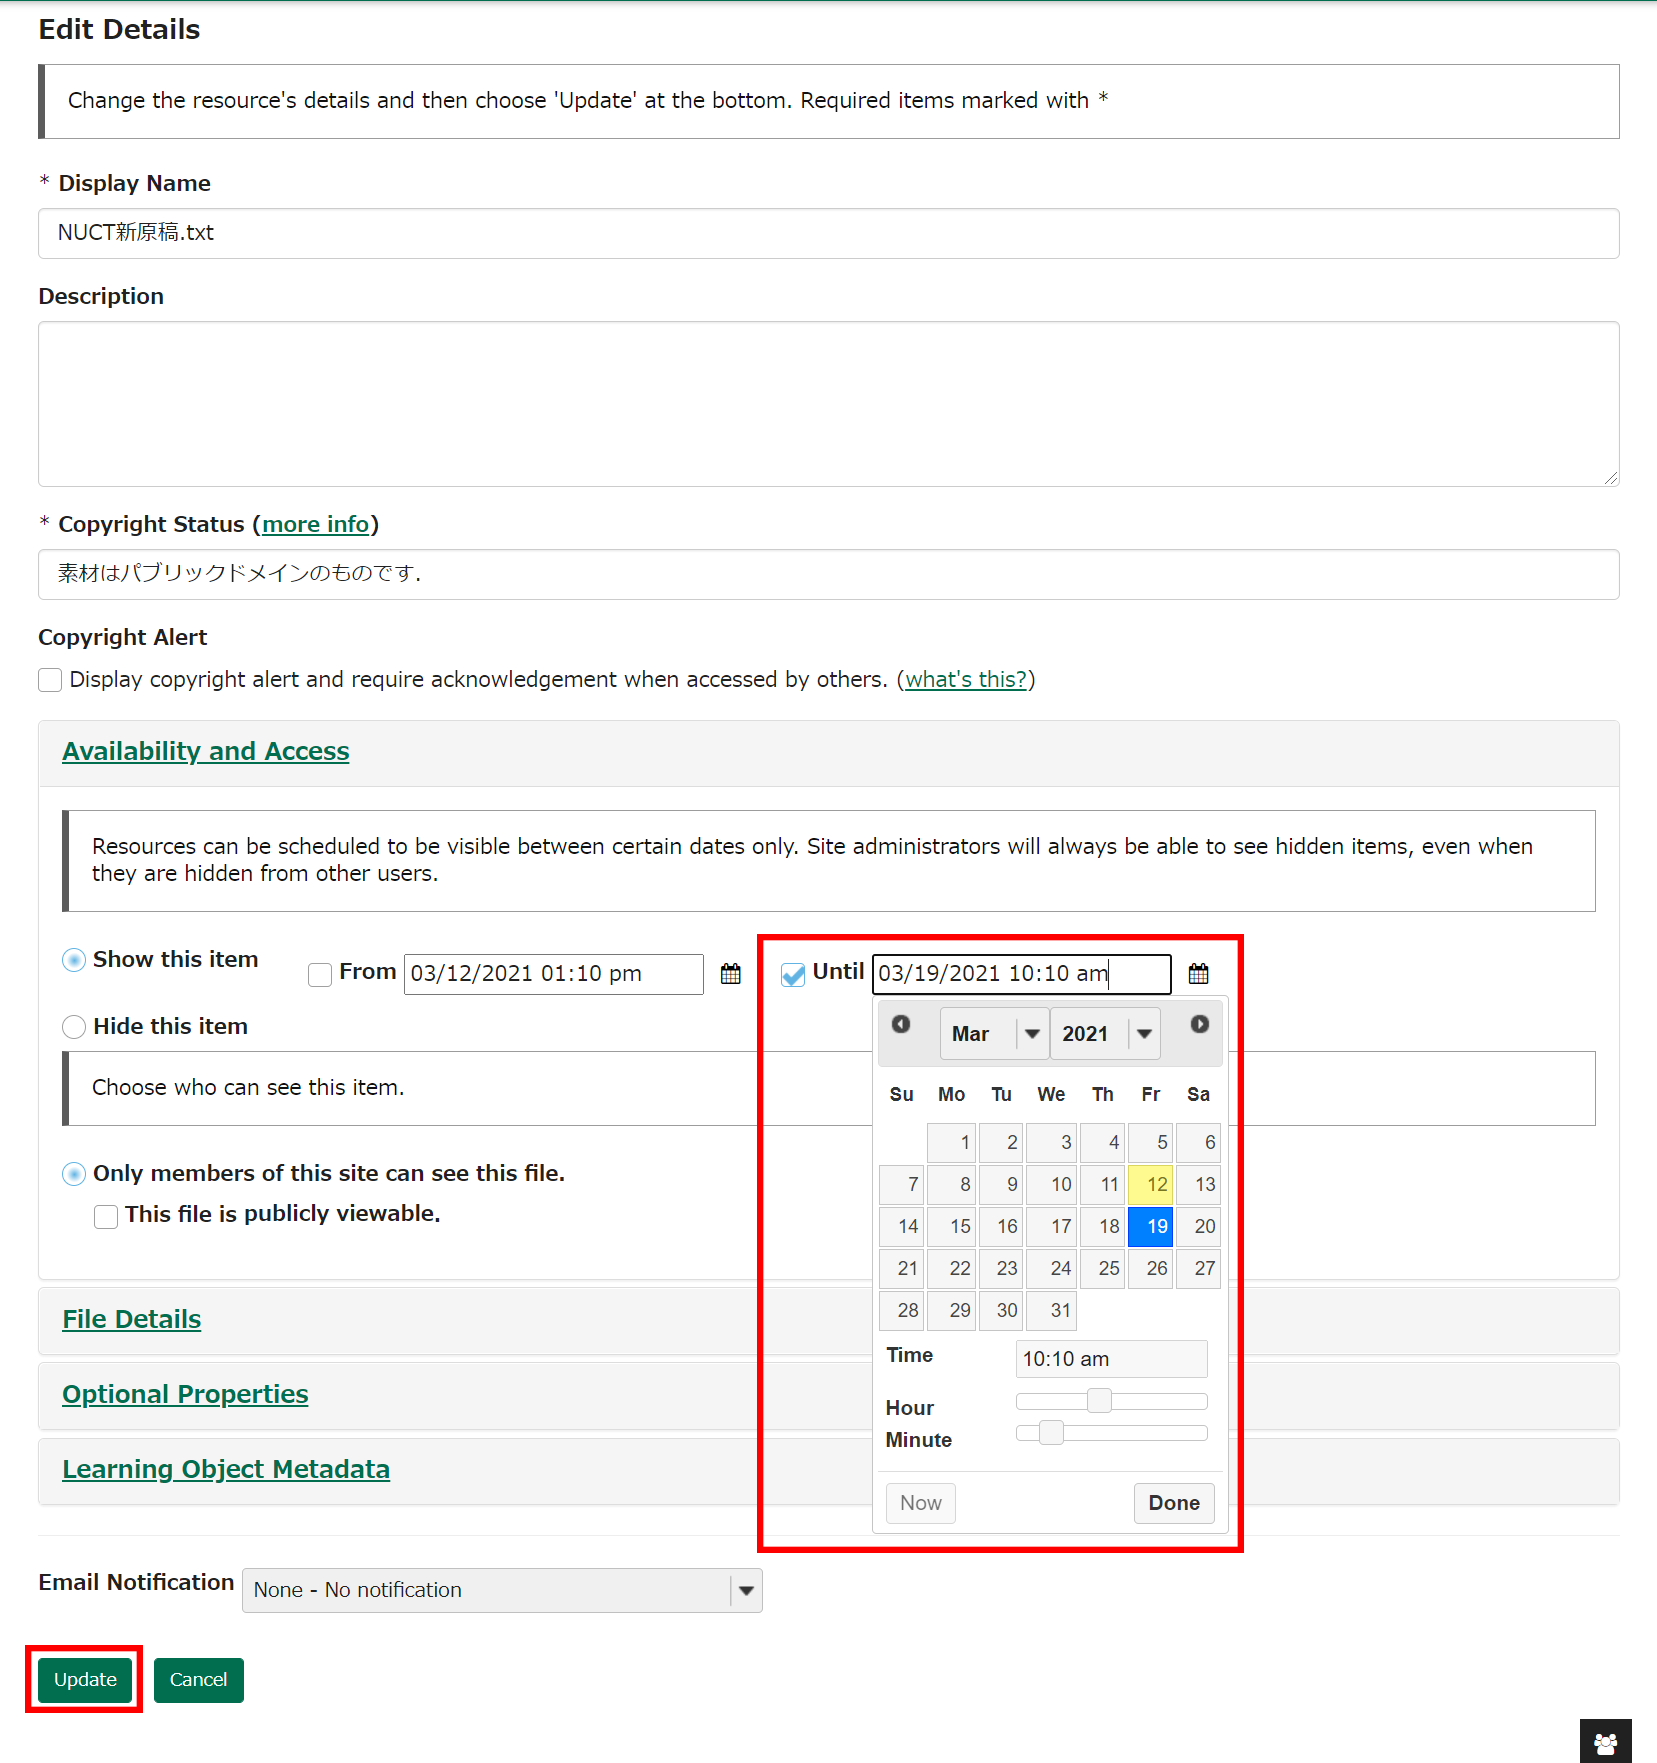
You can also use Copy Content from My Other Sites to import Resources.
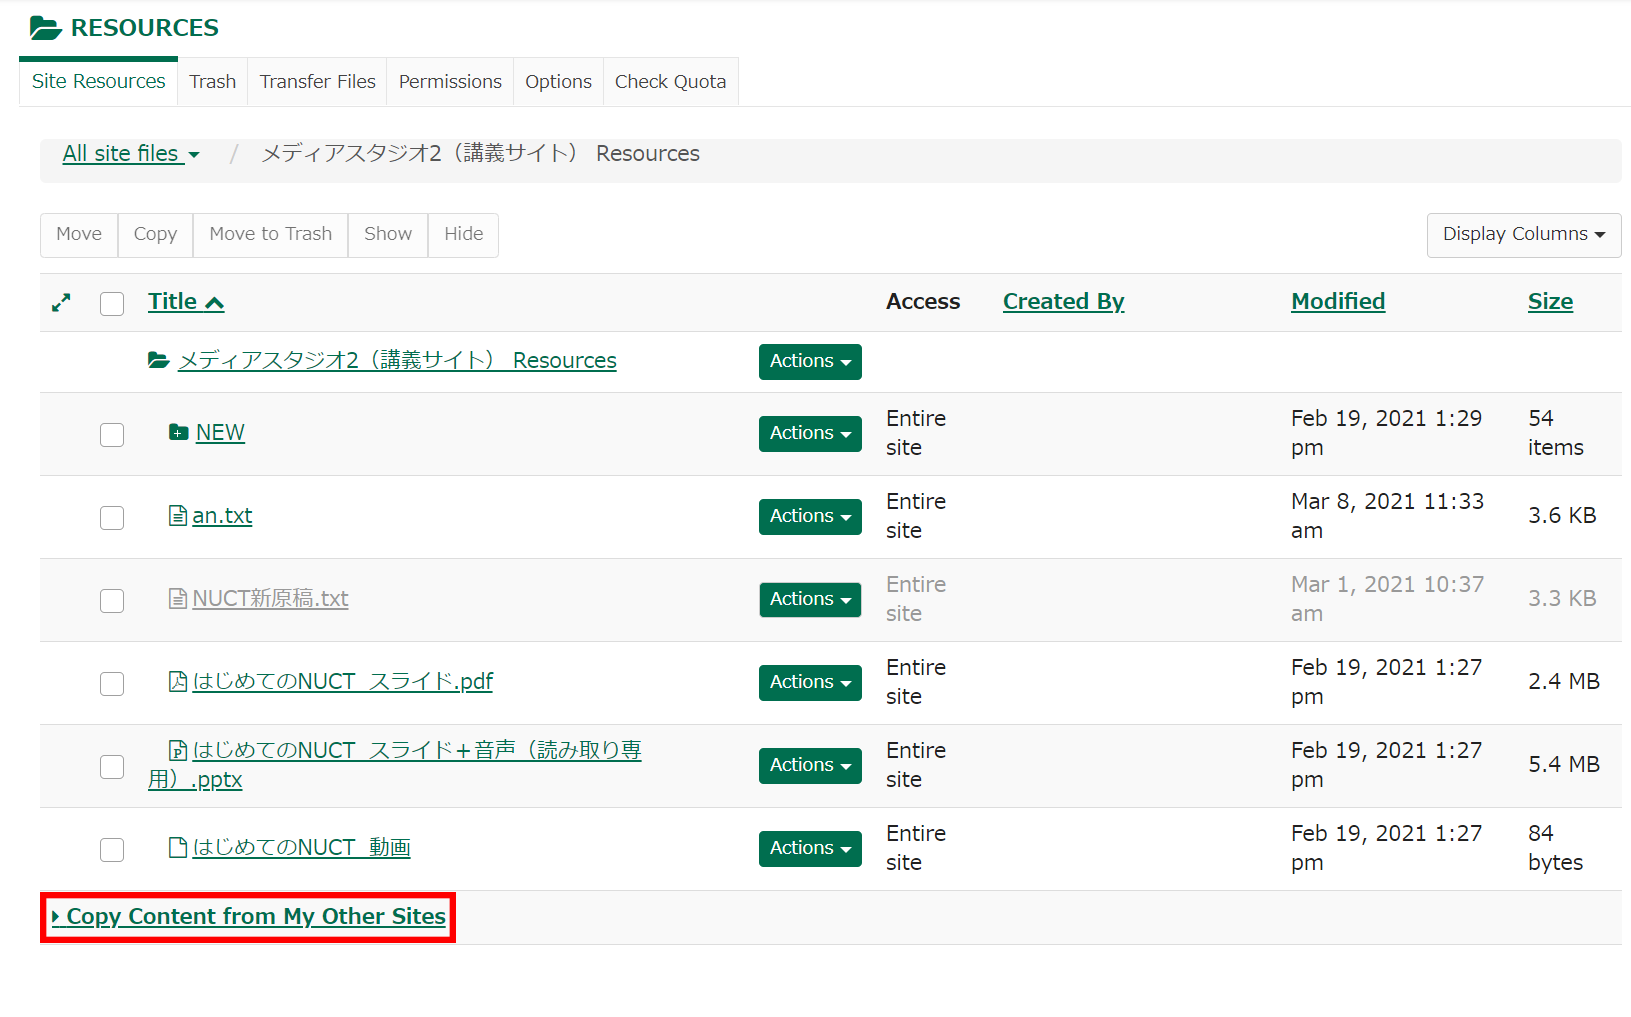
Set the availability date for Tests & Quizzes.
After imported with the above method, Tests & Quizzes will be the status of Working Copies.
Click “Select Action,” then “Publish” for the announcement you would like to edit.
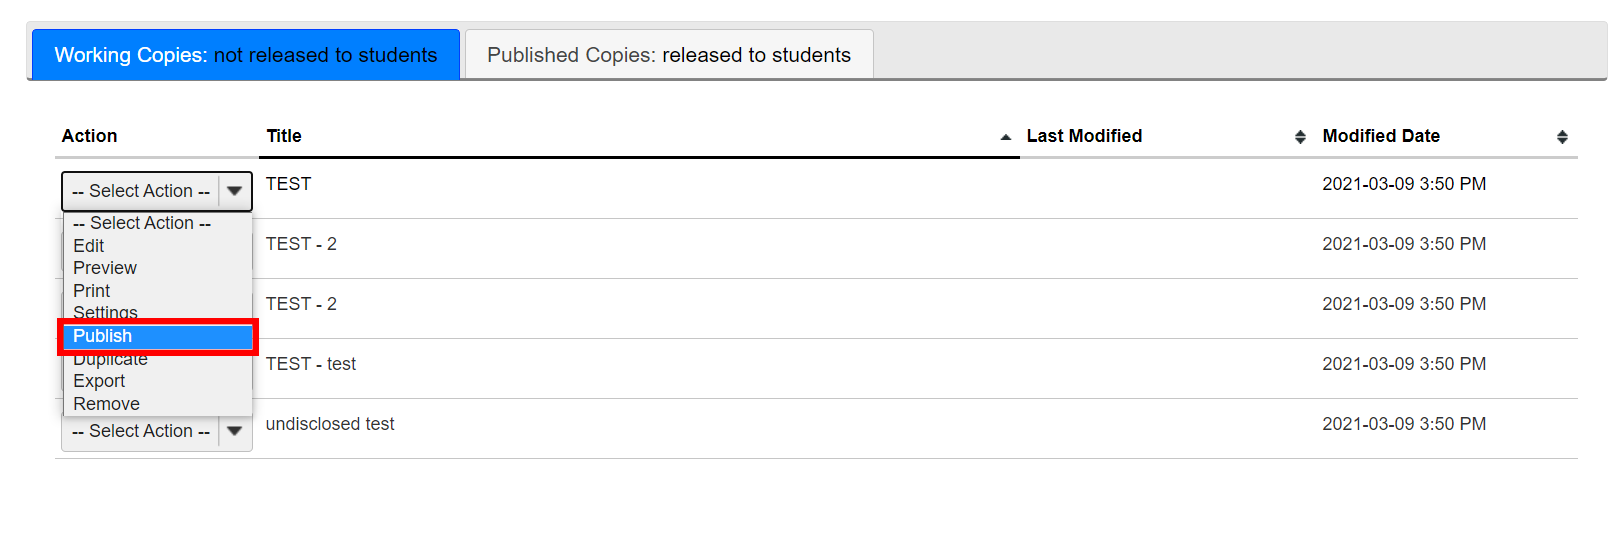
Click Edit Settings. Then you can set the availability date in the Availability and Submissions item.
Click “Save Settings and Publish.”
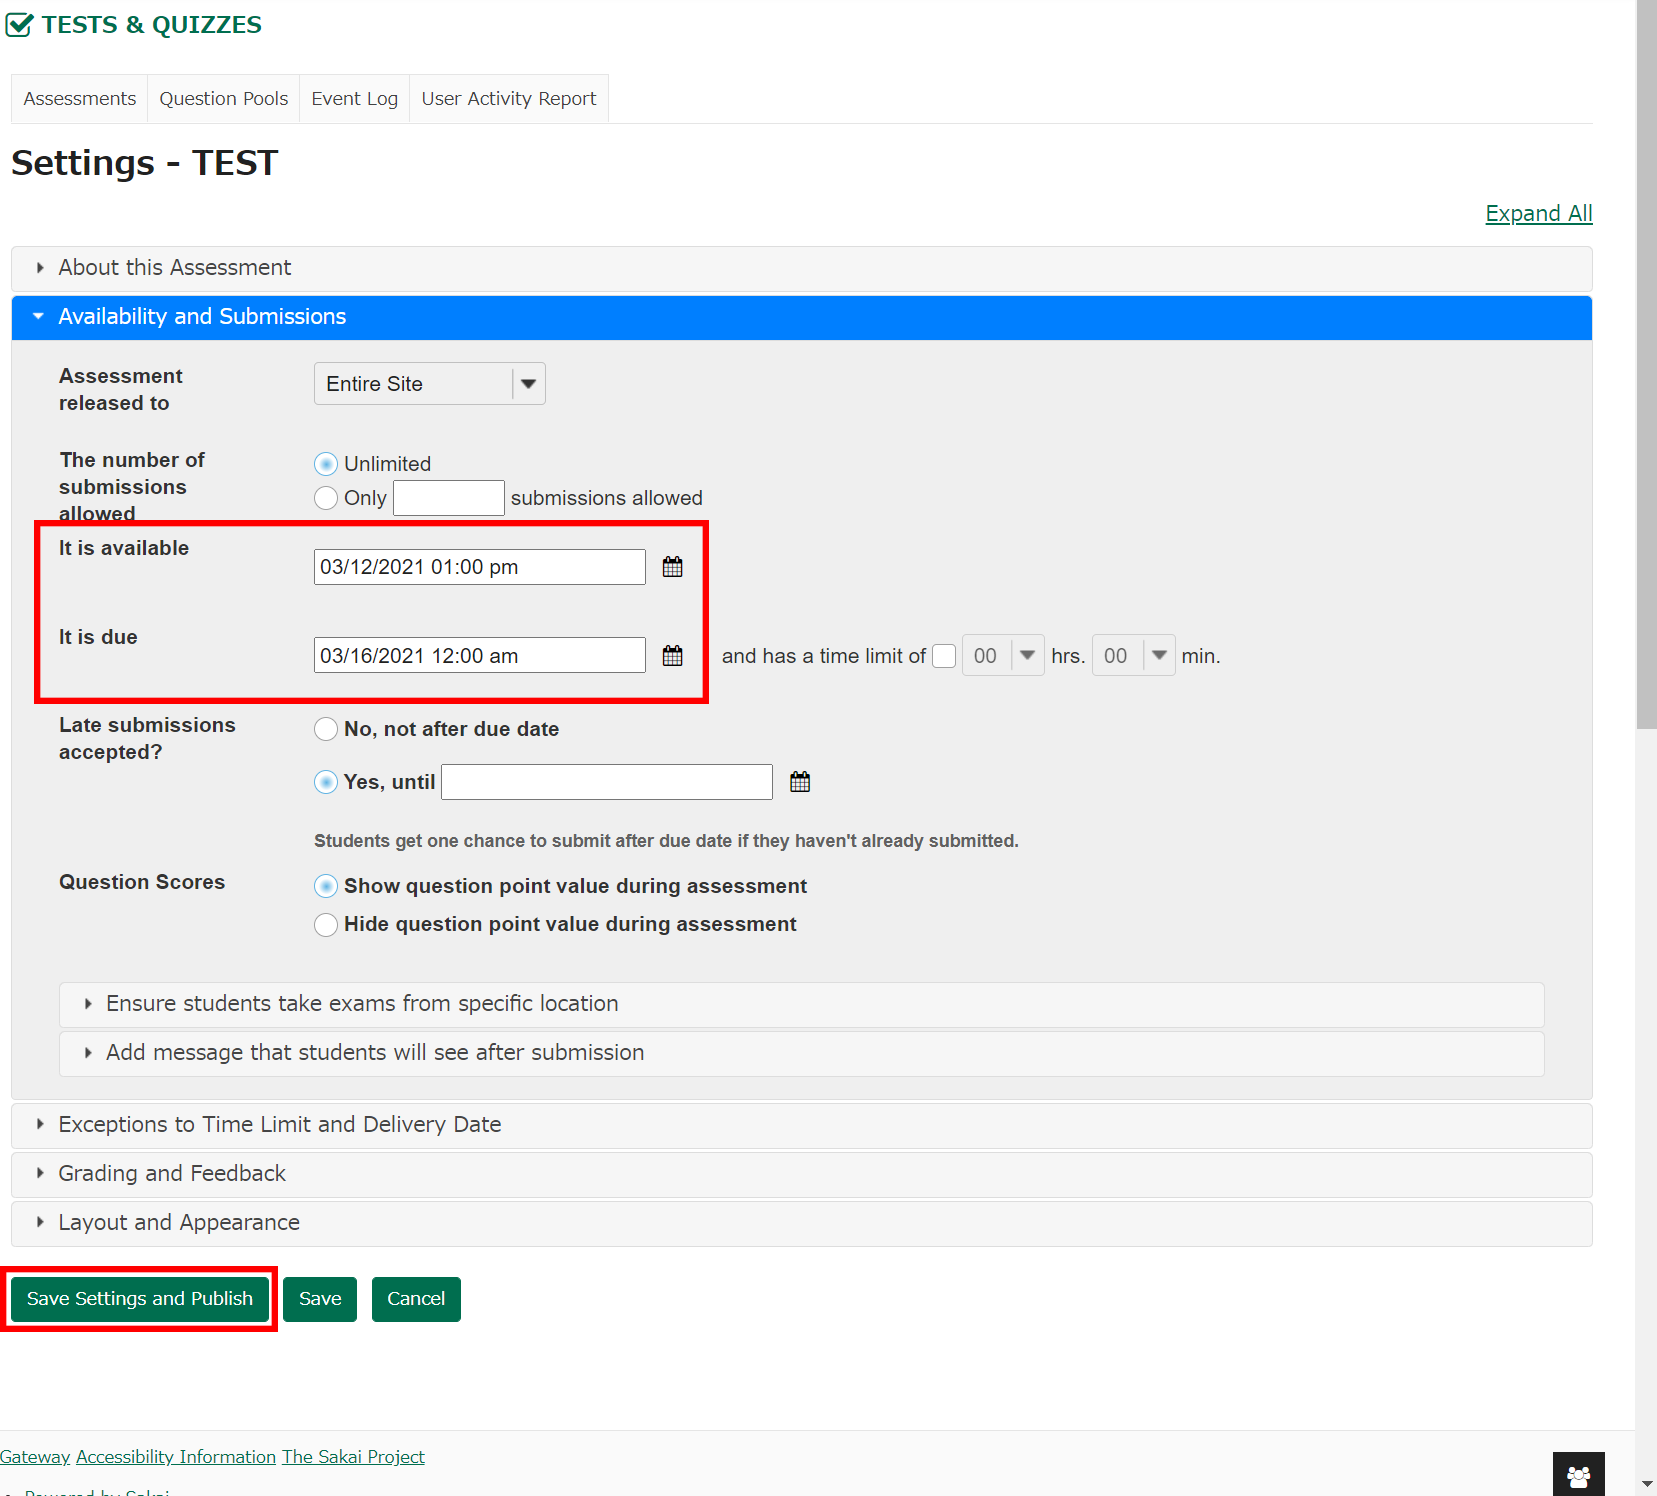
You can also use the function of Export and "Import" in the Test & Quizzes tool.
Set the availability date for Assignments.
After imported with the above method, Assignments will be the status of drafts.
Click Edit for the assignment you would like to edit.
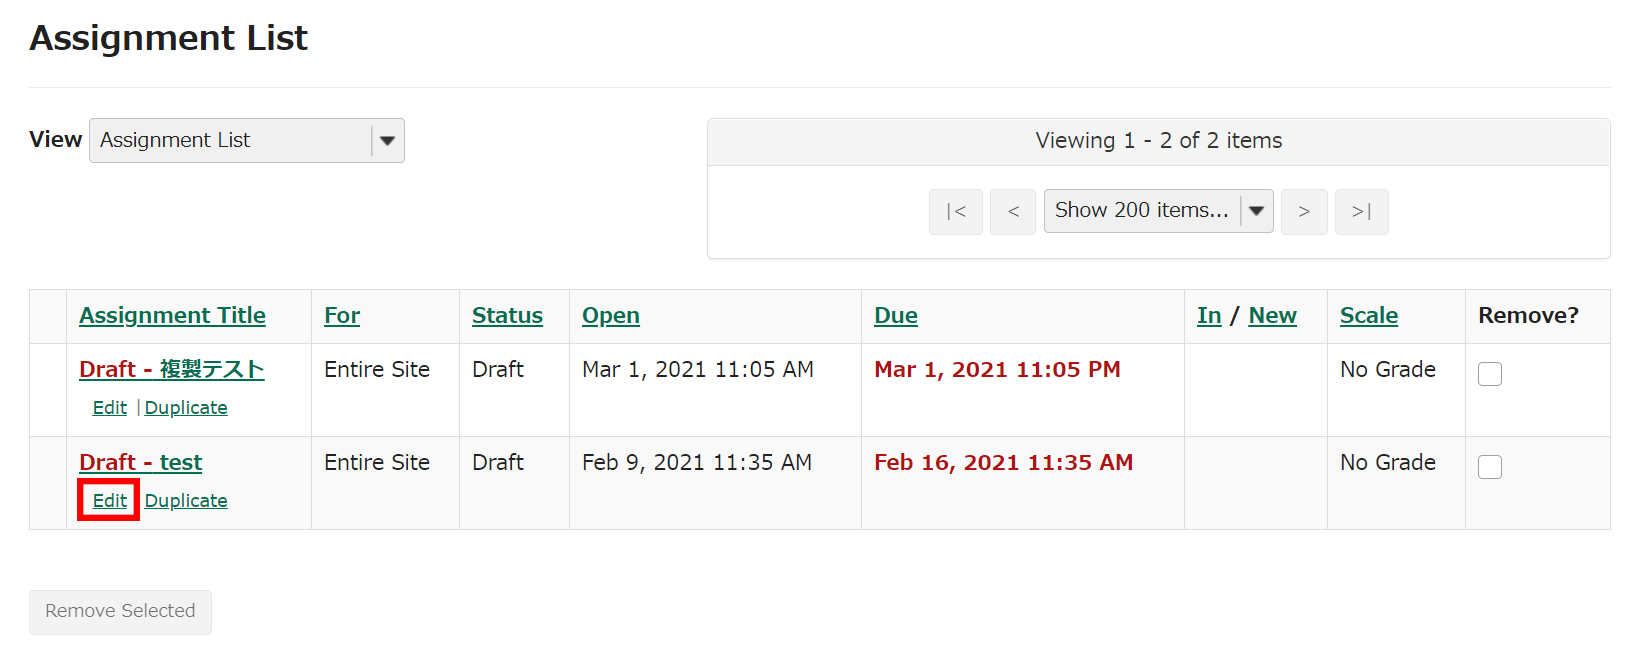
On the following page, you can set the availability date.
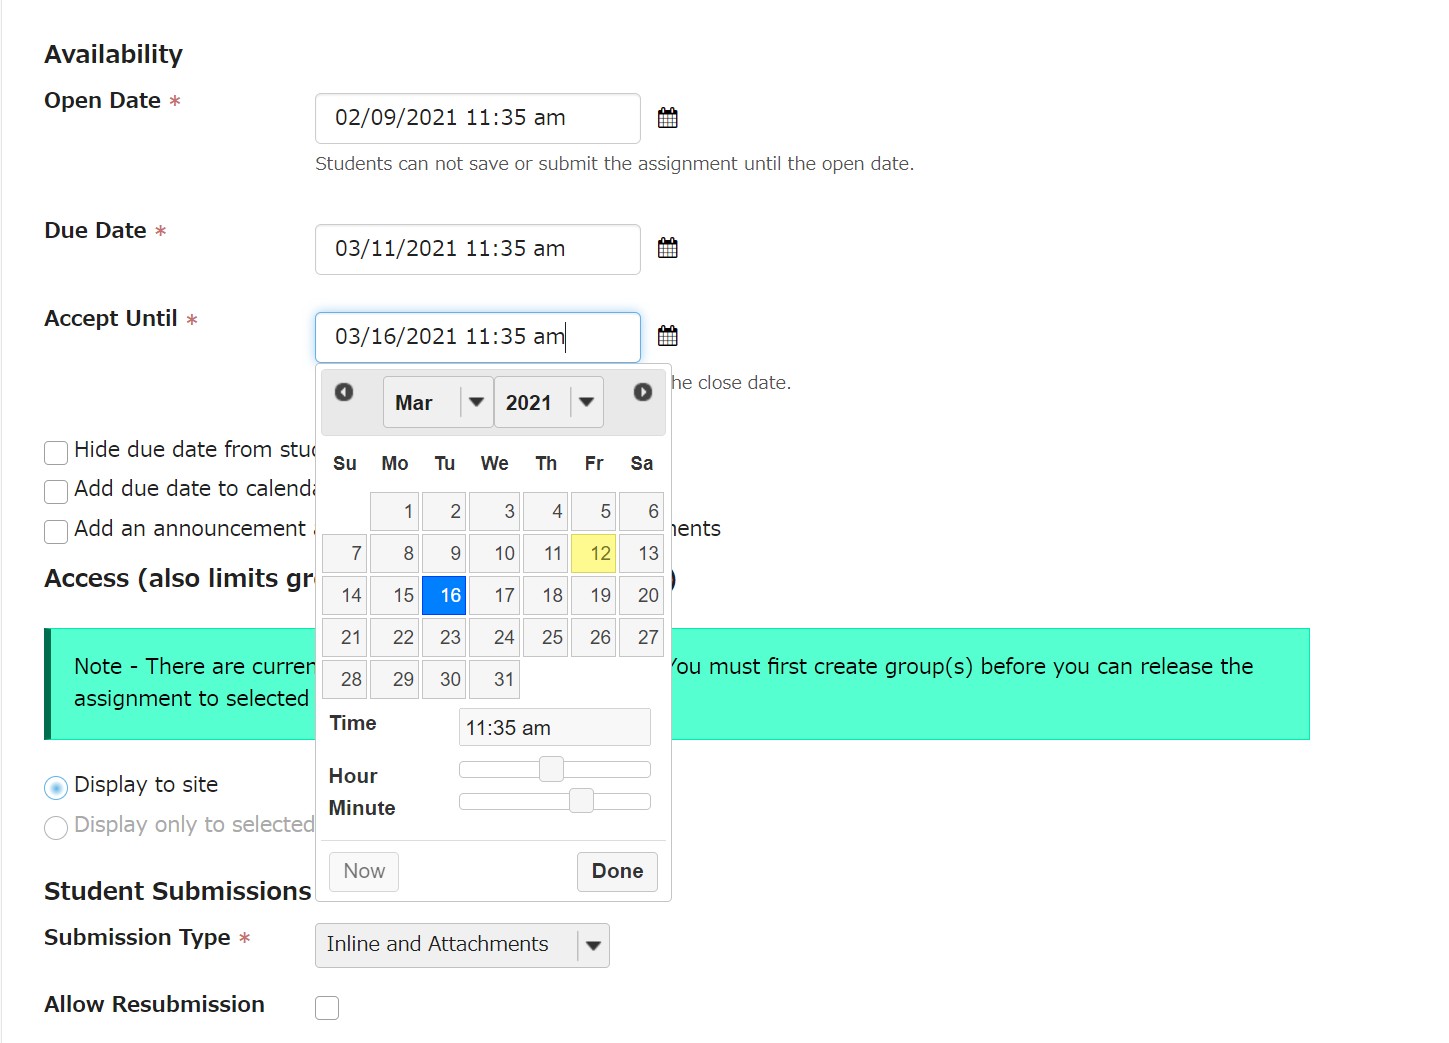
After editing, click Post.

Messages
What is the Messages tool?
The Messages tool offers a convenient way to send and receive private messages to other members enrolled in the course site. Each course site has its own Messages tool. For example, if you are enrolled in two course sites (Site 1 & Site 2) you will have two separate inboxes, one in each site. When in Site 1 you may send and receive messages to and from members of Site 1. When in Site 2 you may send and receive message to and from members of Site 2.
The Messages tool is like email in some respects but the two have fundamental differences. The Messages tool does not use external email addresses. Instead, you simply select the person you wish to write from the list of enrolled site participants. Also, messages do not leave the system. They are not carried over the Internet like email is; therefore, they remain self-contained with the course or project site.
To access this tool, select Messages from the Tool Menu in your site.
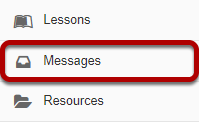
How do I view my messages?
Go to Received folder.
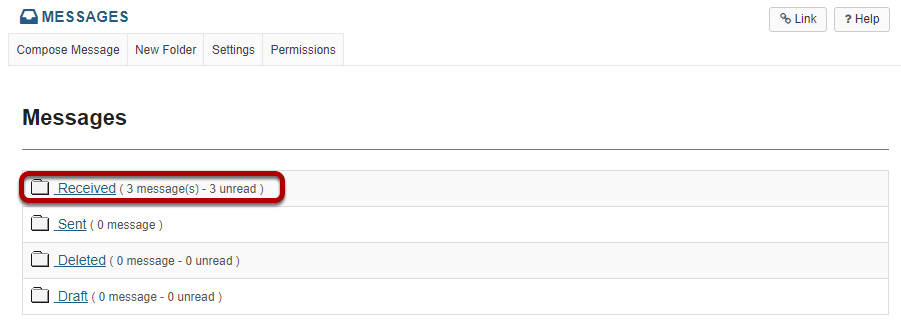
Select theReceived folder to view a list of your received messages.
Open the message.
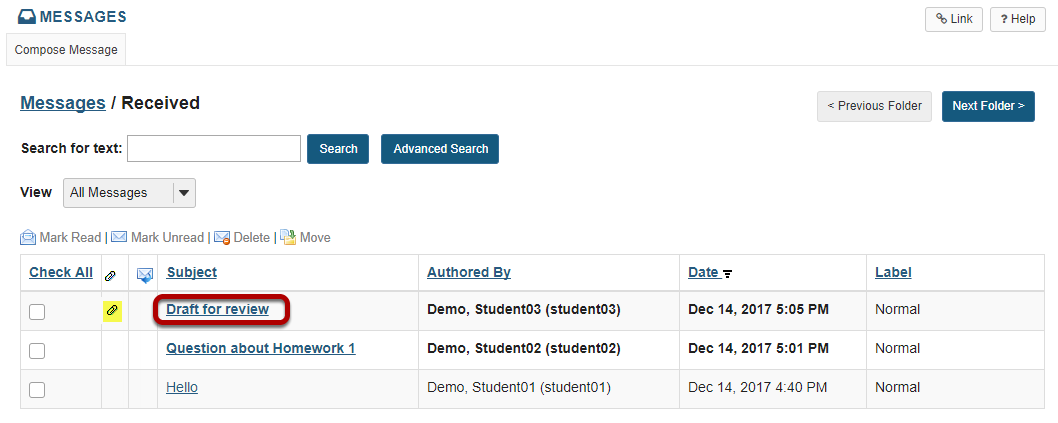
New messages will appear in bold text. Select the subject of the message you would like to view.
Note: The paperclip icon next to the message indicates that there is a file attached.
View the message.
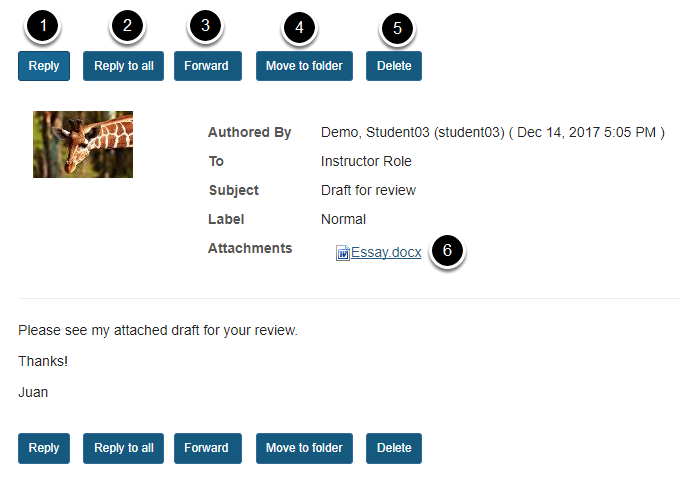
The contents of the message will appear. The following options will also be available to you:
- Reply: Select Reply to reply to the original sender with a message of your own.
- Reply to all: Select Reply to all to reply to the original sender and any other course members included on the message.
- Forward: Select Forward to forward the message to another member of the course.
- Move to folder: Select Move to folder to move the message from one folder to another.
- Delete: Select Delete to delete the message.
- Open/Download File: Select the file name to download and open an attachment.
How do I send a message?
Click Compose Message.
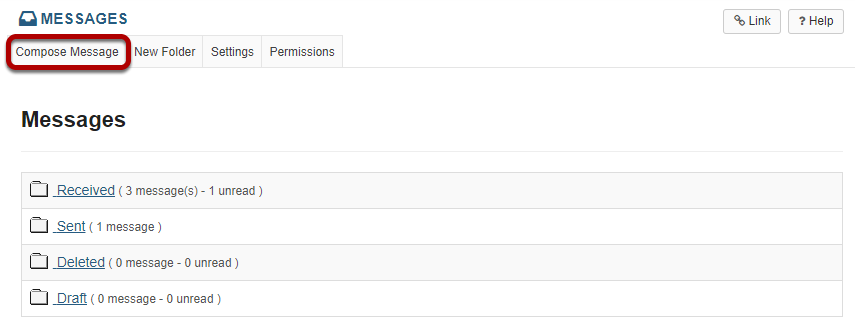
Select Compose Message from the options at the top of the tool.
Address your message.
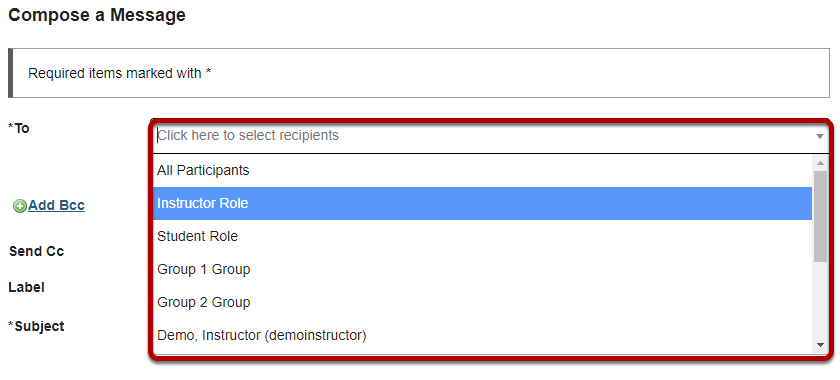
Click the To field to expand the course member list. Select the member of the course that you wish to address. You can repeat this step to address your message to multiple recipients.
Tip: You can address a message to all members assigned to a specific role by selecting that role from the list. For example, you can send a message to all instructors by selecting "Instructor Role".
Add Bcc. (Optional)
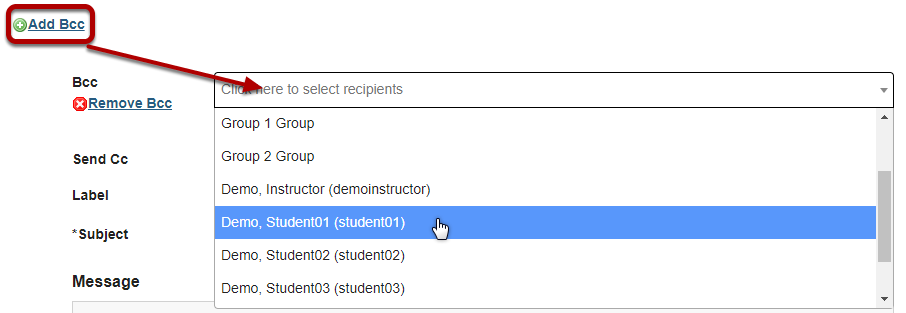
If you would like to blind copy recipients on the message, click the Add Bcclink to expand this option, and then click in the Bcc address field to select recipients from the list of site participants.
Tip: The Bcc option allows you to send a message to multiple people without the recipients being able to see the other people addressed in the message. Faculty often use this option when emailing groups of students about grade-related issues in order to protect the students' privacy and FERPA rights.
Send Cc. (Optional)

If you would like to send a copy the recipient's external email address, check the box for Send a copy of this message to recipients' email address(es).
Apply a label.
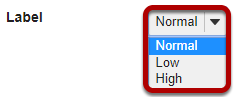
You may apply a label from the drop-down menu to indicate the priority of your message. The default label is Normal. You may change it to Low orHigh if desired.
Enter a subject.

Click the Subject field. Type the subject for your message.
Enter a message.
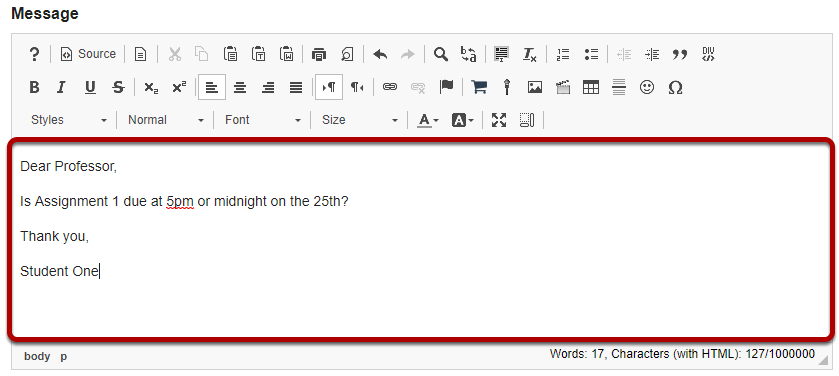
Type your message into the Message box.
Tip: There are a variety of tools within the rich text editor to help you format your message. Other features include adding images, video, and emoticons.
Add an attachment. (Optional)
If you would like to attach a file to your message, click the Add attachments button to browse for and select your file.
Send the message.

Select Send to send your message.
Tip: You can also select Preview to preview a finished version of your message, Save Draft to save the message as a draft that you can revisit later, or Cancel to cancel and delete the message.
How do I reply to a message?
The Messages tool allows you to reply to a message sent to you by another member of the course.
Go to Received folder.
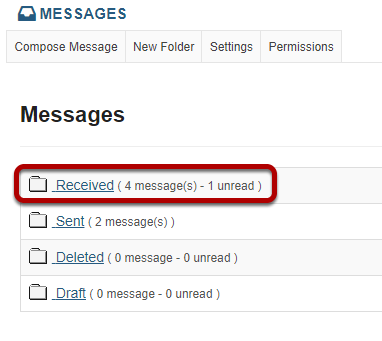
Select the Received folder to view a list of your received messages.
Open the message.
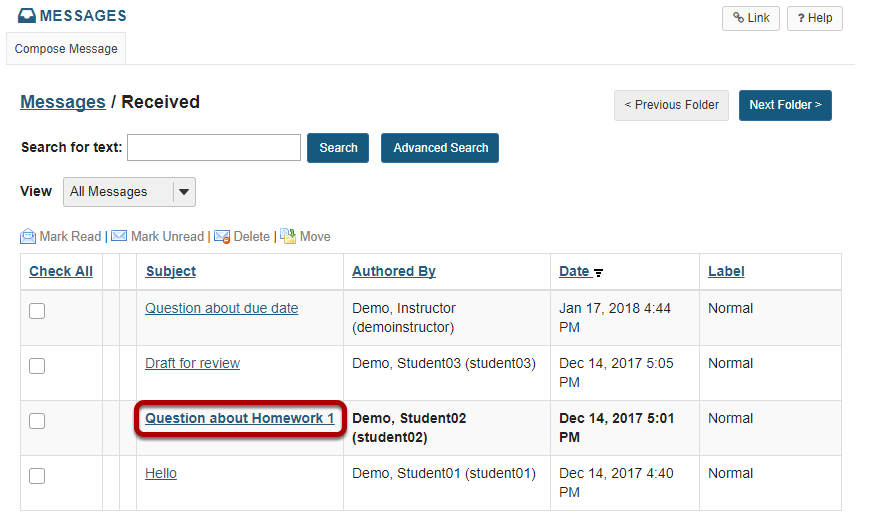
Select the subject of the message you would like to view.
Choose Reply or Reply to all.
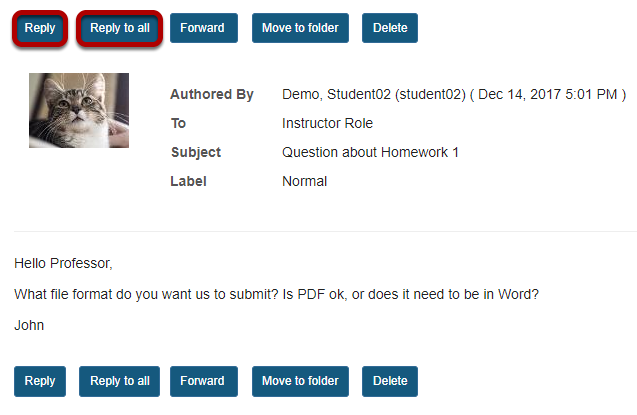
Select Reply to reply to the author of the original message. (Or, select Reply to all to reply to all parties included on the original message.)
Compose the message and send.
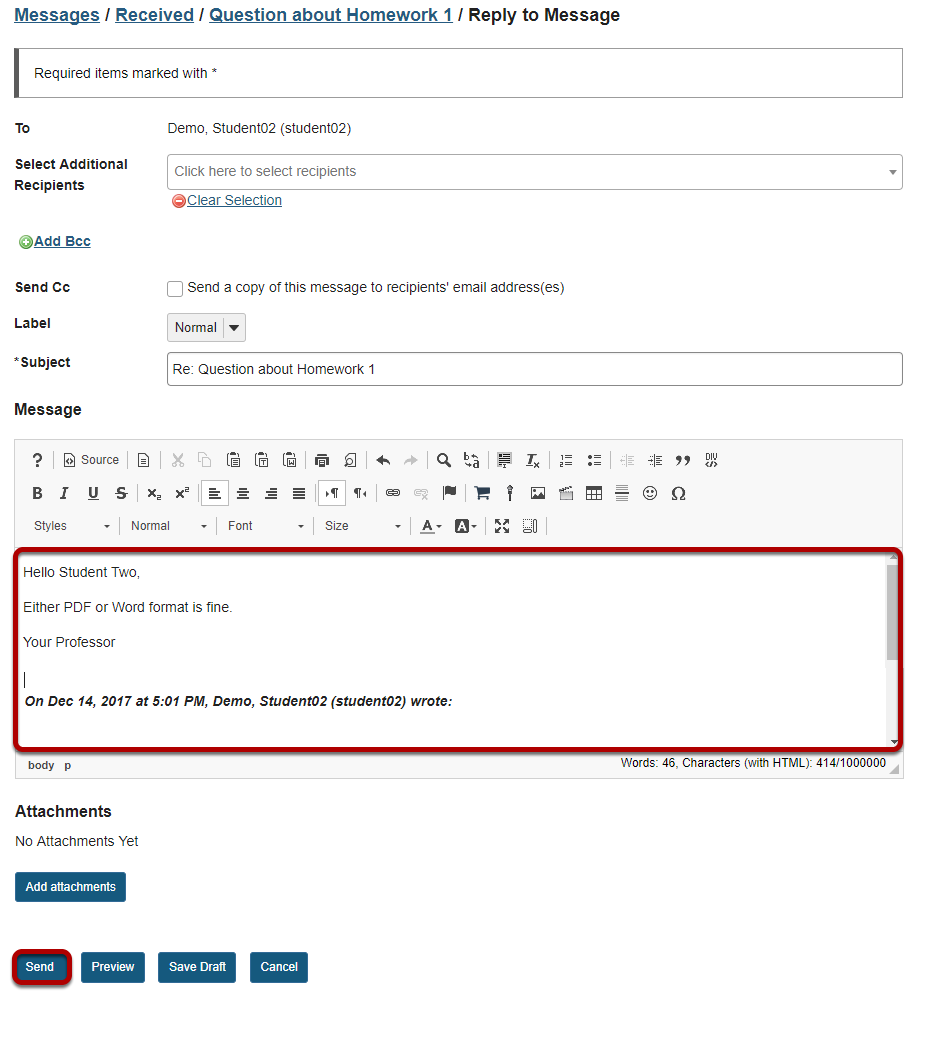
Compose the message and select Send. For instructions on composing a message, view the article "How do I send a message?"
How do I create a Messages folder?
Folders can be created within the Messages tool to aid in organization.
Go to New Folder.
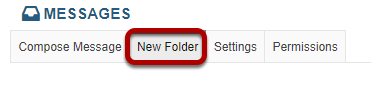
Select the New Folder button.
Enter a folder title.
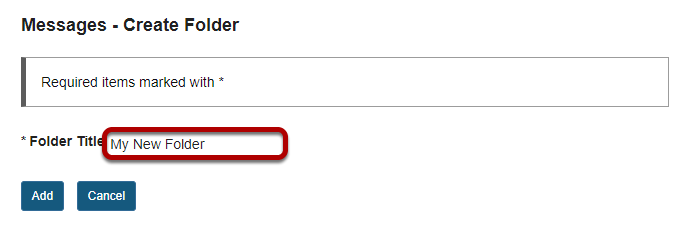
Enter a title into the Folder Title field.
Click Add.
View the new folder in your list of message folders.
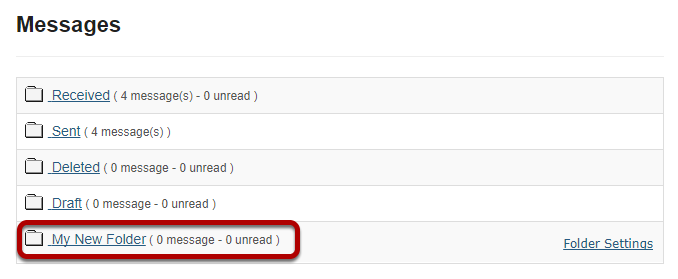
The new folder will appear at the bottom of your list of message folders.
How do I move a message?
A message can be moved from one folder to another for organizational purposes.
Open the folder containing the message to be moved.
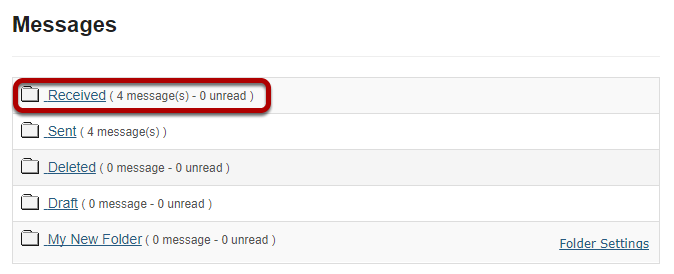
Select the folder name of the folder containing the message to be moved.
Select the message.
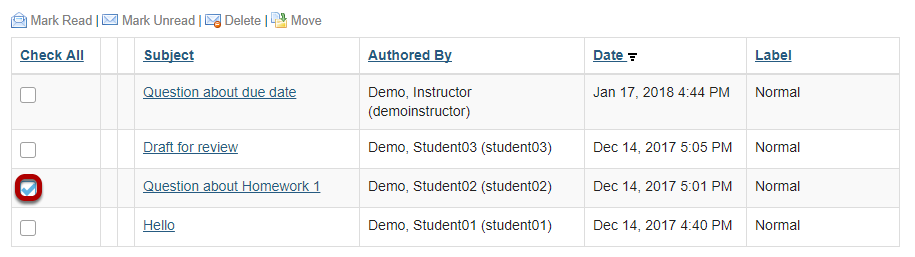
Select the checkbox to the left of the message to be moved.
Click Move.
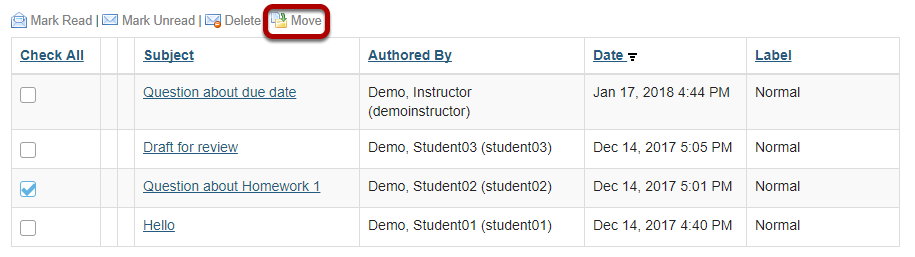
Select the new folder for the message.
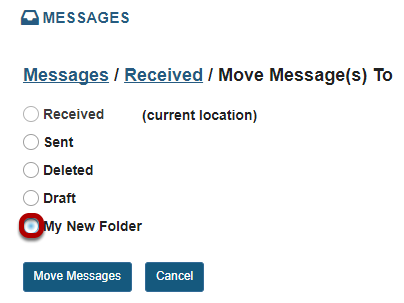
Select the folder where you would like the message to be moved.
Click Move Messages.
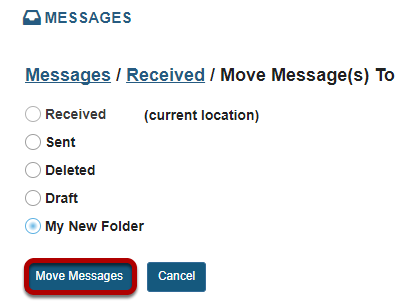
Select Move Messages to complete the move.
How do I delete a message?
A message can be deleted if it is no longer needed.
Open the folder containing the message to be deleted.
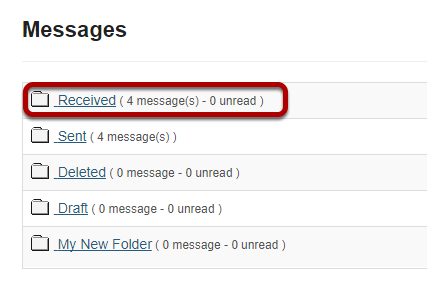
Select the folder name of the folder containing the message to be deleted.
Select the message.
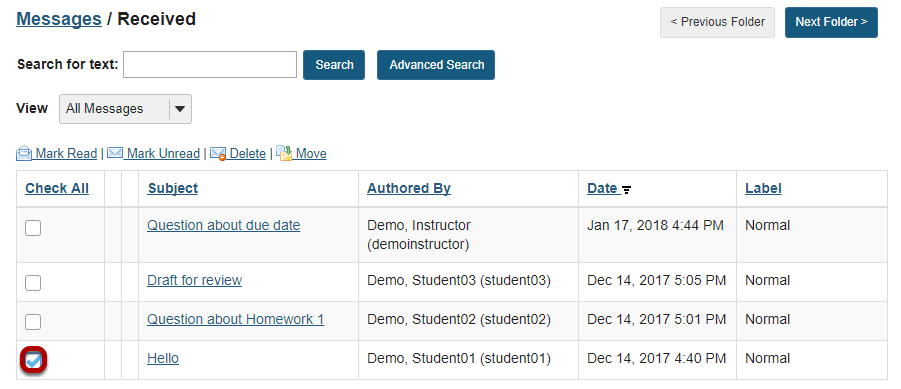
Select the checkbox to the left of the message to be deleted.
Click Delete.
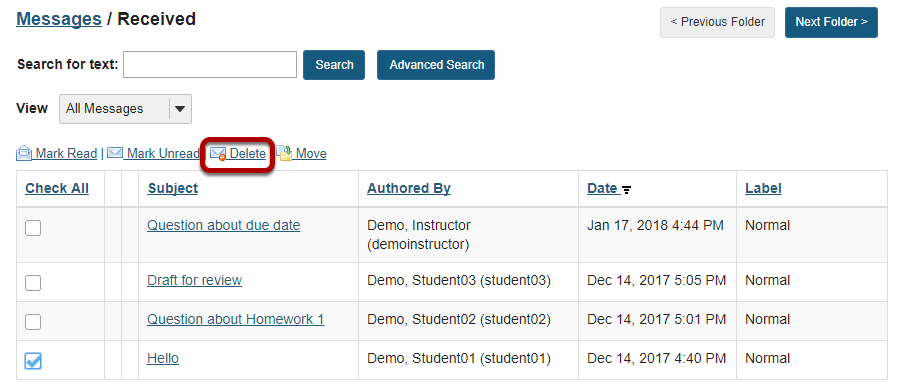
Confirmation message.
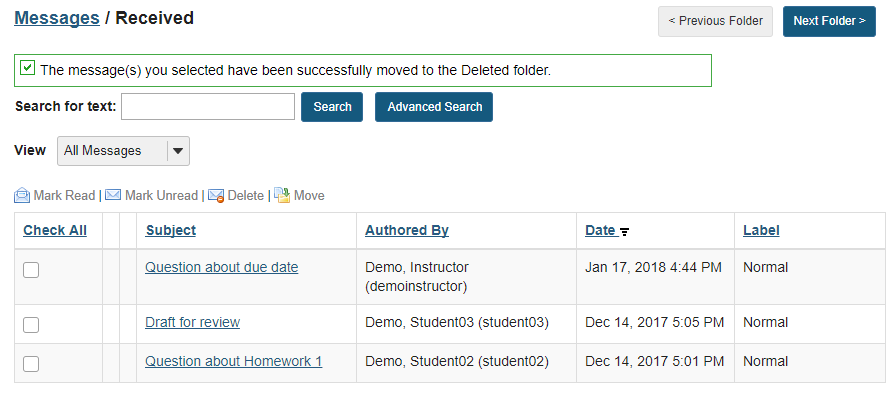
You will receive a confirmation message once your message has been deleted. Deleted messages are move to the Deleted folder.
How do I modify the settings for Messages?
This feature allows users to modify the default Messages tool settings. Users with site owner permission have additional options for configuring the tool within the site.
Click Settings.
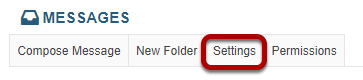
Site owner (instructor) settings options:
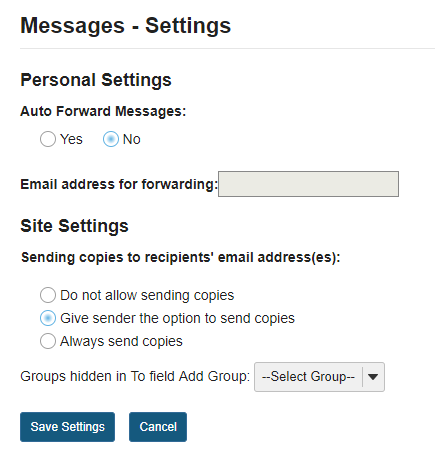
As an instructor or site owner, you can choose whether or not site participants are able to forward messages, and which groups (if any) are hidden in the message recipient list.
You may also set a personal forwarding email address for your own messages.
Site participant (student) settings options:
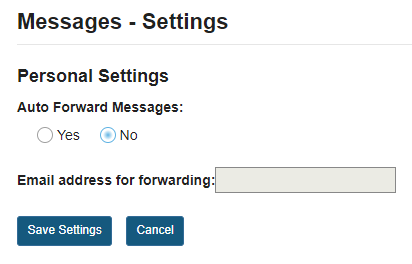
If the site owner has allowed sending copies (i.e. forwarding) messages, then site participants or students will be able to specify a forwarding email address.
Click Save Settings.
Once you have made all of your changes, click Save Settings to save.
How do I determine who site participants can send a message to?
This feature gives the option to regulate each role's message composing permissions.
Click Permissions.
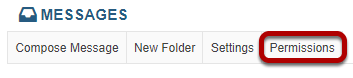
Permissions is located below the Course Site title.
Check the corresponding boxes for desired permissions.
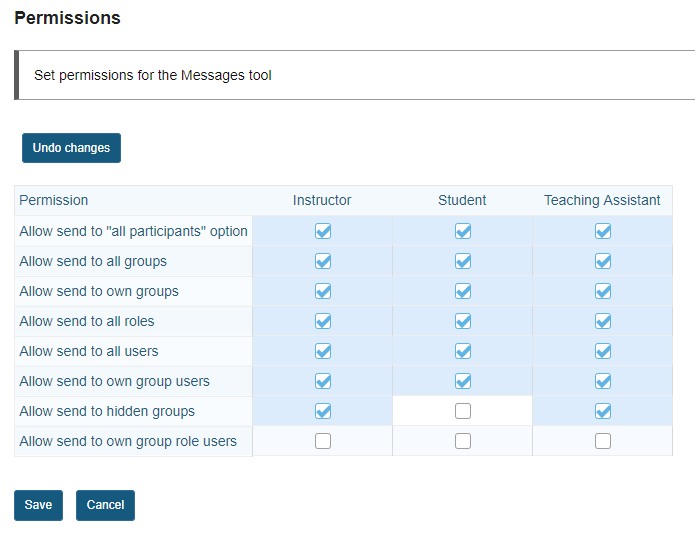
Permissions are assigned on a role-by-role basis. For instance, to prevent a student from sending a message to "All Participants", un-check the Student Permission box located next to the option, "Allow the 'All Participants' options to the 'To' field."
Note: These options will be visible when clicking the "To" text box in Compose a Message, within the Message tool.
Click Save.
Click Save or Cancel to quit.
How do I import data into later course sites?
STEP.1 Import data from the former site into the later site.
First, open the destination site (or the later site), and click Site Info in the Tool Menu.
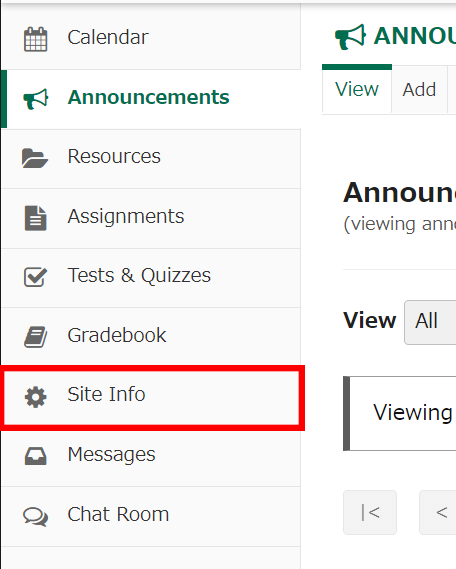
Then click Import from Site.
There are 2 ways to import data from another site.
- Replace: All data of the destination site will be removed, and only data imported will be reserved.
- Merge: Data imported will be added to the destination site, and data that already exists will be reserved also.
‘I would like to replace my data.’ or ‘I would like to merge my data.’
Select the source site, then Continue.
A list of materials will be displayed. Select the items you would like to import. If you would like to select all, select the item of the course name.
After that, click ‘Finish’.
STEP.2 Reset the availability dates for materials.
Announcements, Tests & Quizzes, and Assignments imported will be unpublished, so please set the availability date if necessary.
If there is a questionnaire for last year in ‘Tests & Quizzes’, please remove it.
If the availability dates for resources are unset before importing, these resources will be published after imported.
Remember to set the availability dates if necessary.
Set the availability date for Announcements.
After imported with the above method, Announcements will be the status of drafts.
Click Edit for the announcement you would like to edit.
On the following page, you can set the availability date. After editing, click Save Changes.
Set the availability date for Tests & Quizzes.
After imported with the above method, Tests & Quizzes will be the status of Working Copies.
Click Select Action, then Publish for the announcement you would like to edit.
Click Edit Settings. Then you can set the availability date in the Availability and Submissions item.
Click Save Settings and Publish.
You can also use the function of Export and Import in the Test & Quizzes tool.
Set the availability date for Assignments.
After imported with the above method, Assignments will be the status of drafts.
Click Edit for the assignment you would like to edit.
On the following page, you can set the availability date.
After editing, click Post.
Set the availability dates for Resources.
After imported with the above method, Resources will be the same status as the source site.
Click Actions for the folder or file you would like to edit, then Edit Details.
On the following page, you can set the availability date in the Availability and Access item.
After editing, click Update.
You can also use ‘Copy Content from My Other Sites’ to import Resouces.